

C/6 Surface Development
Scroll through the gallery of surface technique test tiles and find ones you enjoy. The arrow to move through the images is in the top Right corner. OR, search by category via the drop down list above the surfaces gallery.
Match the image(s) you saw with the thumbnail below to read instructions of how the technique was done!
We hope you find these helpful and inspiring! Everything was fired to cone 6 on a porcelain clay body.
Thanks to Clay Art Center in Tacoma for making great clay and AMACO for all the surface enhancing underglazes and pencils!
RCS Classroom Glazes
View Recipes
Always test before applying to work you love!


Coming Soon!


Coming Soon!


1. Applique: Add relief to your surface by attaching thin patterns or shapes of clay. Slip & score both contact surfaces for a strong seam. For the highest success rate apply the clay at a leather hard stage. Compress the seam. Finish by adding slips/ underglazes. This tile uses cookie cutter flowers. The clay and yellow underglaze are bare where the clay is white. The underglaze is covered where there is glaze.
Clay: JG Porcelain Glaze: Turquoise, Light Yellow
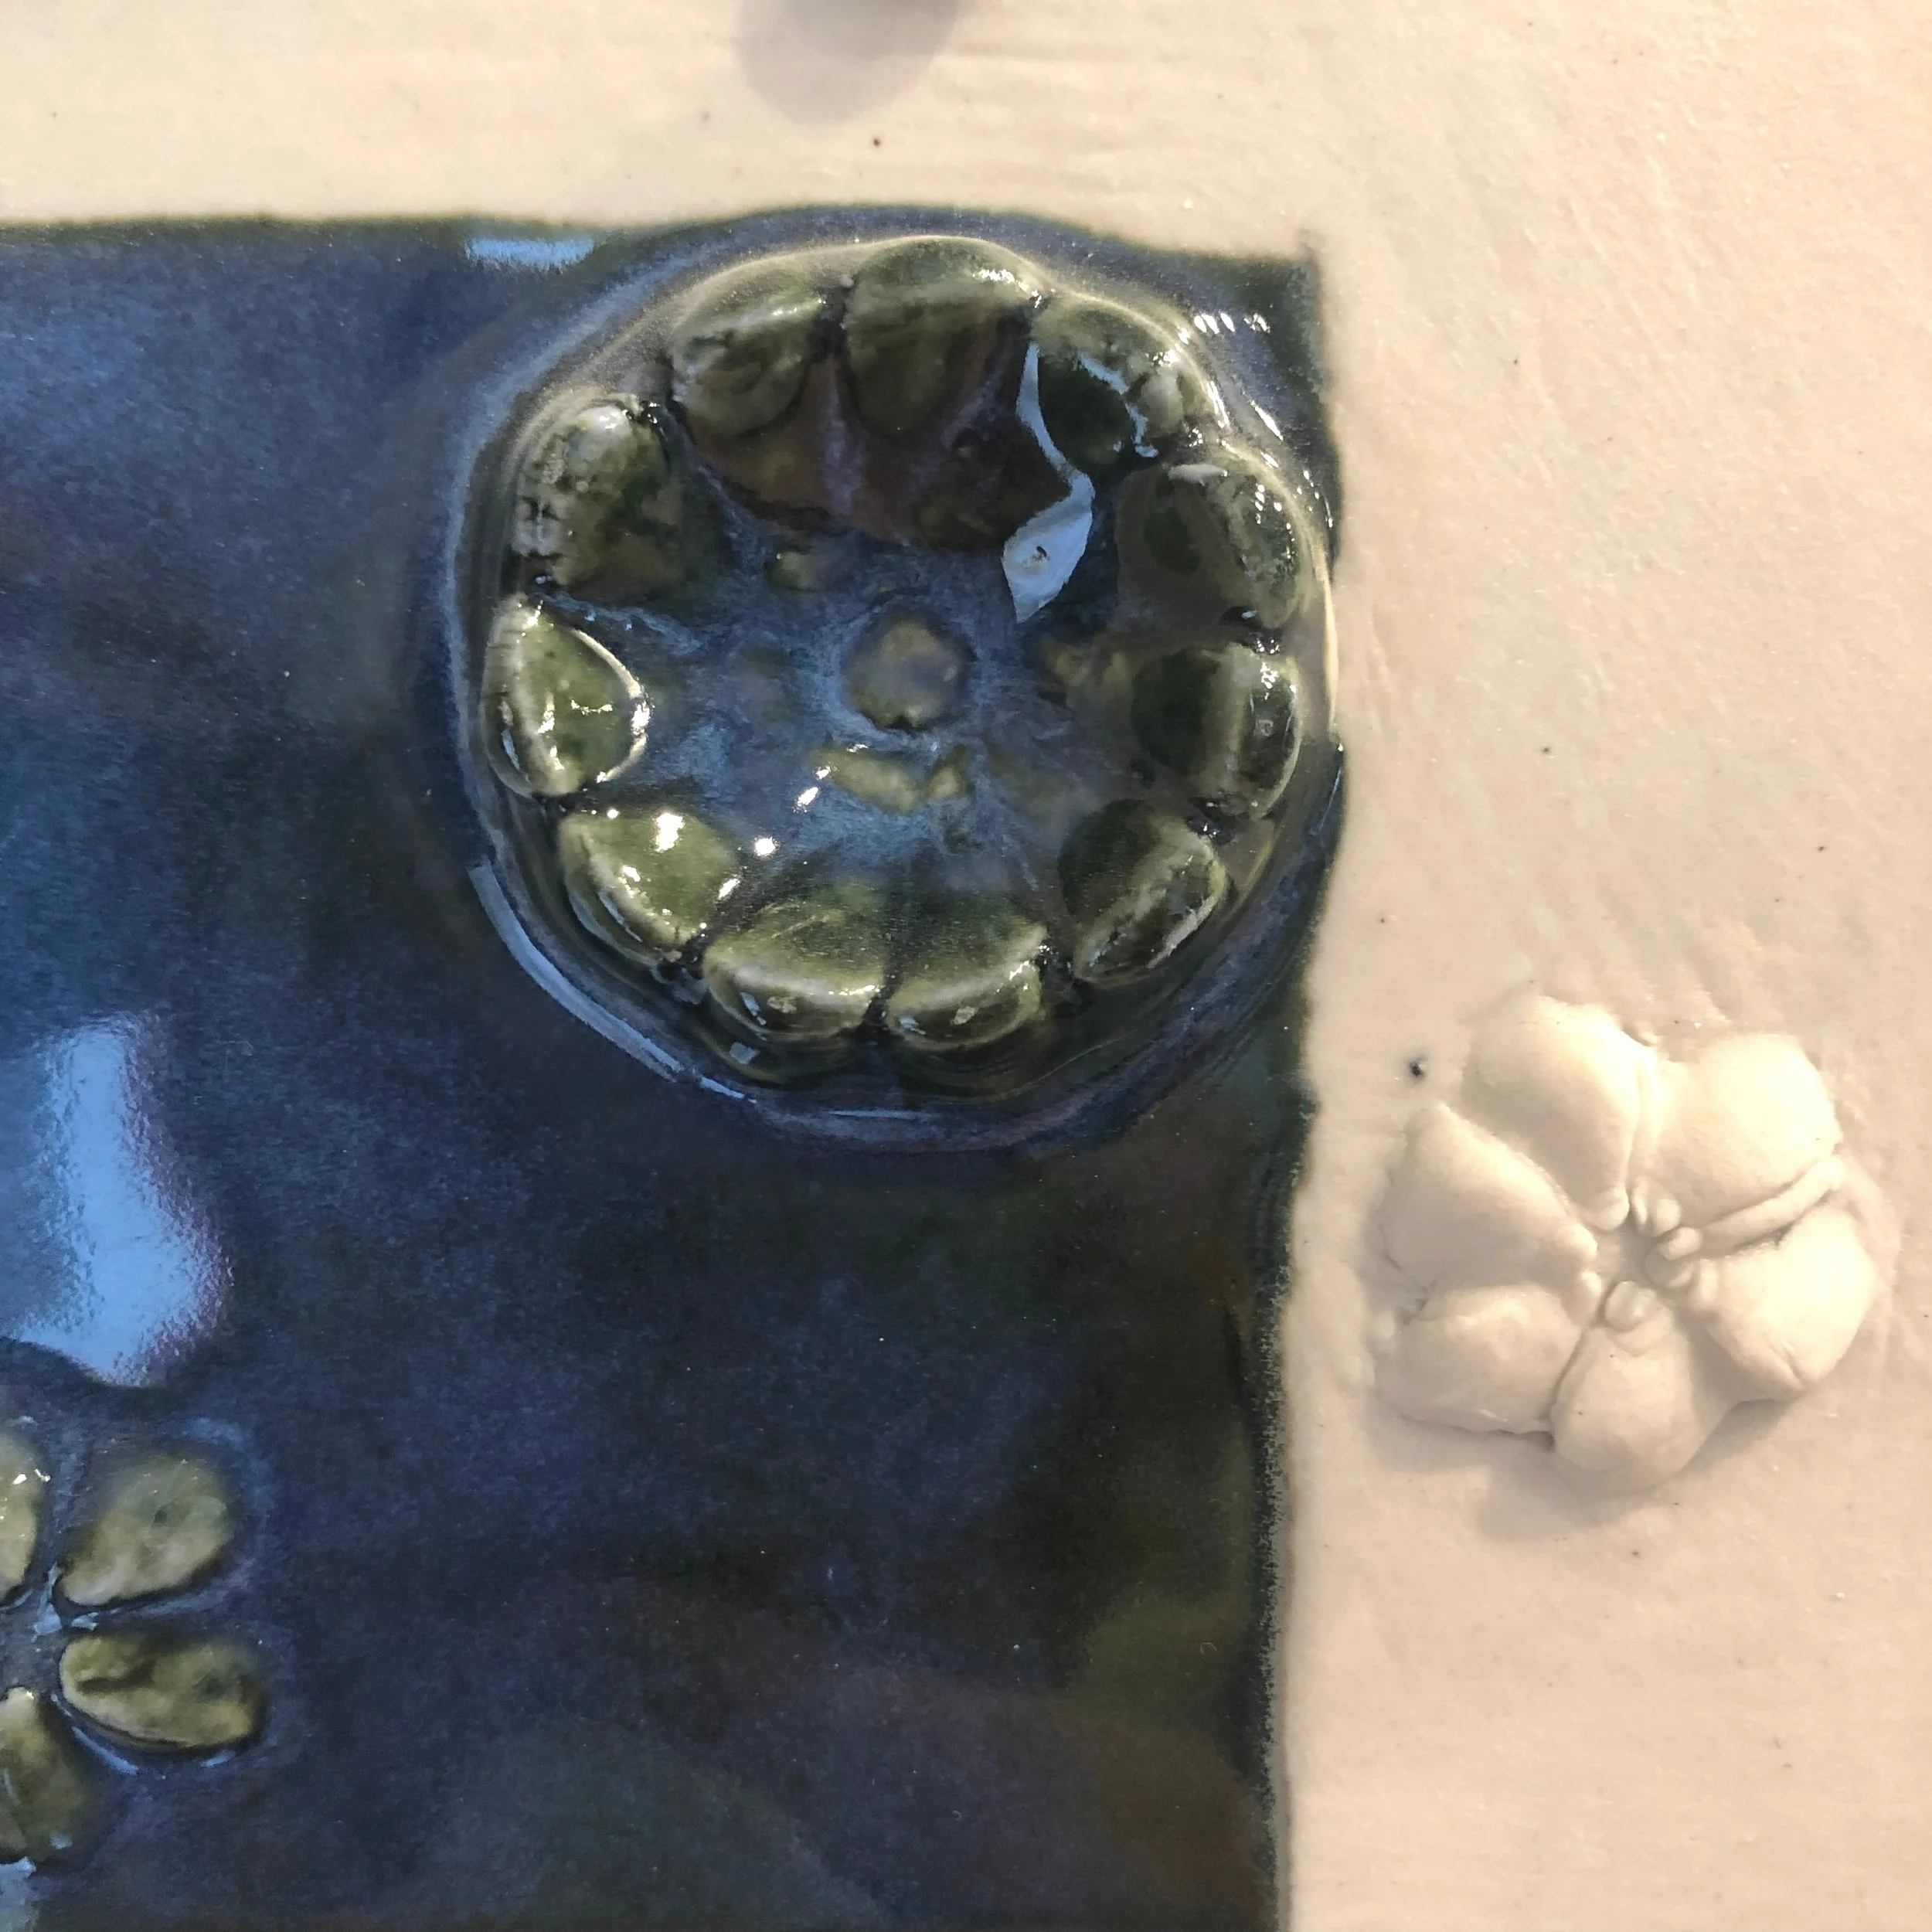
2. Sprig Molds: Press small balls of clay into a sprig mold. Rib the back of the pressed clay in the mold, and “stamp” it onto a slab to remove it from the mold. Repeat for multiples. Slip & score each leather hard connecting surface to attach. Make bisque fired clay sprig molds by pressing antique buttons, shells, toys, or carving your own design into clay. Then fire it use it to shape clay! Clay: JG Porcelain Glaze: Sapphire Blue ½ (L)
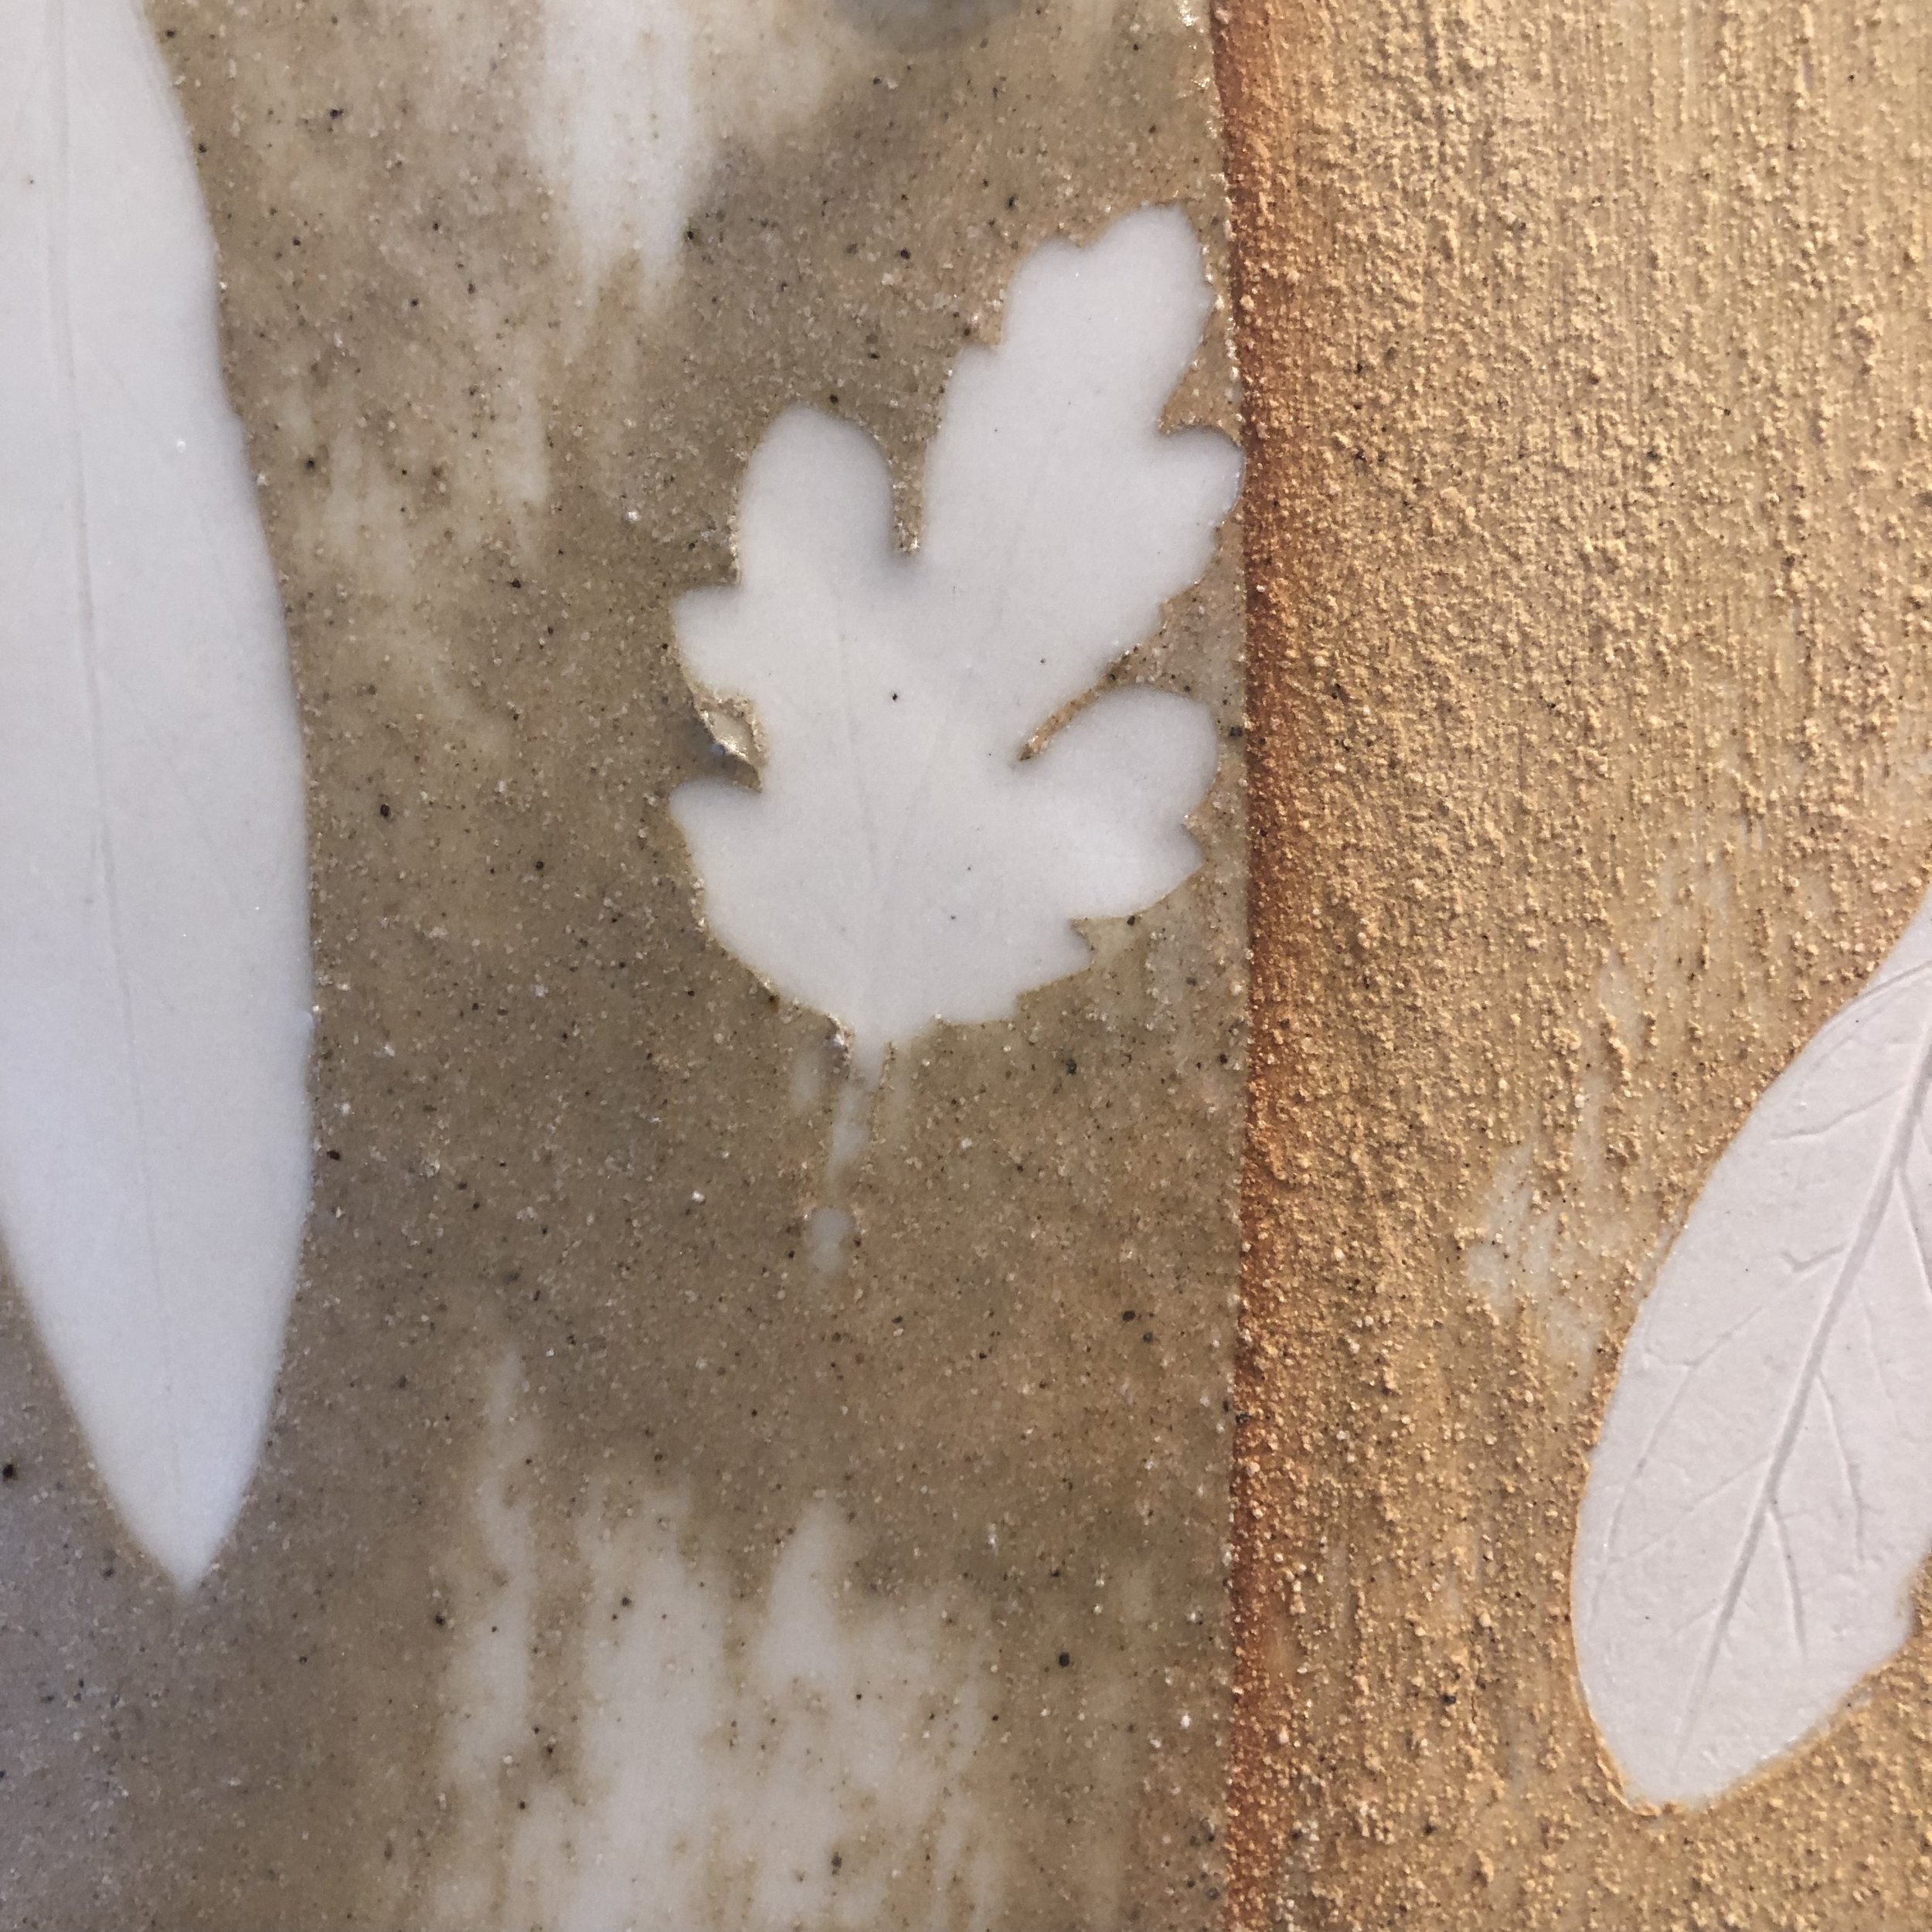
3. Nature Stencil: Use a leaf, fern, or petal as a stencil. Brush or sponge your stencil lightly with water to help it seal down to the clay. (This keeps the slip from bleeding beneath the stencil.) Gently press the leaf/ stencil into the surface of the clay with a rolling pin and/ or fingers. Finish by painting over it with a contrasting slip or underglaze. Once it dries a bit, remove the stencil. Clay: JG Porcelain Slip: Dakota Red Glaze: Transparent Matte ½ (L)
4. Paper Stencil: Dakota Red Slip was painted on a leather hard JG tile. A bird silhouette was cut from standard paper and gently pressed onto the surface of the clay. If you wet the stencil with a paintbrush/ sponge it will stick better. Smooth it down with your finger tips and follow up with a rolling pin if needed. A blue underglaze was then painted over the stencil and slipped tile. Remove the stencil. Clay: JG Porcelain Colors: Dakota Red Slip, Royal Blue Underglaze Glaze: Transparent Matte ½ (L)
5. Paper Stencil (Double): Two stencils were reused to build up this design. Begin by painting leather hard clay with orange underglaze. Position one stencil. (Dampen and press in place). Then paint on sky blue underglaze. Layer the second stencil on top of everything. Next, paint black underglaze over everything. Once the underglaze is dried somewhat, remove the stencils by picking up the edge with a needle tool and pulling them off. Clay: JG Porcelain Underglazes: Real Orange, Sky Blue, Jet Black
Glaze: Sparkle Clear ½ (L)
6. Slip-trailing: JG-on-JG - Use a slip trail bottle to draw your design on leather hard clay. This works best when clay is on the wetter side of leather hard. You can practice on newspaper or a board to check for correct thickness of slip passing through the bottle nozzle. Once the slip is leather hard, press down any sharp points with your finger.
Clay: JG Porcelain Slip: JG Glaze: Dark Turquoise ½ (L) Sparkle Clear ½ (R)
7. Slip-trailing: Use a slip trail bottle to draw your design on leather hard clay. This works best when clay is on the wetter side of leather hard. You can practice on newspaper or a board to check for correct thickness of slip passing through the bottle nozzle. Once the slip is leather hard, press down any sharp points with your finger.
Clay: JG Porcelain Slip: Dakota Red Glaze: Transparent Matte ½ (L) Sparkle Clear ½ (R)
8. Combing (rib): This tile was painted with Dakota Red slip, then Speckle slip, and allowed to dry for a few minutes. To make these marks, take your metal, serrated rib and comb the pattern of your choice. You could also cut up an old credit card to make your own custom combing tool. Tiny bubbles were present on the surface the clear glaze was applied… They melted into the surface and did not show up.
Clay: JG Porcelain Slips: Dakota Red under Speckle Glaze: Sparkle Clear ½ (L)
9. Combing (fingers): Paint a wet-leather hard tile with Dakota Red slip. Quickly, before it dries, drag your fingers through the slip. The more firmly you press as you move your fingers through the slip, the more of the clay body, under the slip will show through… This works best if both clay and slip are on the wetter side. This technique can be done with any slip or underglaze.
Clay: JG Porcelain Slip: Dakota Red Glaze: Transparent Matte ½ (L)
10. Dry Combing: Apply different colors of underglaze or slip. To replicate this example, layer first black and then rose. Allow them to dry to the touch. Using a serrated rib, scratch through the underglaze to reveal the colors and clay body beneath.
Clay: JG Porcelain Underglazes: Jet Black, Rose Glaze: Sparkle Clear ½ (L)
11. Feathering: Use a squeeze bottle to apply alternating contrasting slips to your wet clay surface. The stripes should touch each other. Place your work on a ware board, and tap it on the table to level the slip a little. Close any remaining gaps with more slip. Drag a needle tool lightly through the slip to make one color run into the next. Try not to touch the clay below the slip. Tap your work on the table once again to set the design. This works best on wetter clay due to the thick slip required.
Clay: JG Porcelain Slips: Dakota Red and JG Glaze: Sparkle Clear ½ (L)
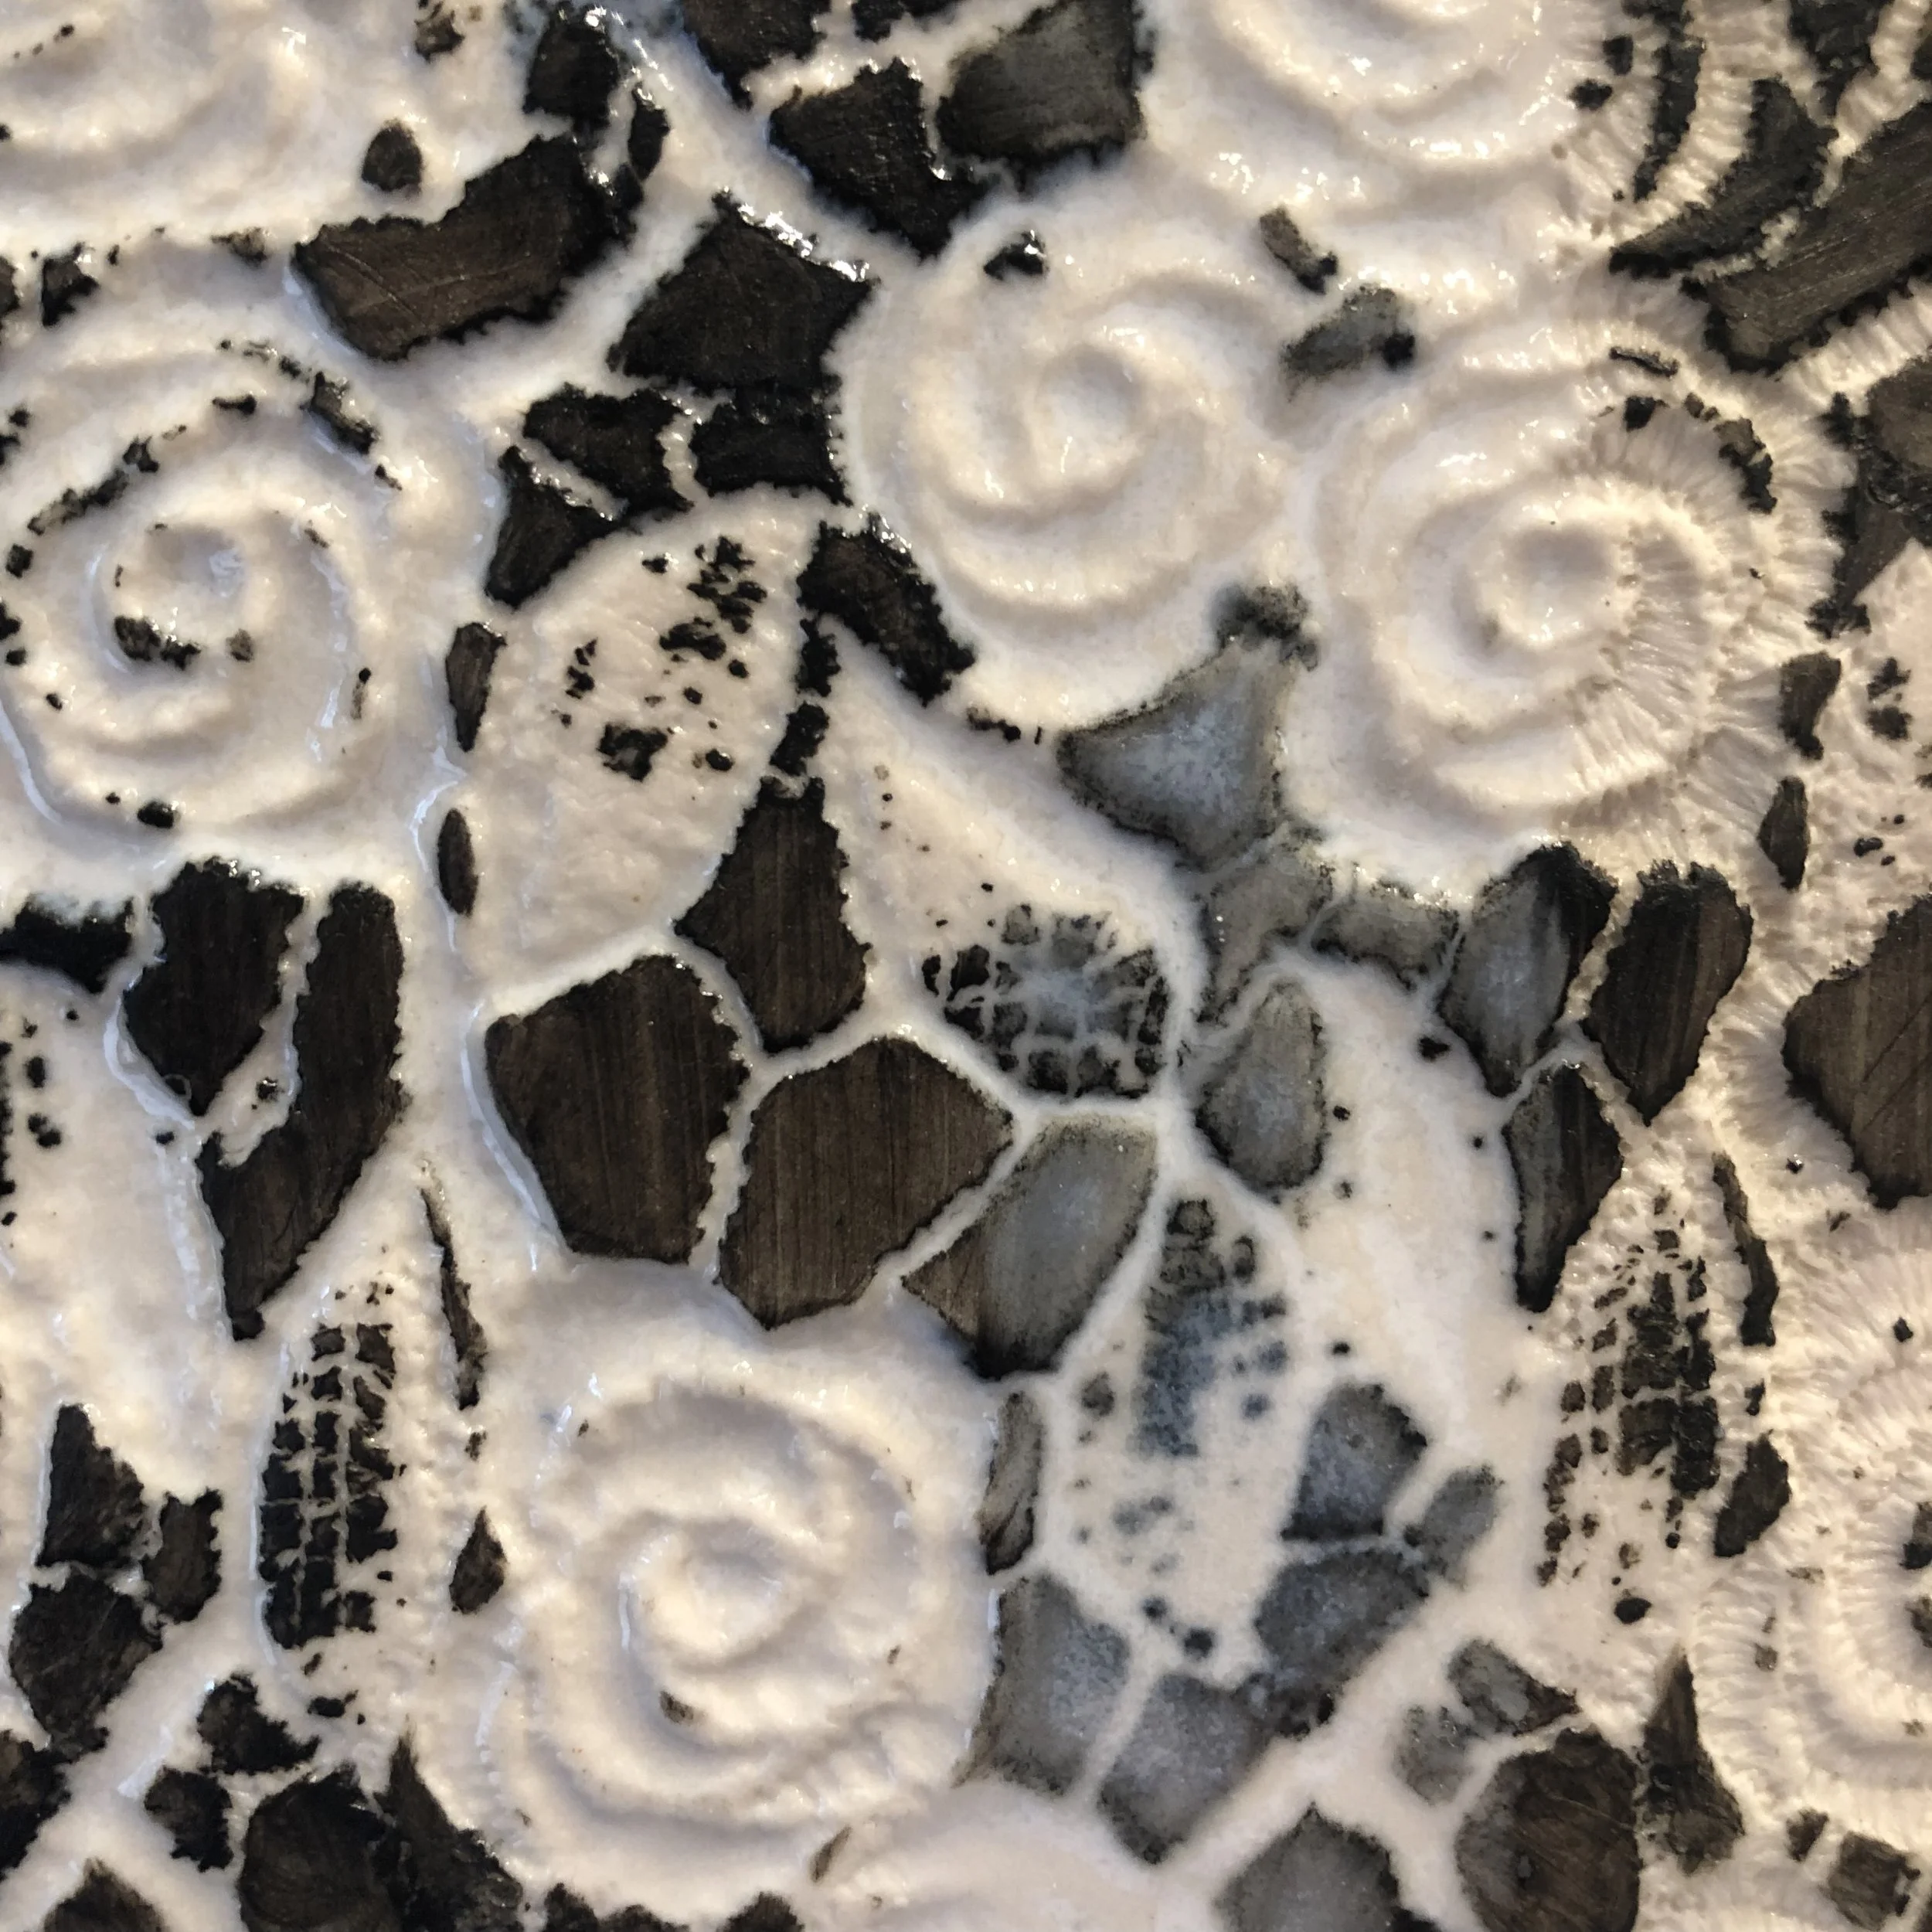
12. Texture: A piece of lace was laid on leather hard clay. It was impressed into the clay with a rolling pin. Underglaze was brushed over the tile while the lace was still on the tile. Once the underglaze has set up slightly, you can peel off the lace to leave behind a strong pattern. A needle tool can be used to clean up or add more details.
Clay: JG Porcelain Underglaze: Jet black Glaze: White Gloss applied on ¾ of tile. On the left half the glaze was wiped off the raised areas and left in the depressions.
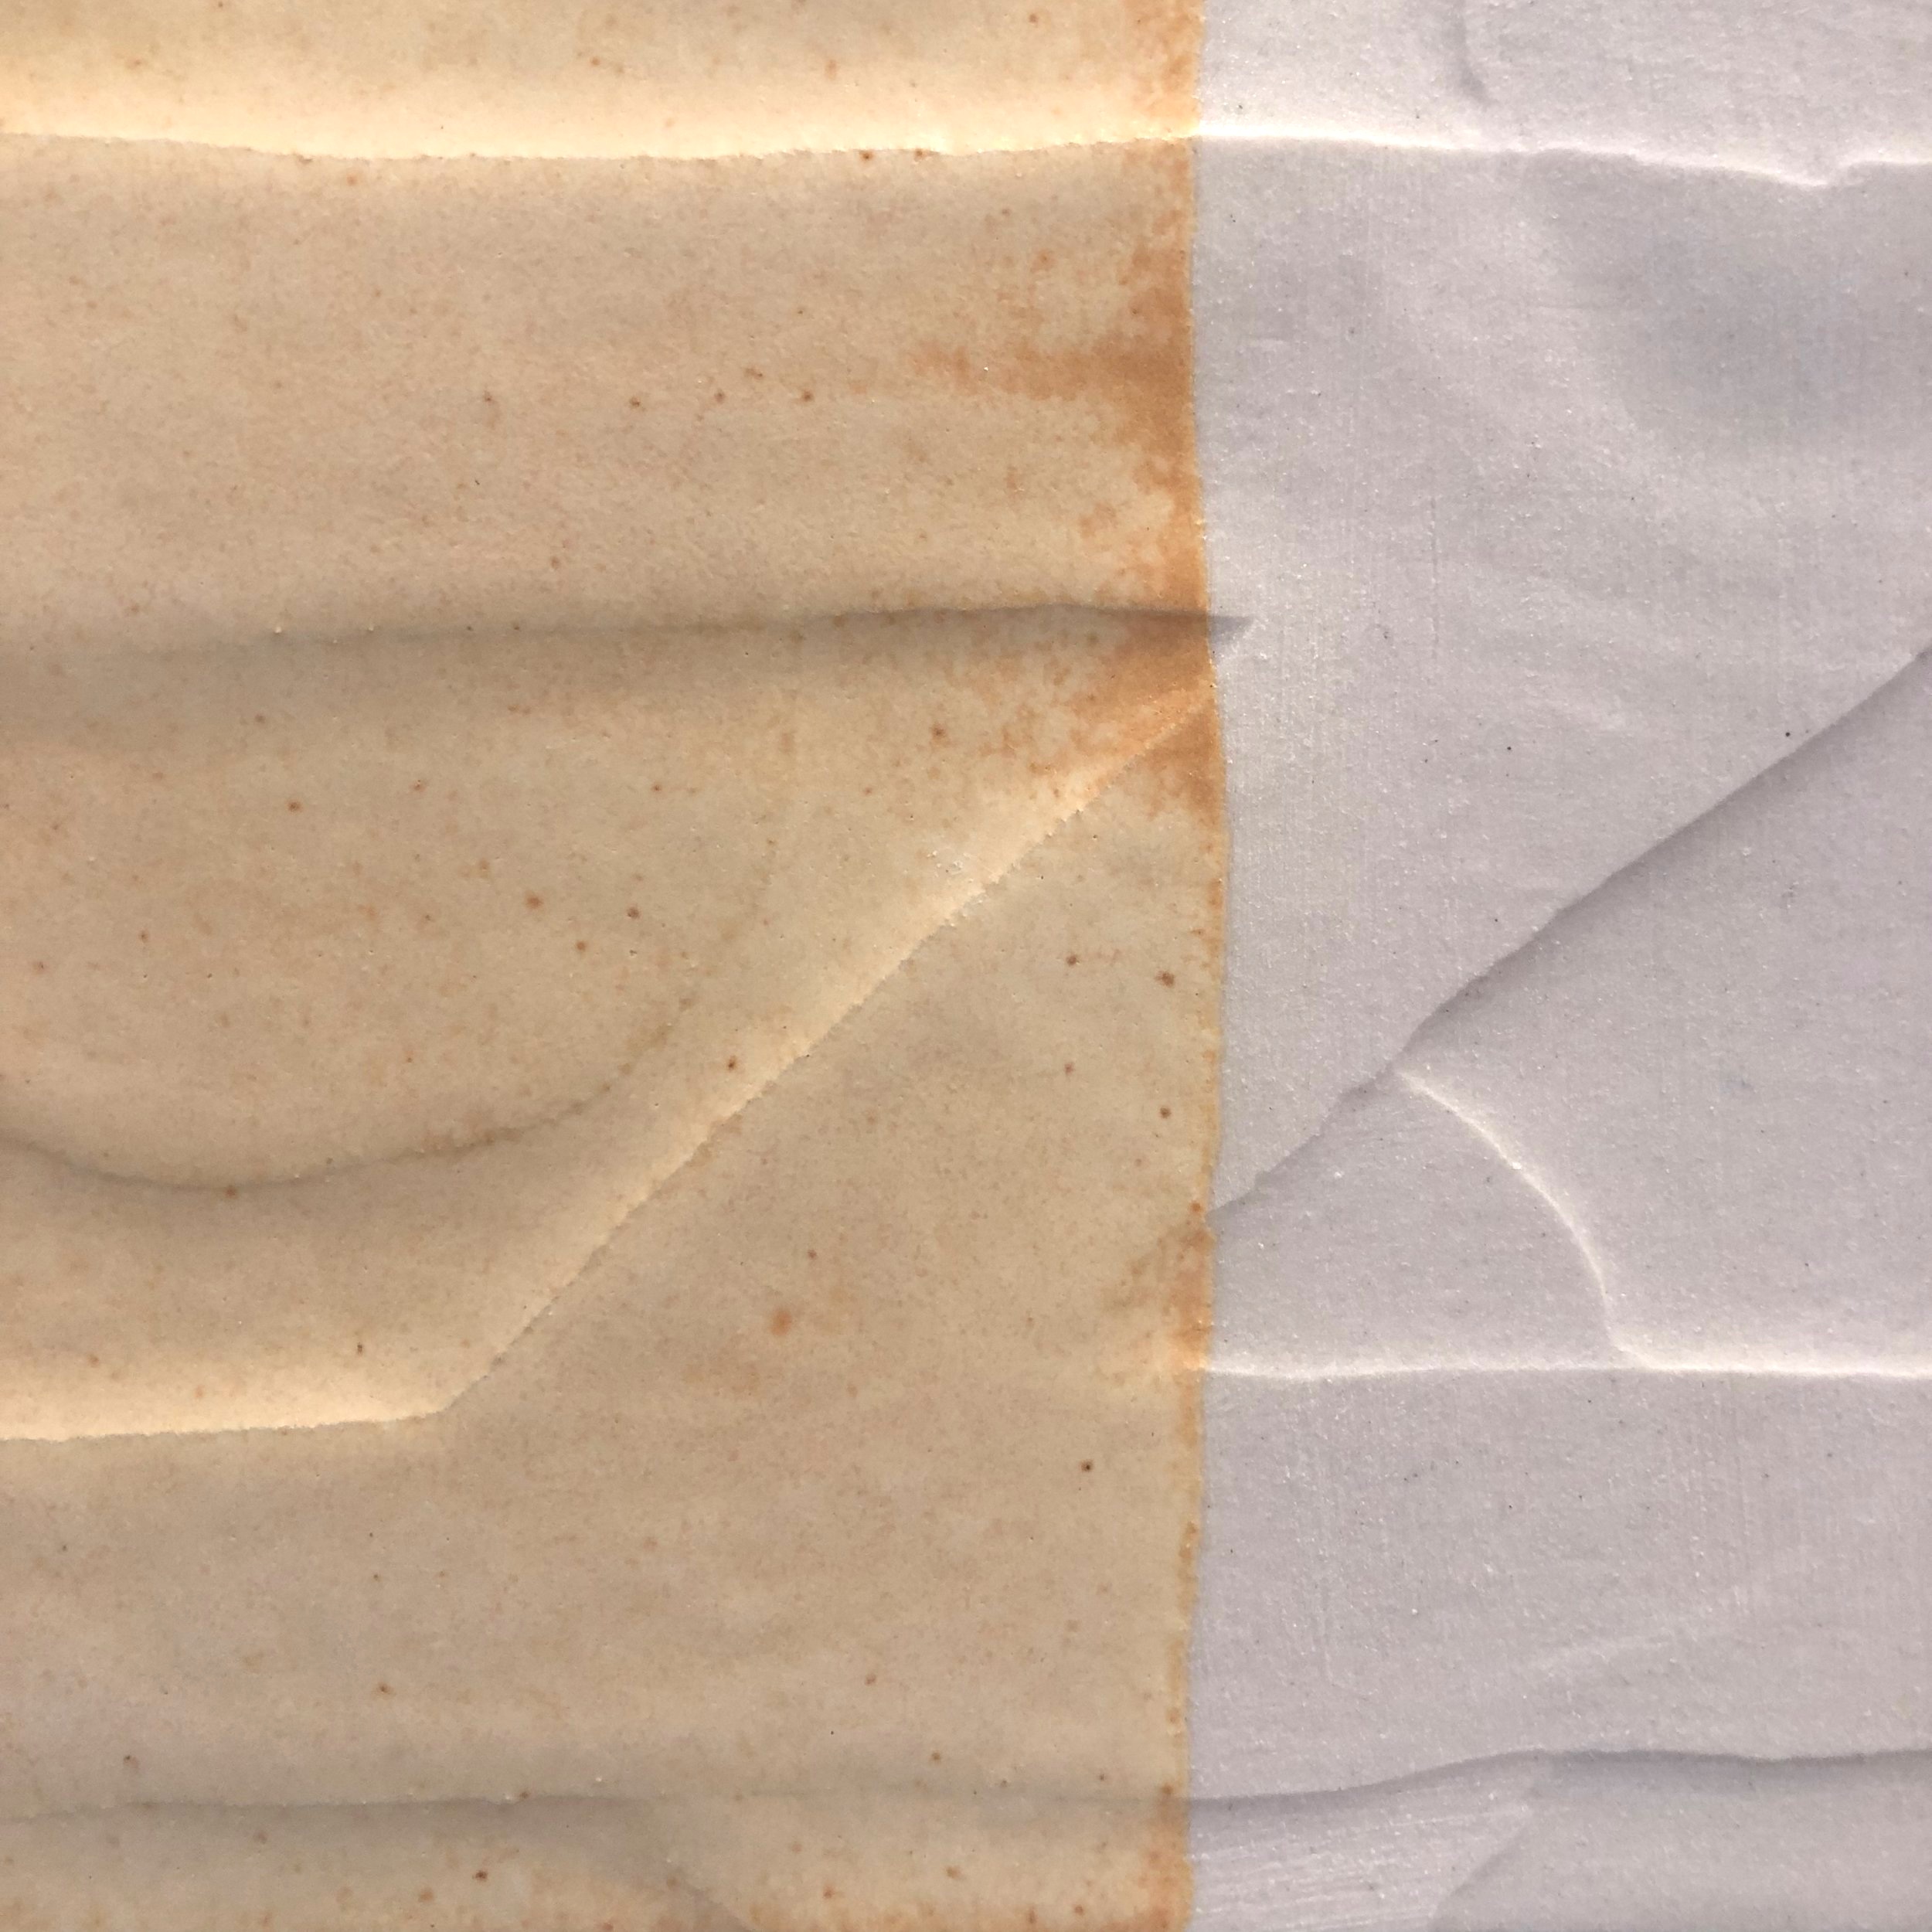
13. Hydro-abrasion: Paint a ModPodge pattern or design on bone dry clay. Allow it to completely dry. Wipe away clay the clay with a wet sponge until the resisted areas appear raised. Rinse sponge frequently so it does not drag a lot of clay over the resisted areas and wear away the ModPodge. Repeat for as many layers as desired. The longer you allow the work to dry between layers, the better. Use a thick layer of ModPodge so it does not rub it off. Clay: JG Porcelain Resist: ModPodge Glaze: Bee Pollen ½ (L)
14. Hydro-abrasion (with underglaze): Brush entire tile with contrasting color slip or underglaze and allow it to dry to bone dry. Paint design with ModPodge and allow it to completely dry. Then wipe away the areas that do not have resist on them. This will leave behind an underglaze pattern under the resist. Clay: JG Porcelain Underglaze: Hunter Green Resist: ModPodge Glaze: Sparkle Clear ½ (L)
15. Carving: Use a pointy tool to cut or scratch a design into leather hard clay. (If free hand drawing is not your thing, consider tracing over paper on leatherhard clay to get an initial soft line to guide you. Then go over it with more pressure without the paper in the way...) It helps to use a dry brush to remove the clay burrs along the cut edges. You can also impress the design through a sheet of thin plastic to prevent burrs on the edges.
Clay: Porcelain Glaze: Dark Turquoise ½ (L)
16. Inlay (Mishima): Draw a design on leather hard clay. Incise lines using a knife or other sharp point. Use a dry, stiff brush to sweep away the clay burs raised by the drawing. Apply a contrasting color of slip/ underglaze into incised lines. Allow it to set up. Sponge the slip off of the raised clay surfaces letting it remain in the incised design. For a different surface effect, you may remove the slip by scraping it away with a metal rib. Clay: JG Inlaid Lines: Black underglaze Glaze 1: Sparkle Clear (all) Glaze 2: Sea Green ( edge )
17. Inlay (Mishima with Wax): Apply wax resist (non-alumina) over leather hard clay. Allow it to completely dry. Incise lines through the wax with a sharp tool. Brush a contrasting color of slip/ underglaze/ oxide wash into incised lines. Allow this to set up. Sponge extra material off of the waxed surface with a wet sponge. Repeat - leave no smudges. You can use a dry sponge at the end to get the last smudges off. Slip/ underglaze /oxide will remain in deeper lines. Clay: JG Porcelain Inlaid lines: Black underglaze Glaze: Bee Pollen ½ (L)
18. Inlay (Mishima with Wax over Slip): On this example, paint slips on leather hard clay. Let dry. Then paint color blocks of figure/ pet. Allow to dry, and brush a thin, even coat of wax resist (non-alumina) on the leather hard slip surface. Allow the wax to dry completely. Incise your drawing onto the clay surface - outlining figure and pet . Brush a black underglaze into the incised lines. Let dry. Sponge away extra underglaze. Clay: JG Slip: Dakota Red, Speckle Inlaid lines: Black Underglaze Glaze: Sparkle Clear ¾ (L)
19. Sgraffito: Brush an even coat or two of contrasting slip or underglaze on to leather hard clay. Let it dry. Use a needle tool, trimming or carving tool to remove the surface and reveal the clay body below. Tip: see next tile with info on transferring drawings onto clay surfaces. Clay: JG Porcelain Underglaze: Jet Black Glaze: Sparkle Clear ¾ (L)
20. Sgraffito 2: Red underglaze was applied to the surface. (See description for previous tile) Tip: You can transfer a design from paper onto your clay surface. Trace through paper with a pencil, ball stylus or pointy stick laid over your clay surface. This will leave a faint line to trace with pencil. Pencil graphite will burn out in the kiln.
Clay: JG Porcelain Underglaze: Bright Red Glaze: Transparent Matte ½ (L)
21. Impressions: Press stamps, textures, or tools into leather hard clay surface. Bisque your work. Apply oxides or underglazes to bisque-fired clay. Let dry. Then, wipe back high surface areas with a wet sponge, leaving color in depressed areas. Different glazes can also pool up nicely in recesses. Consider using the Letter Stamps!
Clay: JG Porcelain Oxide: Cobalt (all over, wiped) Glaze: Transparent Matte ½ (L)
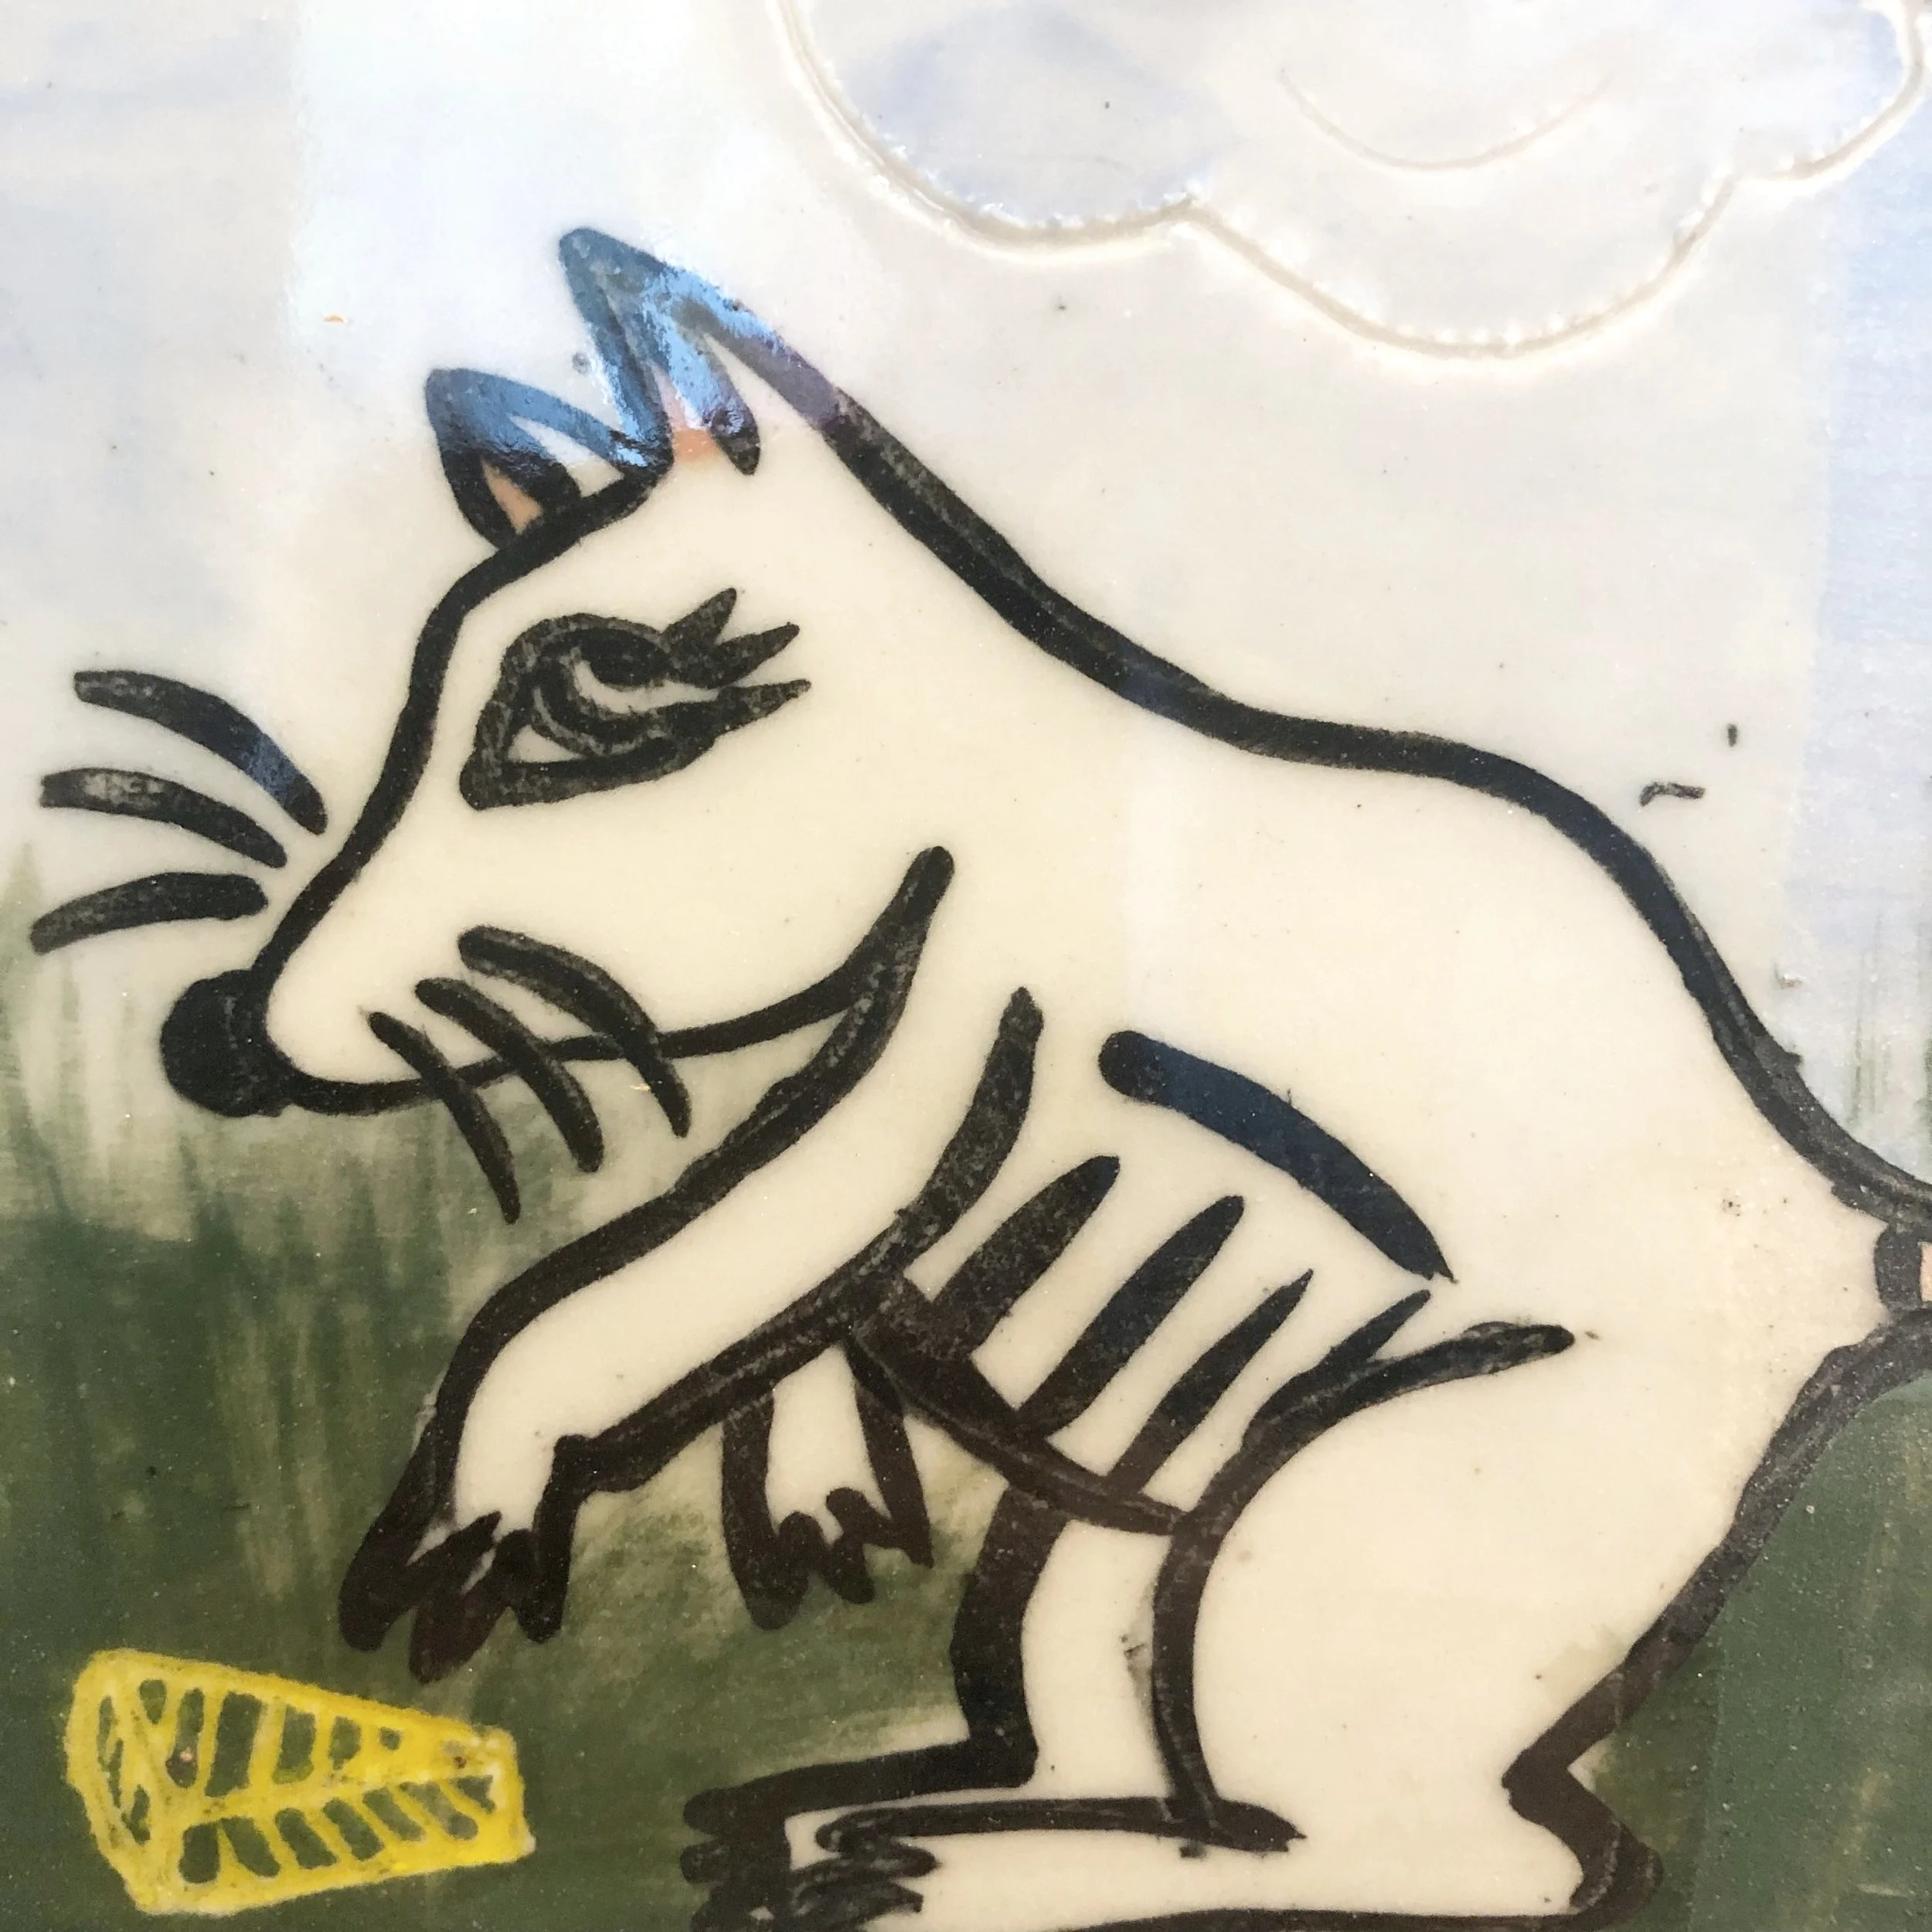
22. Wax Resist (with Colored Slip “Fills” and Inlay): First paint line color (black) over the entire tile. With wax resist, paint your design. Let dry. Sponge away underglaze from non-waxed areas, leaving bare porcelain & black waxed lines. Wax the body of the rat. Then you can add pink (tail), blue (sky) and green (grass) underglazes to create atmosphere. Try carving through (cloud). Apply wax to an area of the grass, incise, and brush underglaze into the cheese wedge lines. Let dry and wipe clean. Clay: JG Porcelain Underglazes: Jet black, sky blue, salmon, hunter green, yellow Glaze: Sparkle Clear ¾ (L)
23. Transfer (newsprint): On a piece of newsprint, begin your design with the outline. Let dry. Fill in with painted/ slip trailed underglaze. Let dry, and then add a layer of slip over the entire design. Let slip dry. To use, rehydrate the newsprint with spritzed water. Lay the paper slip side down on your leather hard clay. Press and smooth the newsprint onto the clay using a soft rubber rib. Move from the center to the edges, removing air bubbles. Carefully peel newsprint from the clay to reveal the image. If any of the design lifts, press the newsprint back down and smooth on again. Clay: JG Porcelain Slip: Speckled Underglazes: Jet black lines, peach, green, brown Glaze: Transparent Matte ½ (L)
24. Iron Decals: Draw or photograph an image and format it for computer printing. Using iron decal paper and a laser jet printer, print out your image(s). Cut away from sheet. Soak in a bowl of water until the paper backing separates from the decal film. Carefully lay your decal on the glaze-fired surface. Quickly position and gently press. With a soft rubber rib or finger, press away air bubbles starting at the center and move to edges. Fire your piece according to the temperature of the decal paper you used (cone 017-015).
Clay: JG Porcelain Glaze: Glossy White Decal paper/ Laser Printer HP M201dw
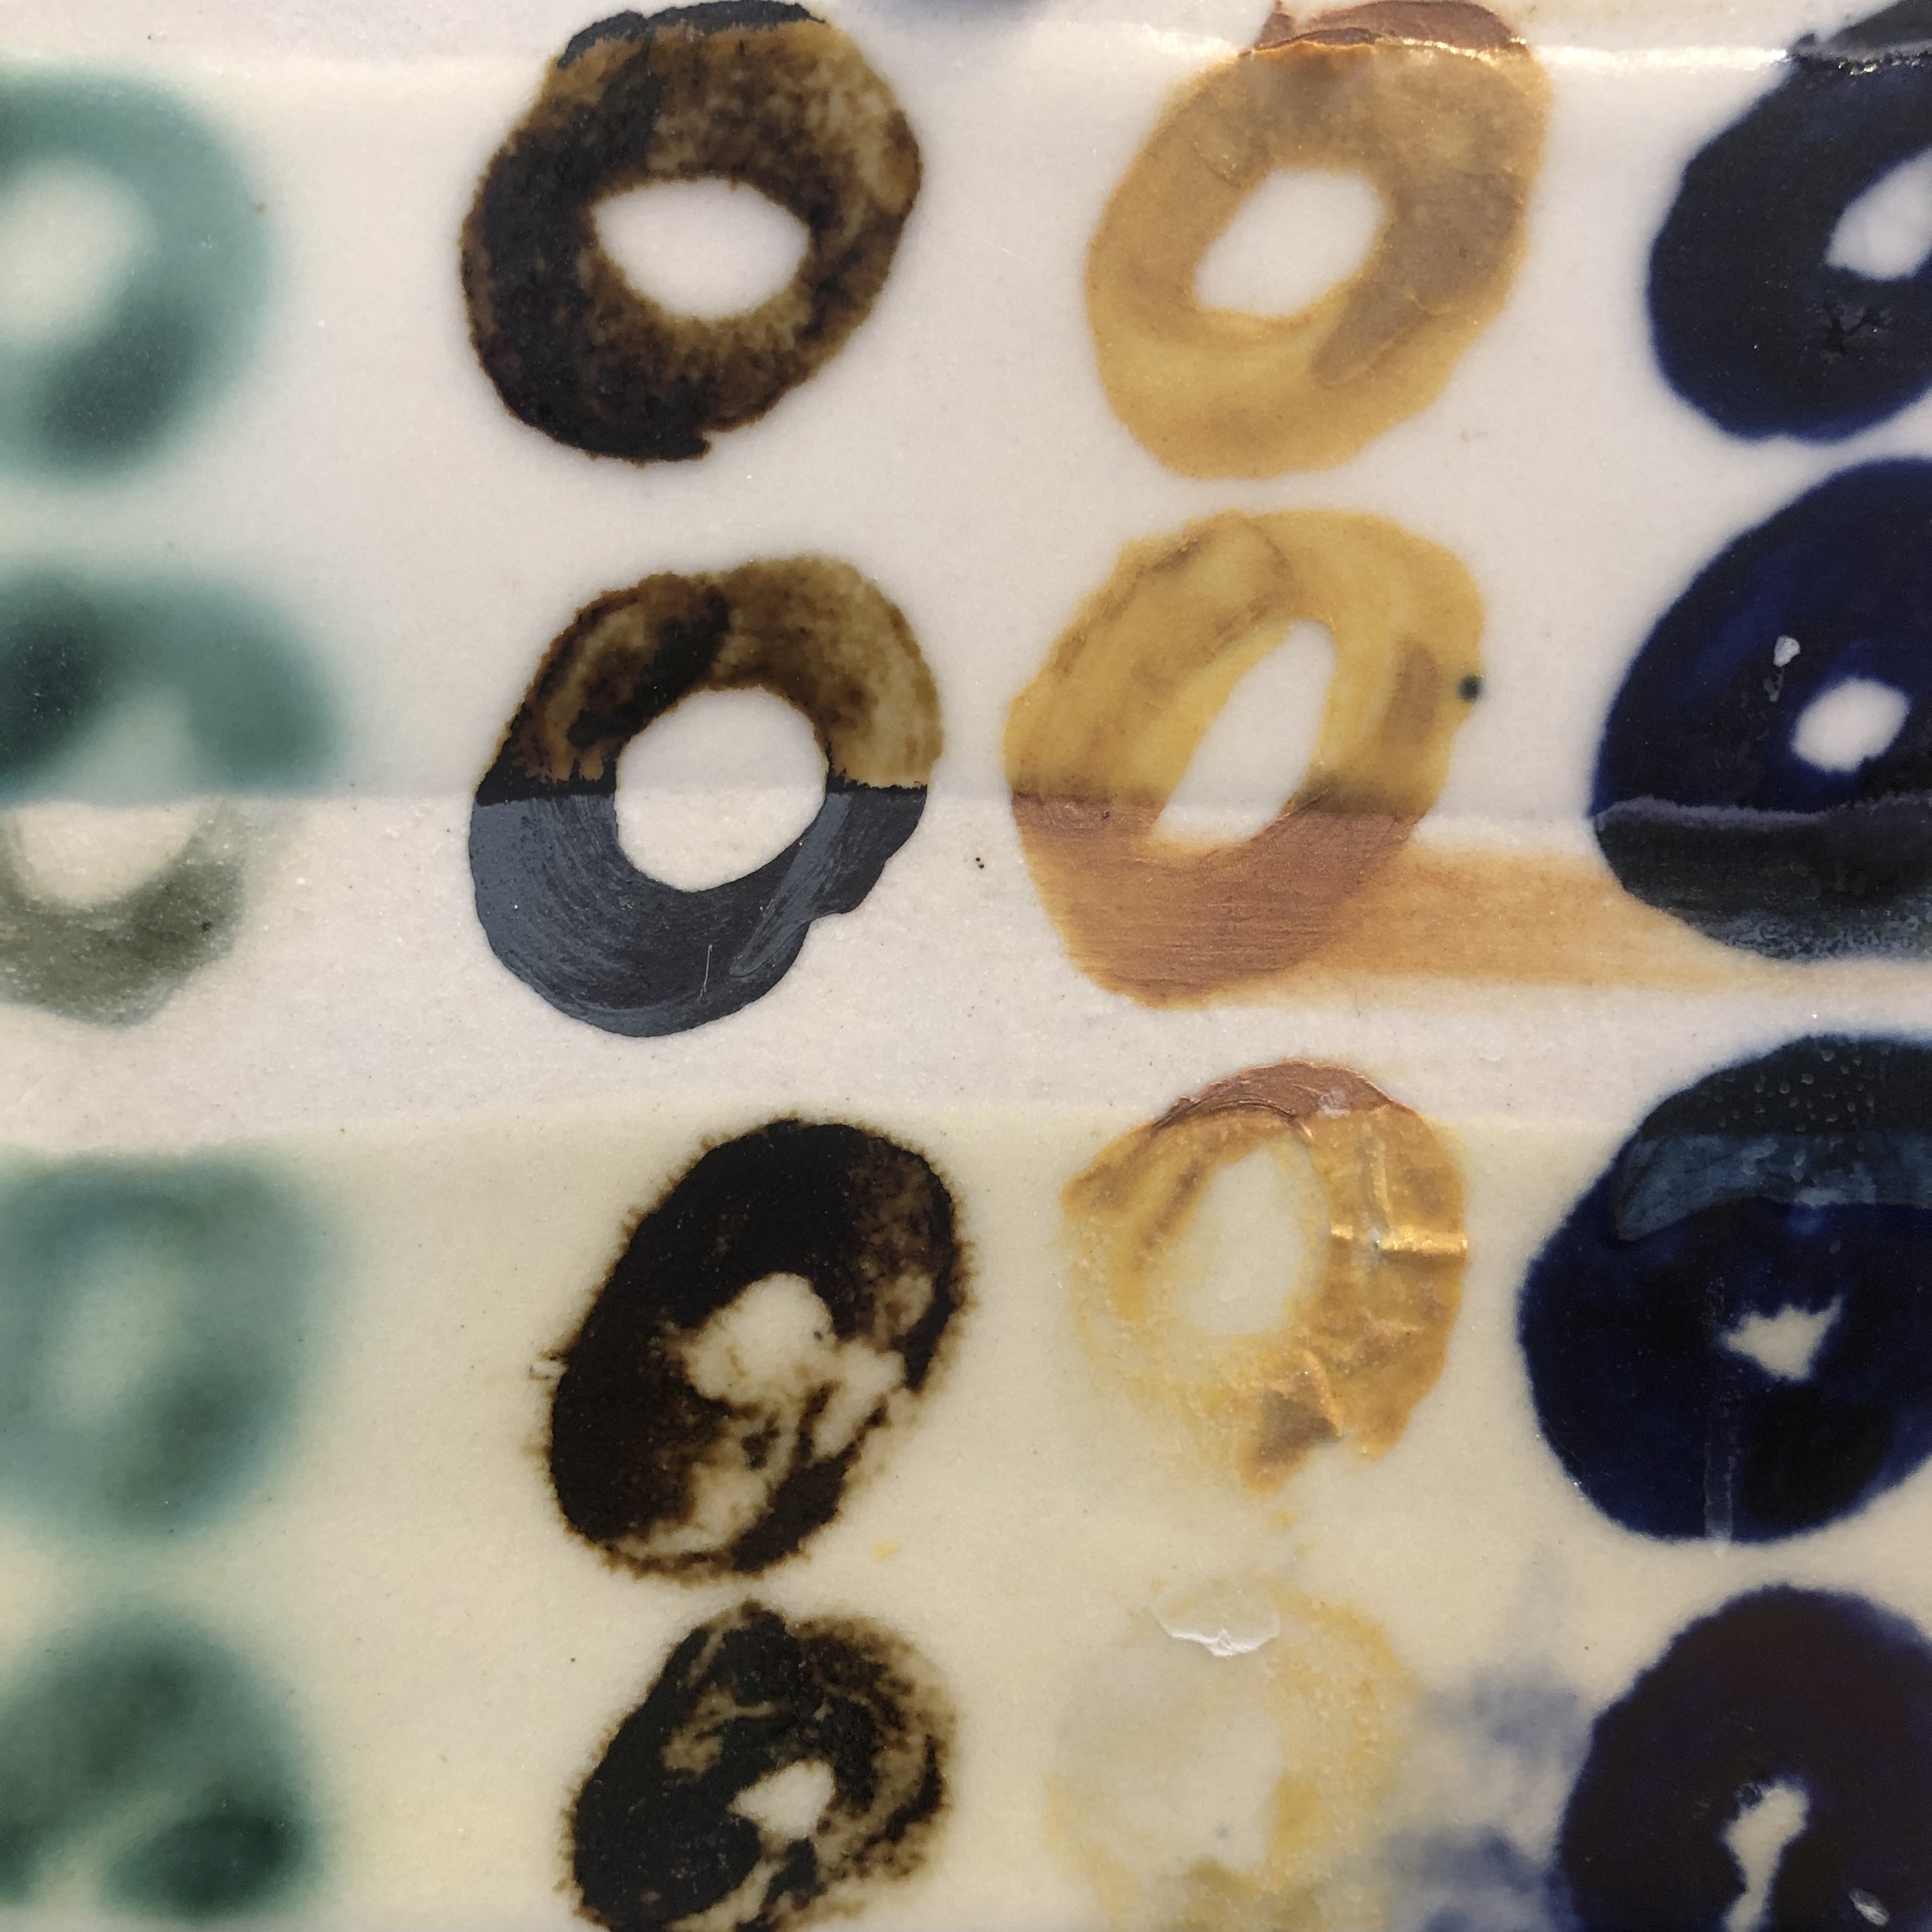
25. Oxide Wash: On bare clay, we brushed each of the oxide washes in a line of stacked circles. The oxides settle out and need to be stirred before application. Note: These should only be applied to bisque ware. Apply a glaze over them.
Clay: JG Porcelain Oxides: Copper, Cobalt, Rutile, Red Iron (Left to Right)
Glaze: Transparent Matte (Top) Sparkle Clear (Bottom)
26. Dry Brushing: Use a textured rolling pin to impress texture on soft clay. Bisque the clay. Paint a layer of underglaze to highlight the ridges of the pattern. Dip just the tips of a stiff bristled, DRY paintbrush in red underglaze. Hold the brush at a strong angle and brush in only one direction. The movement across the raised texture should be light and quickly so only the high ridges get any colorant/ underglaze
Clay: JG Porcelain Underglaze: Light Red Glaze: Transparent Matte ½ (L)
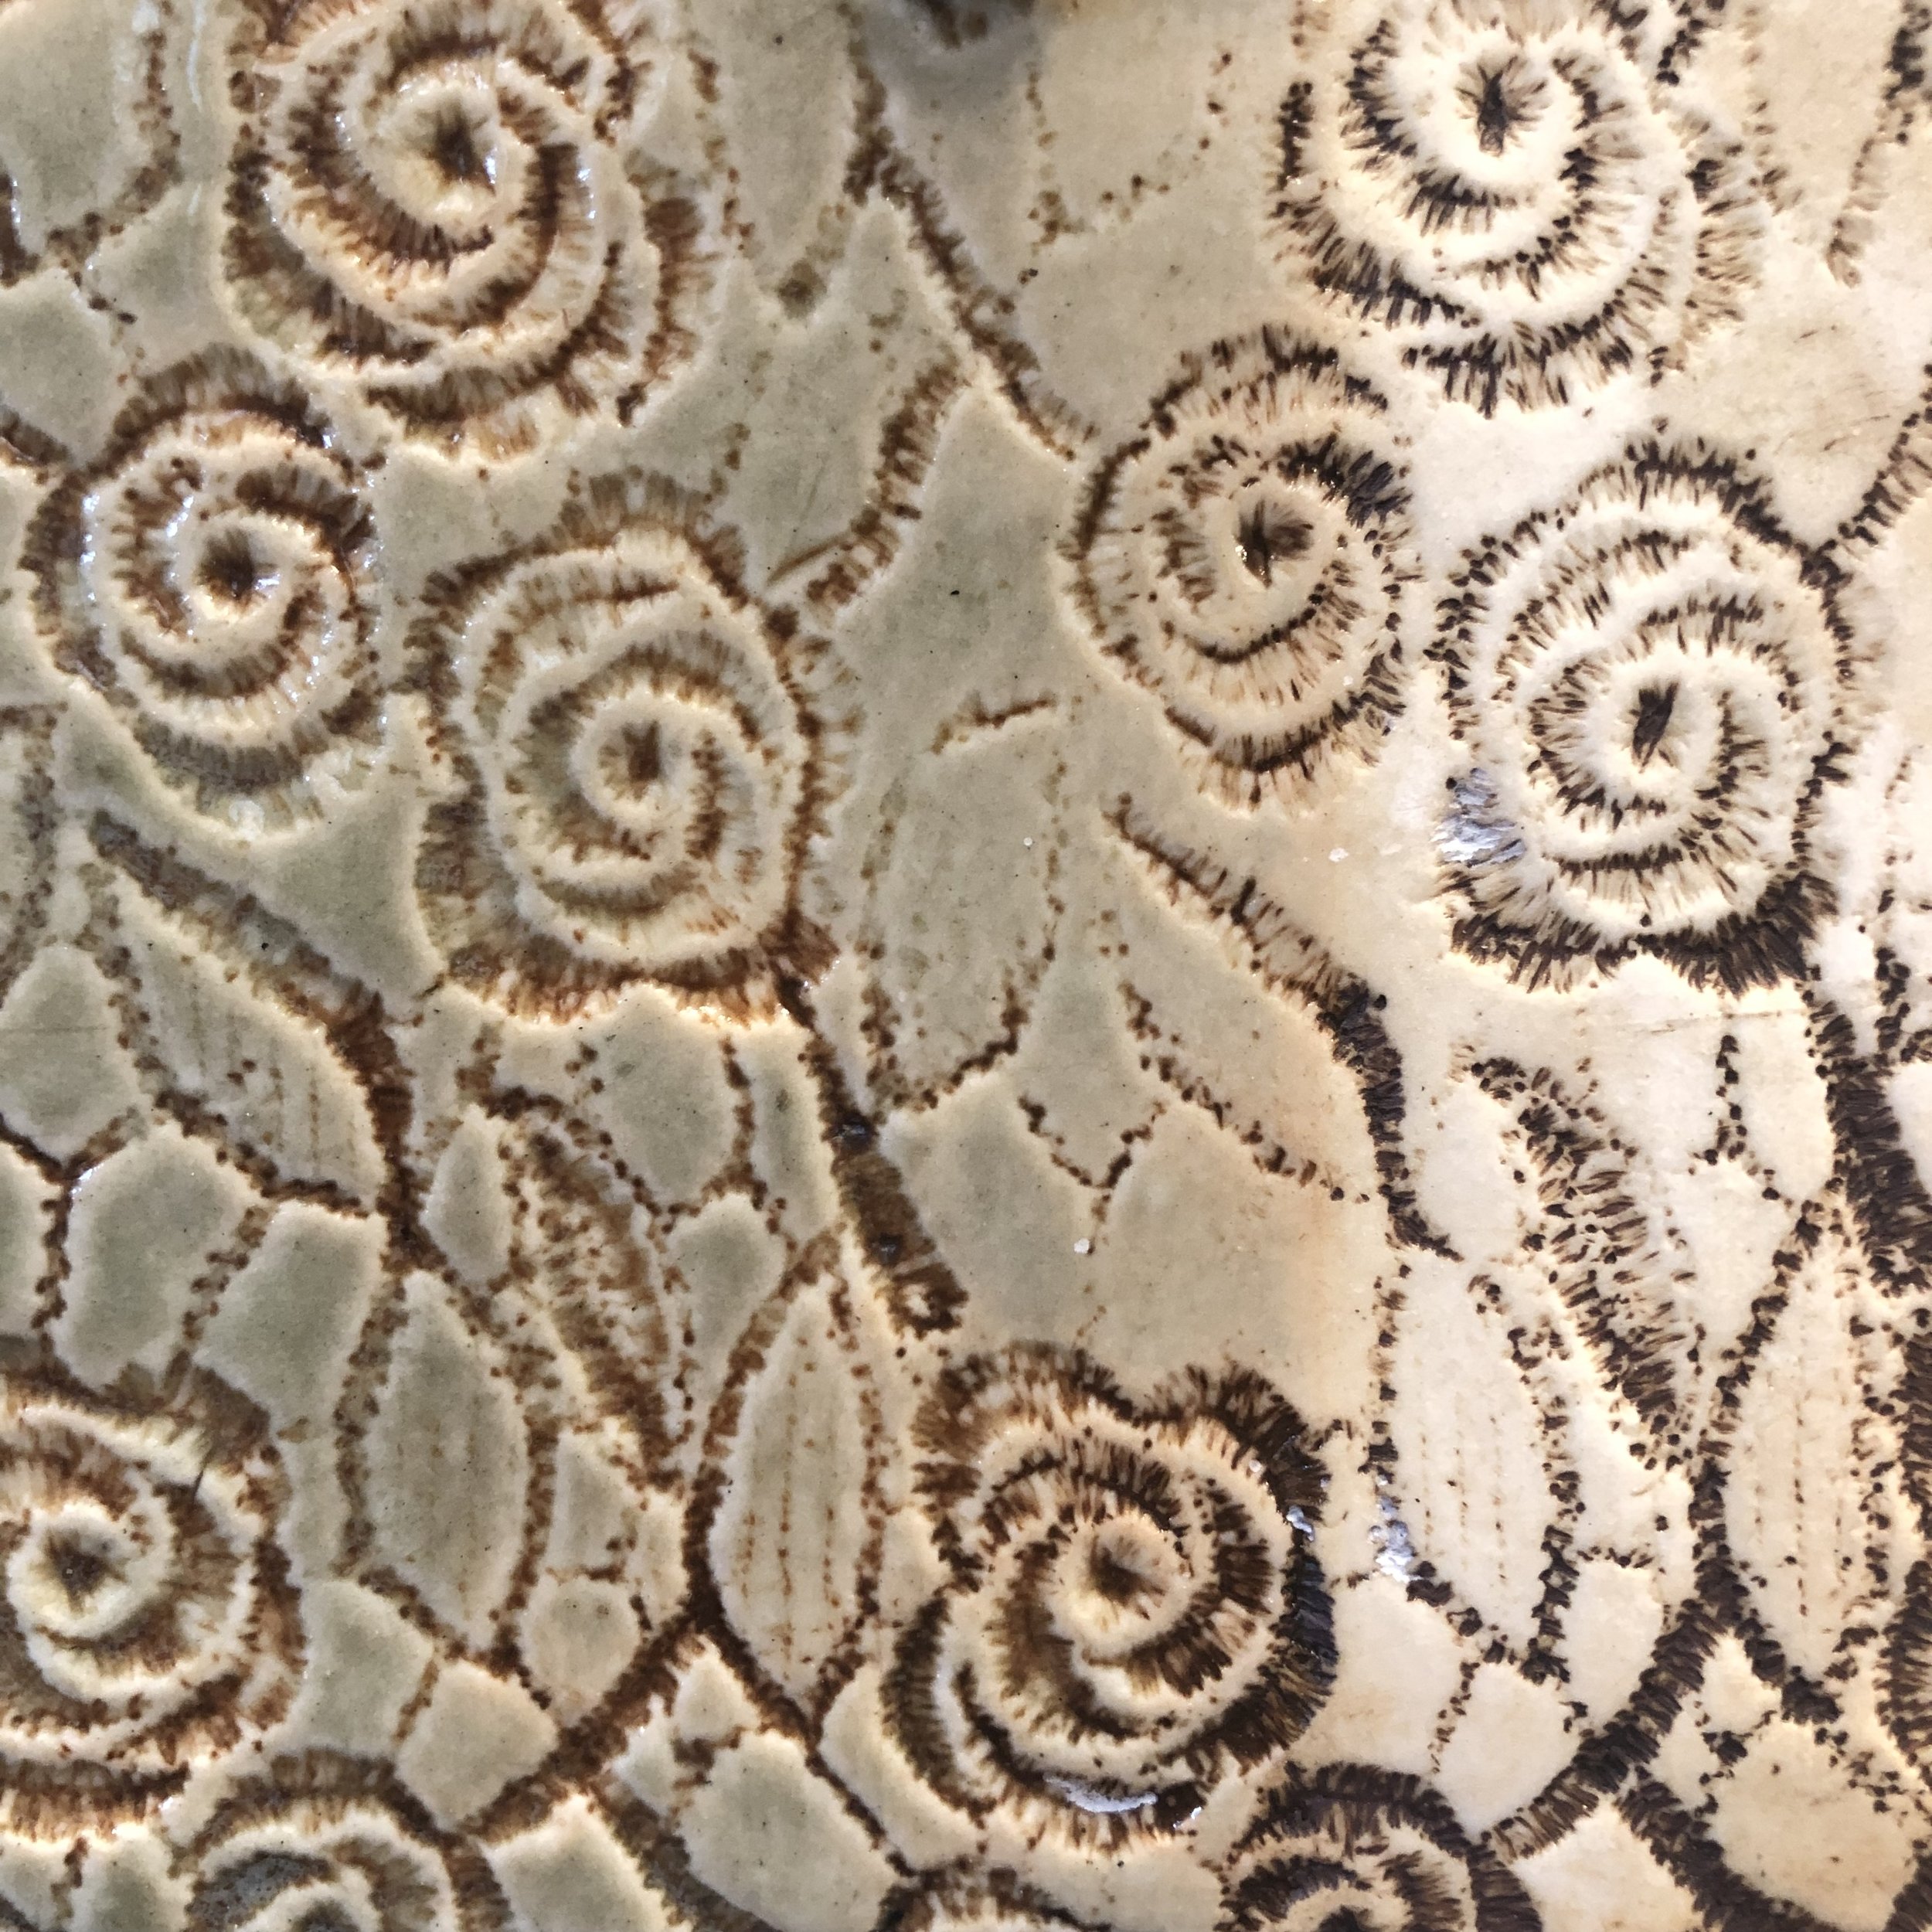
27. Impression 2: A piece of lace was laid on leather hard clay. It was impressed into the clay with a rolling pin. Then the clay was bisque fired. The iron oxide wash was applied to the bisque fired tile. After the stain dried, it was wiped off so that it remained only in the recessed spaces. Clay: JG Porcelain Oxide Wash: Iron Oxide Glaze: Sea Green ½ (L)
28. Incising with Cobalt Oxide
Paint on a layer of wax resist to leather hard clay and let it dry completely. Make cuts through the wax using a sharp tool or Exacto knife. Paint in cobalt oxide wash and let it settle into the incised lines. Wipe off excess oxide wash with a sponge.
Clay: JG Porcelain Oxide Wash: Cobalt Oxide Glaze: Furpple ½ (L)
29. Incising with Red Iron Oxide
Paint on a layer of wax resist to leather hard clay and let it dry completely. Make cuts through the wax using a sharp tool or Exacto knife. Paint in cobalt oxide wash and let it settle into the incised lines. Wipe off excess oxide wash with a sponge.
Clay: JG Porcelain Oxide Wash: Red Iron Oxide Glaze: Light Yellow ½ (L)
30. Incising with Cookie Cutters
Use different cookie cutters to stamp into leather hard clay. After it’s been bisque fired, paint underglaze into the incised patterns. Let dry and wipe back with a wet sponge. Underglaze will stay in stamped lines.
Clay: JG Porcelain Underglaze: Teal Glaze: White Gloss ½ (L)
31. Letter Stamps
Use letter stamps to press into leather hard clay. After bisque, copper oxide wash was painted onto the surface. After it dried, it was wiped back with a wet sponge. The wash stayed the most in the recessed areas. Clay: JG Porcelain Oxide Wash: Copper Oxide Glaze: Furpple ½ (R)
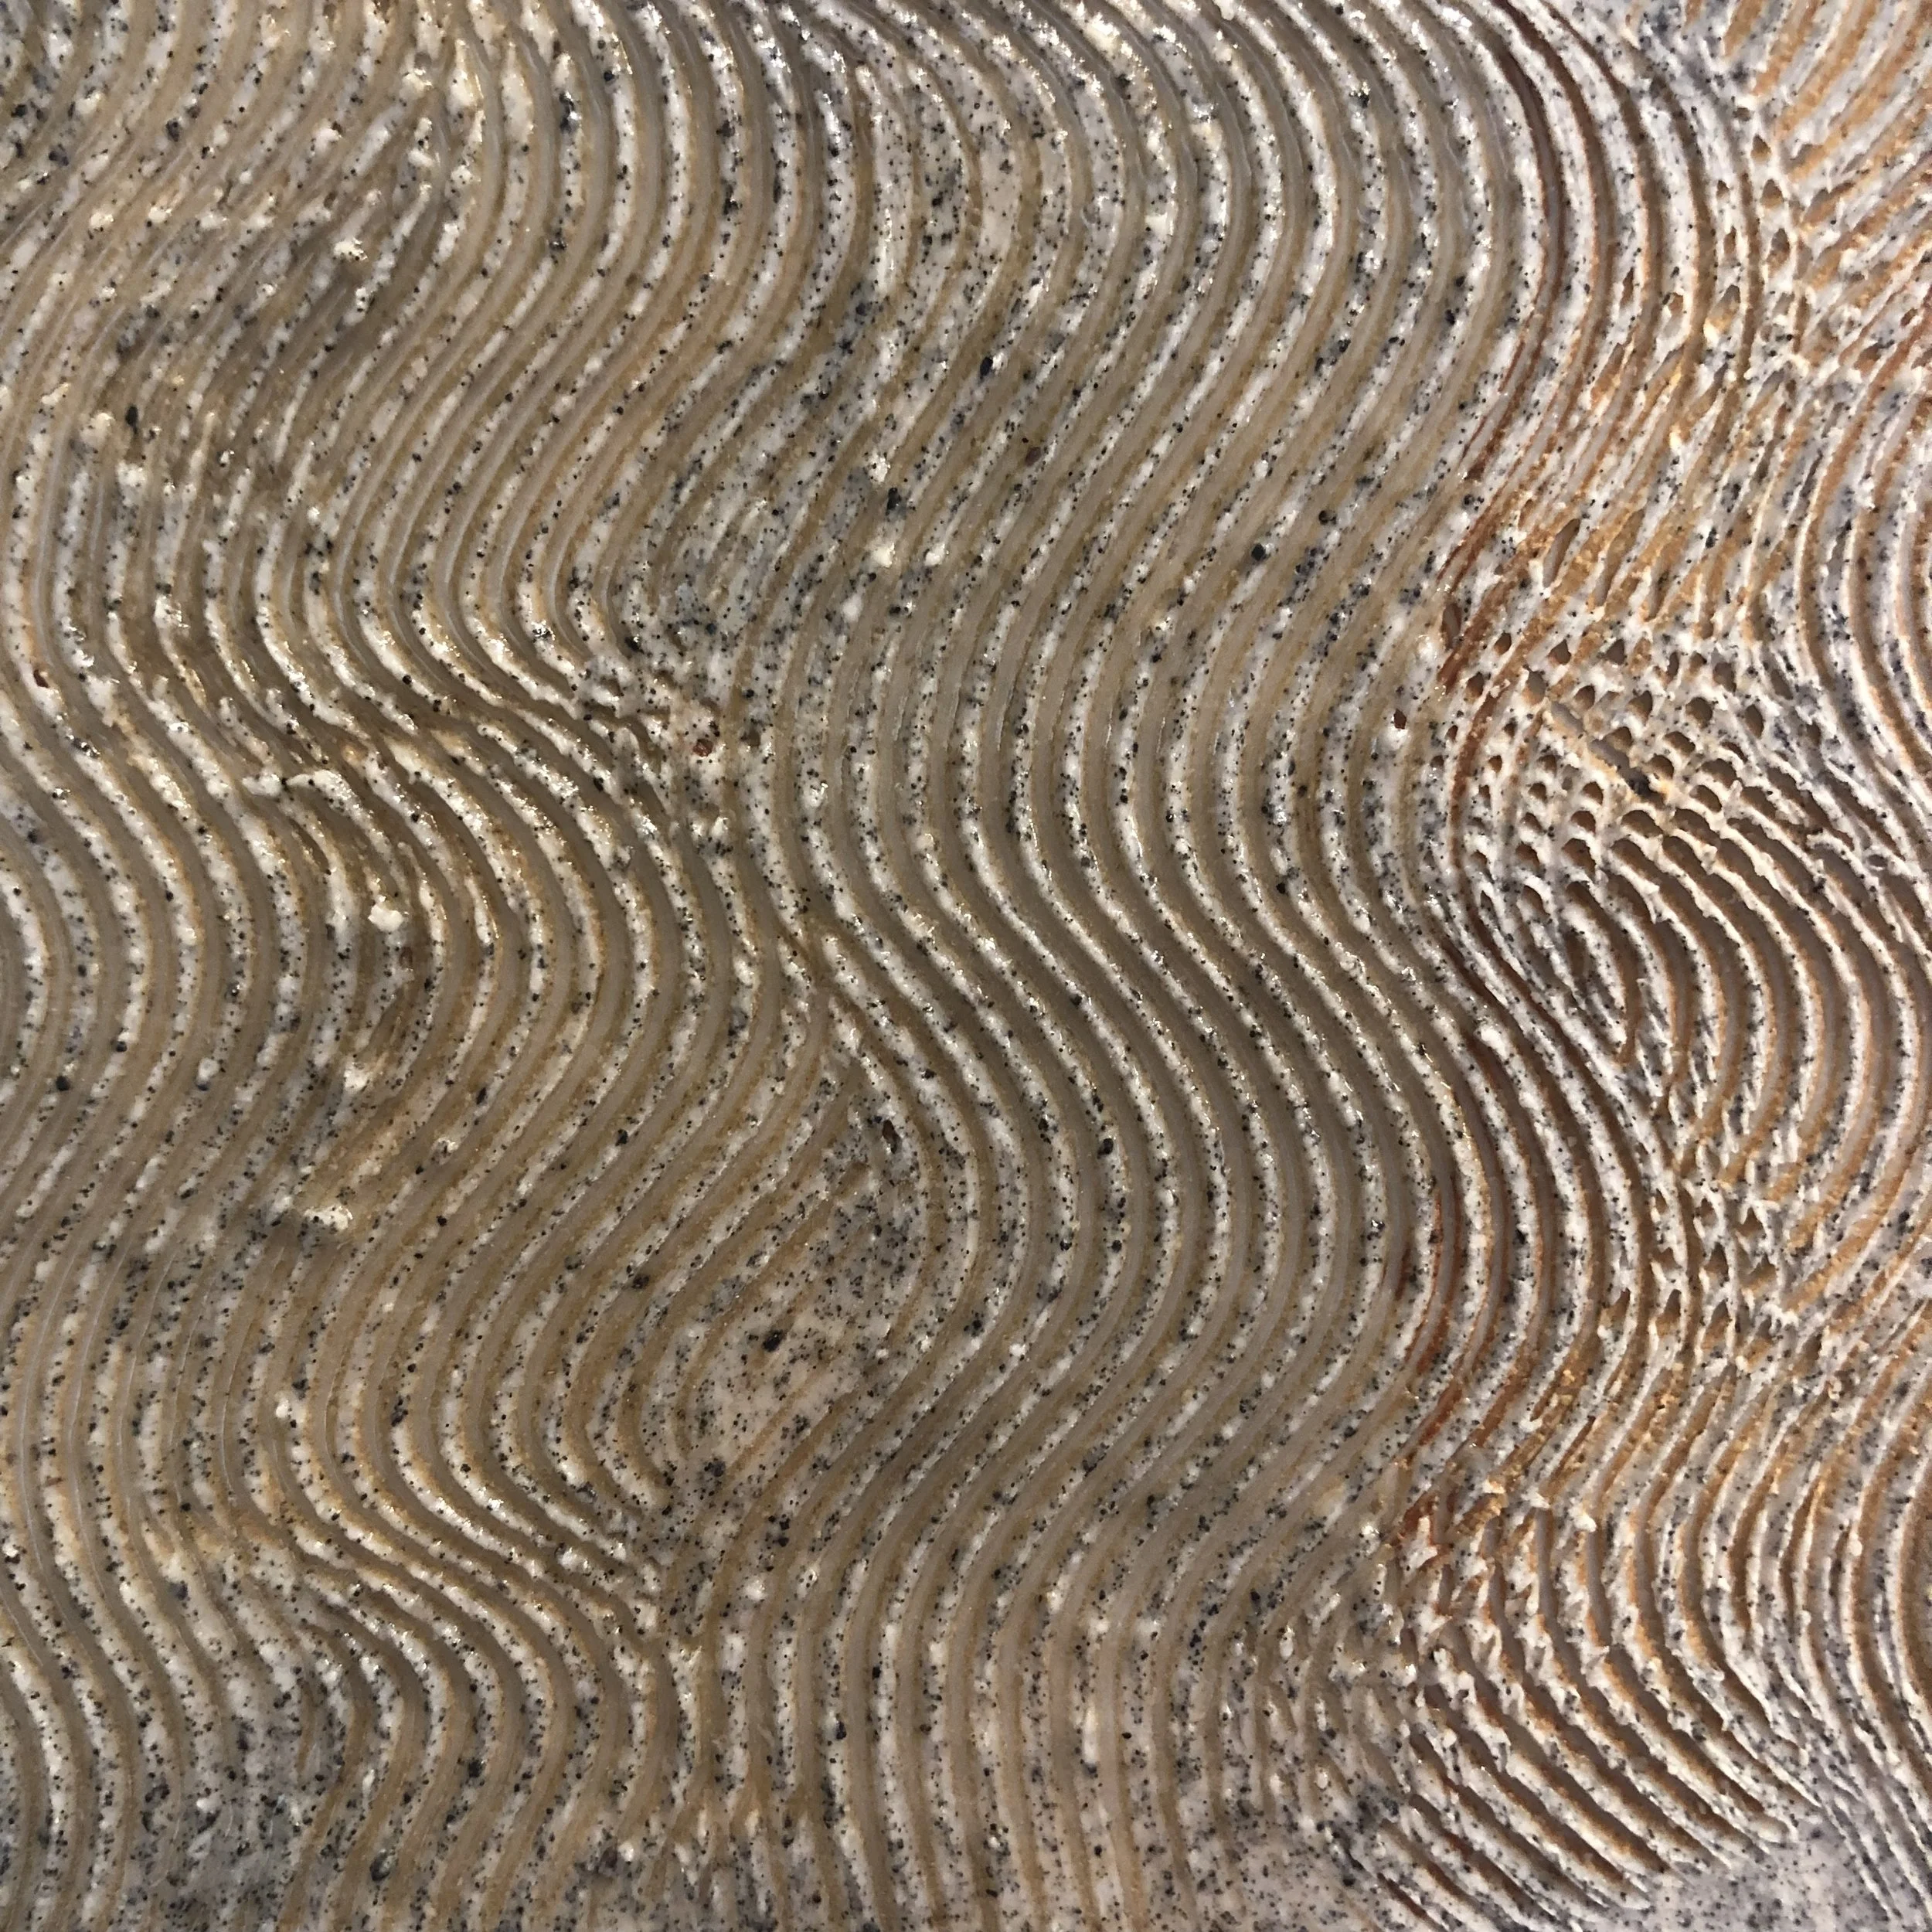
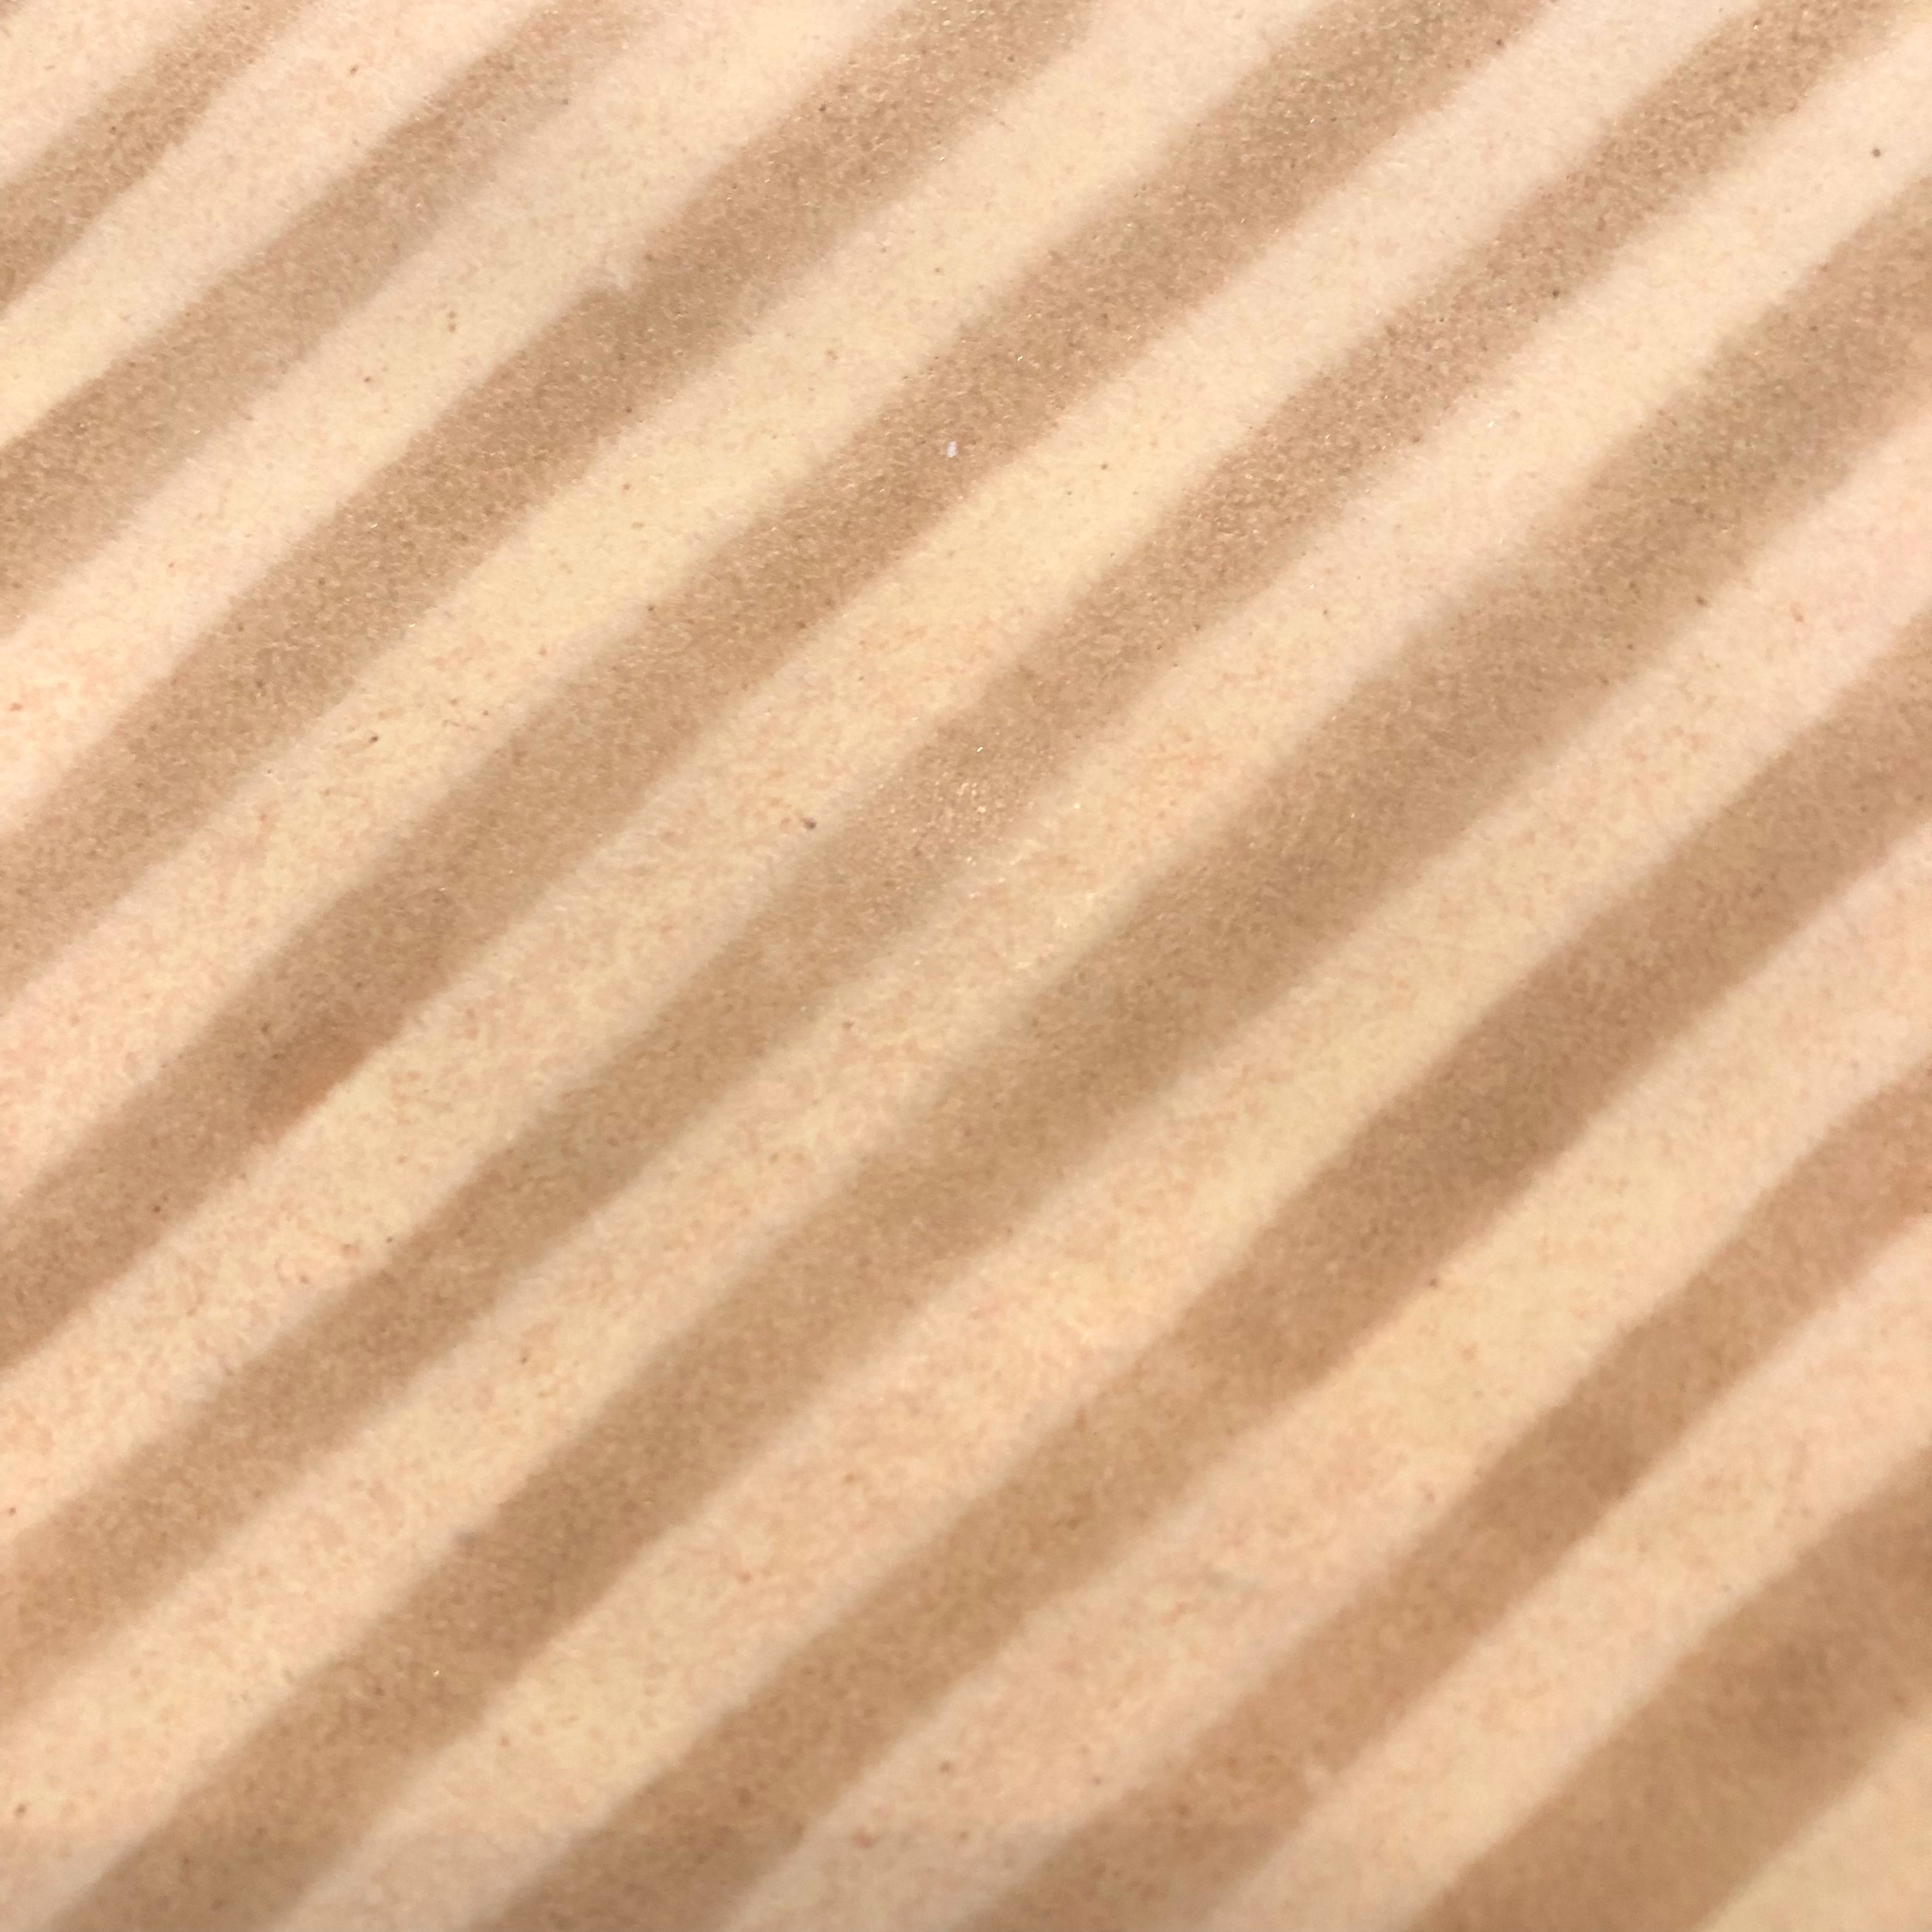
32. Texture Using Different Tools
You can use lots of tools to make texture. This pattern was done with the corner of a hard rib on leather hard clay. It was repeatedly pressed into the clay to form rows.
Clay: JG Porcelain Glaze: Light Yellow
33. Applicator Bottle
White on White Lines
Dip the first layer of glaze. Using an applicator bottle full of white glaze, apply lines as an additional layer. This is subtle, but a lovely surface. The lines are raised and have a soft texture to the. A great application for this technique is the surface of a plate.
Clay: JG Porcelain Glaze: White Gloss
34. Applicator Bottle
High Contrast Dots
Dip the Tile in Bee Pollen. With an applicator bottle full of black glaze, apply a pattern of concentric circles of Black dots on top of the first glaze. When you use highly contrasting glazes the patter shows up a lot. The surface is slightly raised where the black glaze is applied. Clay: JG Porcelain Glaze: Bee Pollen, Black
35. Applicator Bottle/ Bare Clay
There is no base glaze under the Turquoise. Apply turquoise (or other glaze) dots with an applicator bottle to the entire surface of the bare clay. This is great for the surface of a pot that will not have food on it. Bare clay is not as easy to clean and does not sound nice when a fork scrapes across it… Clay: JG Porcelain Glaze: Turquoise
36. Wax resist pattern with glaze (Medium Contrast)
Bee pollen base was dipped and a wax pattern painted on top. Dijon beach then applied second. Both of these glazes are matte and in a similar color palette. The pattern shows up, but it is not dramatic. Since neither of the glazes moves, the line quality is sharp.
Clay: JG Porcelain Glaze: Bee Pollen, Dijon Beach
37. Wax resist pattern with glaze (High Contrast)
The tile was dipped in Dijon Beach and then the angled was resist line was painted over it. It was left to dry for several hours. Then it was dipped in Emerald Green glaze. The Emerald green is shiny and melts more. The Dijon Beach is matte and does not move much. The Emerald Green bled into the Dijon Beach and made the line narrower than it started. If this was on a vertical surface the lines might run down the form somewhat.
Clay: JG Glaze: Dijon Beach, Emerald Green
38. Sprayed glaze
39. Pouncing Design
The dots on this tile are made with charcoal dust. It will burn away in the firing… This is a design transfer method to use on bisque ware. To begin with, trace or draw a design on tracing or standard paper. Place the paper on a layer of cardboard. Perforate the reverse side of the drawing lines with a needle tool. Hold the paper in place on your art project where you want the design. Pounce the paper with the charcoal. And Voila! You may now outline or fill in over the pounced design with underglaze, glaze, or underglaze pencils!
40. Underglaze pencils: Use underglaze pencils to draw on bisque ware. Dip the pencils in water for smoother application and to get a watercolor effect. Pencil lines can also be spread and blurred with a wet paintbrush after drawing. Clay: JG Porcelain Pencils: AMACO Black, AMACO Dark Green, AMACO Dark Blue, Chem-Clay Light Green, Chem-Clay Yellow, Chem-Clay Light Blue Glaze: Transparent Matte
41. Underglaze pencils
This drawing was done by Eliane Medina with underglaze pencils on bisque ware. Dip the pencils in water for bolder line application. The underglaze pencil lines can be blurred and blended with a wet paint brush for a watercolor effect.
Clay: JG Porcelain Pencils: AMACO Black, AMACO Dark Green, AMACO Dark Blue, Chem-Clay Light Green, Chem-Clay Yellow, Chem-Clay Light Blue Glaze: Sparkle Clear
42. Underglaze with Circular Sponge Stamps
We have some little sponges on a stick (these can be purchased at a craft supply or rubber stamp shop). These were dipped in either bright orange or chartreuse underglaze to make the pattern of dots on the tile. The Left half of the tile has Sea Green Glaze over the underglaze.
Clay: JG Underglaze: Bright Orange, Chartreuse Glaze: Sea Green
43. Tape Resist with Underglaze
Use masking take to create angular shapes. Paint around the tape where you want color from underglaze. Remove the tape and let the underglaze dry. Then you can repeat this step adding layers of shapes and colors
Clay: JG Porcelain Underglaze: Intense Yellow, Royal Blue Glaze: Furple
44. Sprayed glaze & Wax Resist
When using the spray booth, first dip your piece in a base glaze of your choice. After the first layer is dry, apply a wax resist design to create a contrasting pattern. Wait for the wax to fully dry. Then, use the spray booth to apply a second layer of glaze sprayed on top. Wipe away any glaze that has settled on top of your wax resist design.
Clay: Whitestone Glazes: White Gloss first layer, wax resist applied, Sea Green sprayed on top, with the spray directed most heavily at the bottom right corner of the tile.


