
Epic Trailer Rebuild: Chapter 2
/By Rickie Barnett

The morning came the way it always does, but this particular morning felt different and in it’s own way it was, in fact, seemingly unusual for me. I’ve always felt like my heart was weakest in the early morning hours, with the weight of the world weighing and hanging as it does and my freshly rested heart not being quite awake enough to shoulder it properly. But on this morning as I brushed my teeth, put coffee on, pants, shirt and sweater, socks and then boots, I realized my hands were a little more steady than usual. While I laced up my boots I became quite aware of my hands and the job that was ahead. On this morning I would be starting the foundation of my new home, I would start building up rather than down. On this morning I would become the center of some bizarre metaphor foreshadowing the next year of my life. Perhaps the next few years of my life.

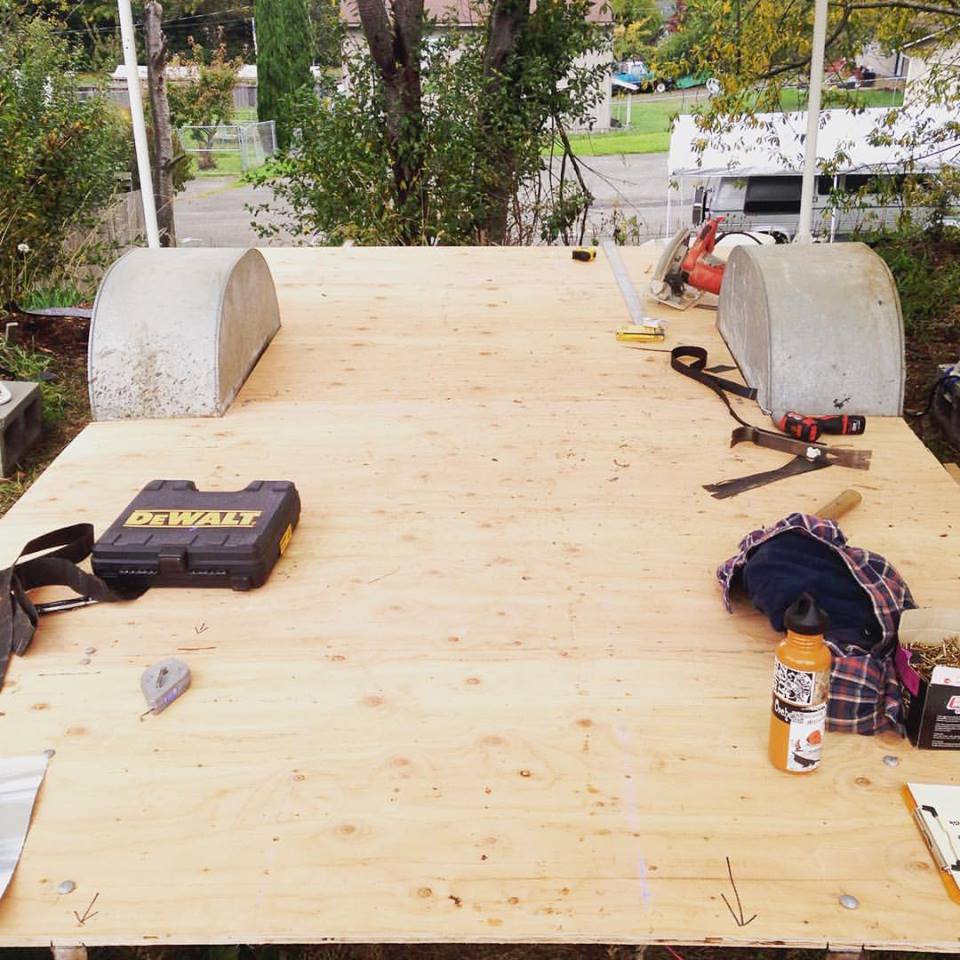
As with any structure being constructed, setting a good foundation is key to success. Not taking your time to make sure the foundation is level will create an uphill battle for the rest of the building process. Building on a chassis is a little harder due to the fact that no matter how well you brace the it after leveling, it will always shift as you put weight on it. To make up for this it is very important to double check all of your measurements once the chassis is level and to trust these measurements as you move forward. Building a trailer is a bit like building a bird-house out of popsicle sticks that you are going to try to live in, so there is not a ton of room to fudge things.
Every action from the beginning is with the intention to put the metal skin back over the newly built skeleton and metal doesn’t stretch so things needed to be built back the same way they were. Every step had to be exact to get the metal skin to fit back over the walls. This meant that I had to constantly be thinking 12 steps ahead and when it came to the floor I had to double and triple check my measurements and essentially map out the entire project. If I made even the tiniest mistake on the floor I would pay for it big time later. Due to this trailer being 50 years old, and the fact that back then wood was cut true, meaning that a 2x4 was actually 2 inches by 4 inches instead of 3.5x1.5inches, I had to do a little bit of milling to start things off. It took about half the day to cut all the wood and map out the floor. This may seem like a long time considering it took me about an hour and a half to build the floor of the cabin.
Once everything was mapped out and the pieces were cut, it was time to crawl underneath and drill all the holes for the carriage bolts. It was the first time in my life that I became very thankful that I’m not a large chested man. That being said, I’m not a little tyke either, so it became very frustrating trying to accomplish all the stuff underneath the floor where I couldn’t see a damn thing I was doing. Oh, and I forgot to mention that I was sick this entire day. Some may say it was food poisoning, others might call it a hangover but either way I was taking breaks from crawling around under the trailer to hurl down the backside of the hill, cursing the entire time. But by the end of the day I could keep down a bowl of soup and I had enough energy to flatfoot a little number on my new floor. It’s important to celebrate these small victories with a flatfoot dance on a newly constructed deck of wood. I always partake, sick or not.

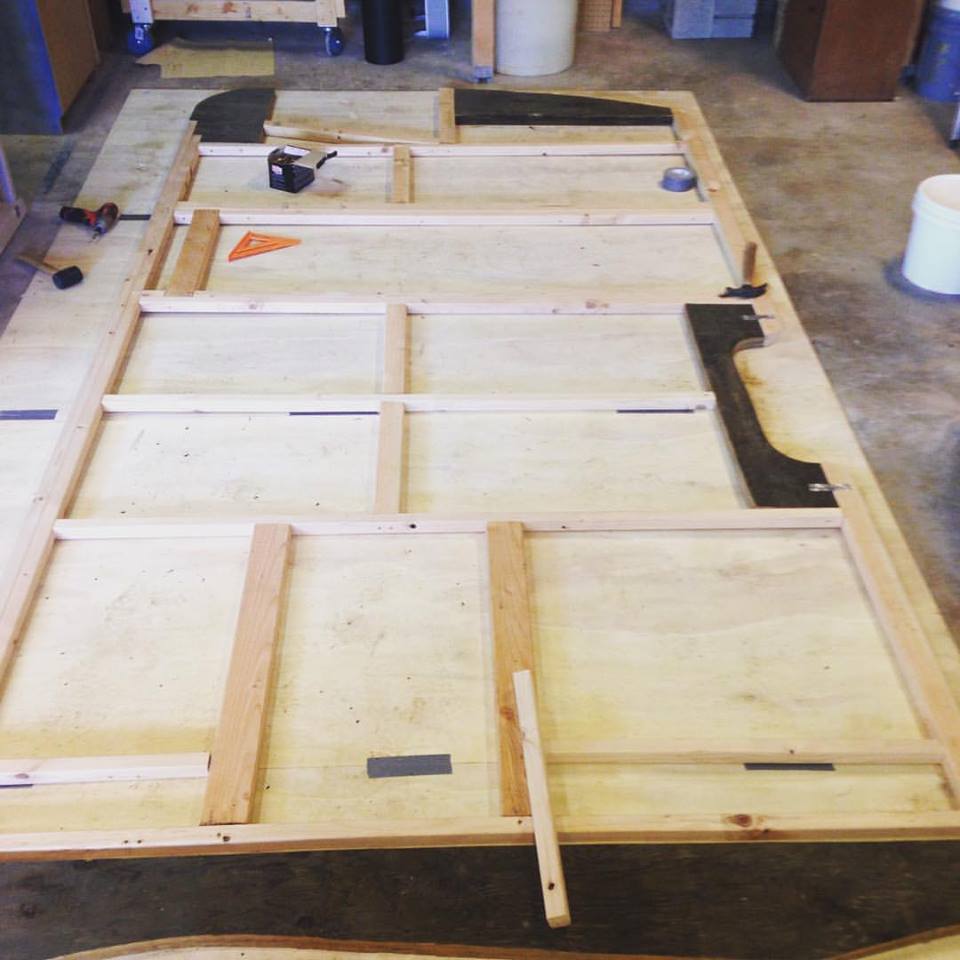
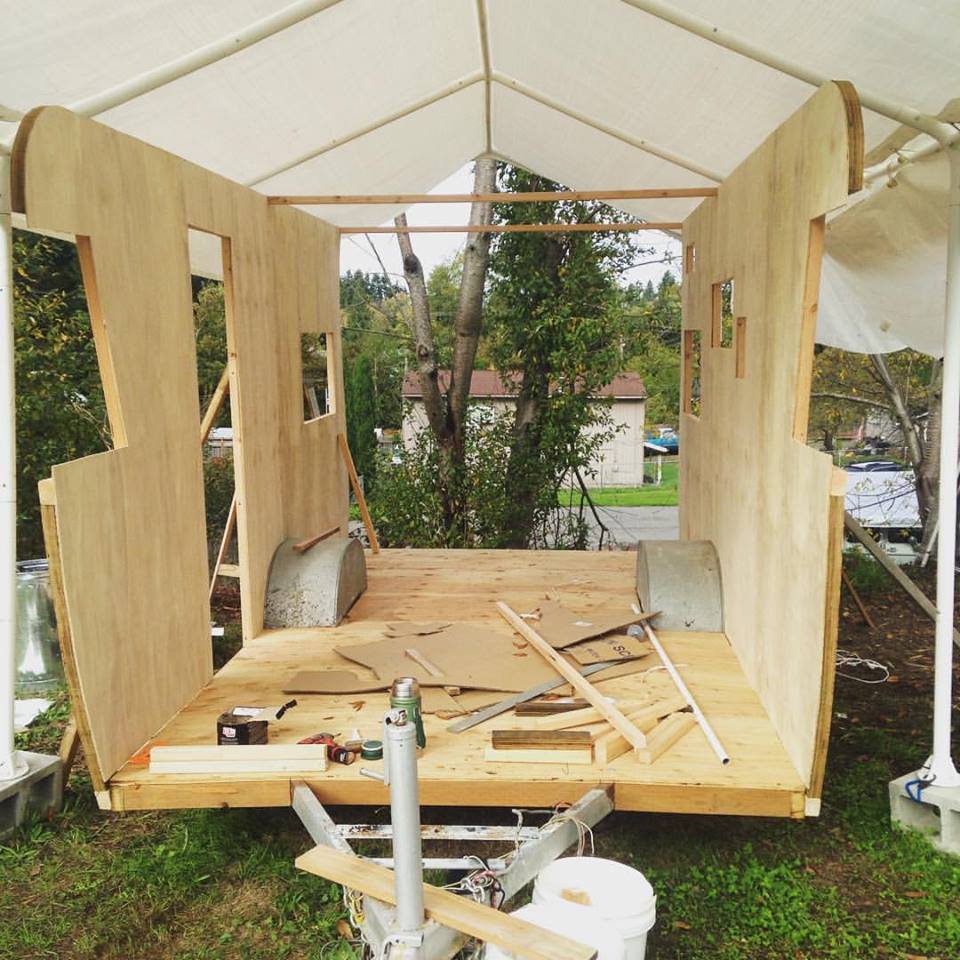
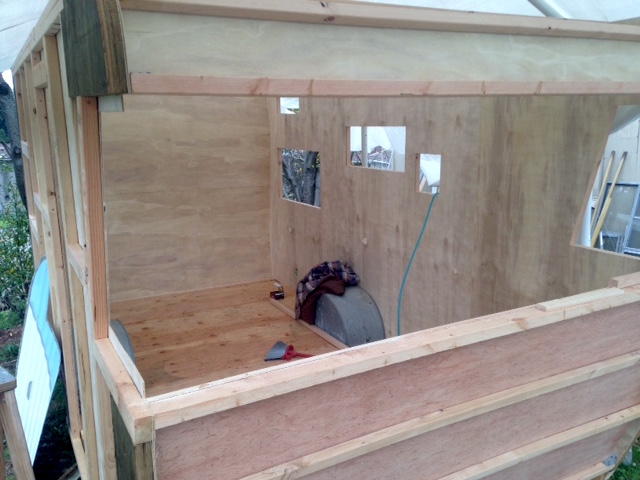
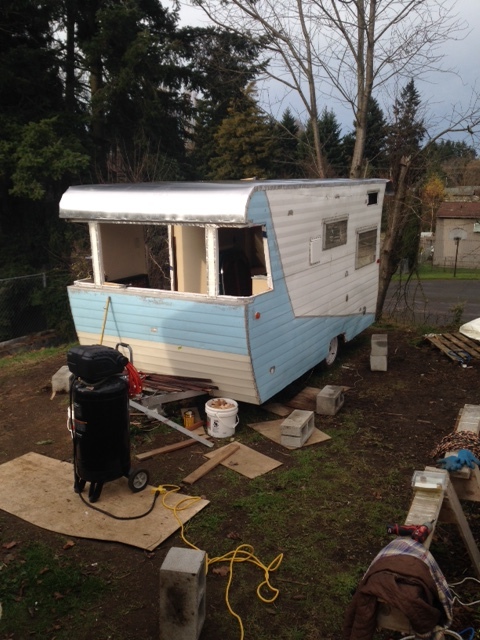
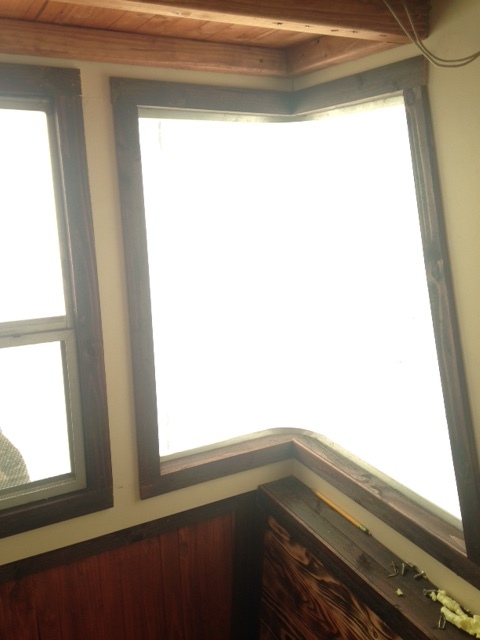
It dawned on me that the construction of this trailer would be best if I approached it the same way that I would the construction of building with clay slabs. And if you know anything about my work, you know I love me some slab building. So all of a sudden my mind was becoming very clear on how to best construct the trailer. When it came to constructing the walls I taped all the metal panels together for each side of the trailer to create a template. I then laid the template over 3 pieces of plywood, also taped together, and traced out the shape of the walls on the plywood making sure to mark all of the cutouts such as windows, door, fan, outlets, etc. Once the drawing was on the plywood I could lay out all of the 2x2’s to frame the wall. This was the easiest way I could think of building the walls to match the metal skin. After I had both the side walls framed up I grabbed some extra hands and we carried each wall out to the trailer floor and lifted them into place. This was an exciting step as now the project was starting, to our pleasure and good fortune, actually resemble a trailer! Once the side walls were in place I could frame the front and back walls to match the beautiful contours of the Aloha design. The trickiest part of this was to build the curved corner windows on the front wall of the trailer. The corner windows are a really neat feature but frustrating nonetheless. Once they were framed in and double checked to make sure the windows fit, I felt like I was sitting pretty.
After the front and back walls were in place I moved on to framing up the roof. This was fairly simple and went up pretty quick. I was starting to feel the momentum picking up and finding my stride in the project but the deadline to have it done by was fast approaching and I was just getting to the interior.
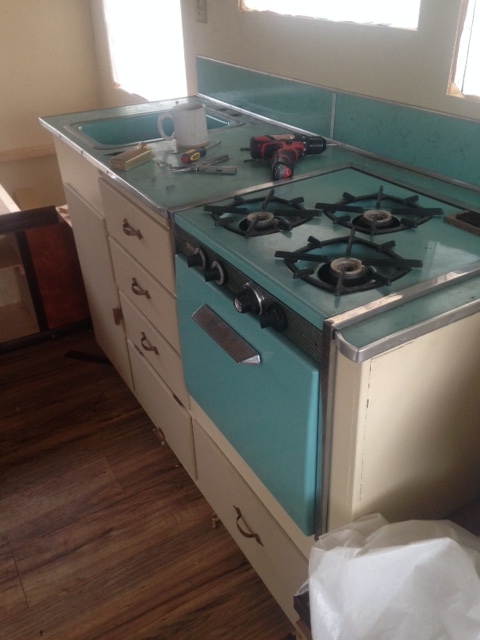
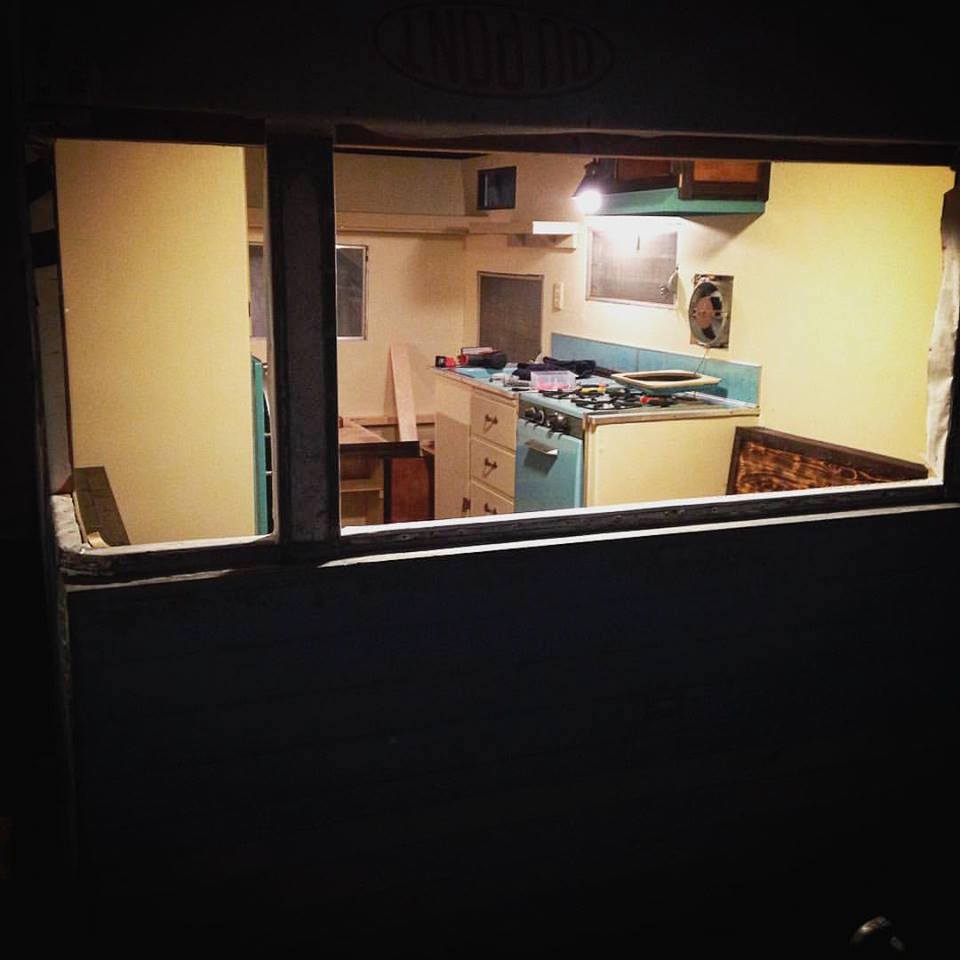
During the deconstruction of the trailer, I was able to save 2 cabinets from the original guts with only needing to replace a couple rotten boards in them. This was hugely beneficial due to the fact that they where the 2 biggest cabinets in the trailer and rebuilding them would have taken me a couple days. I replaced the boards in them and passed them off to the other assistants for a new coat of paint.
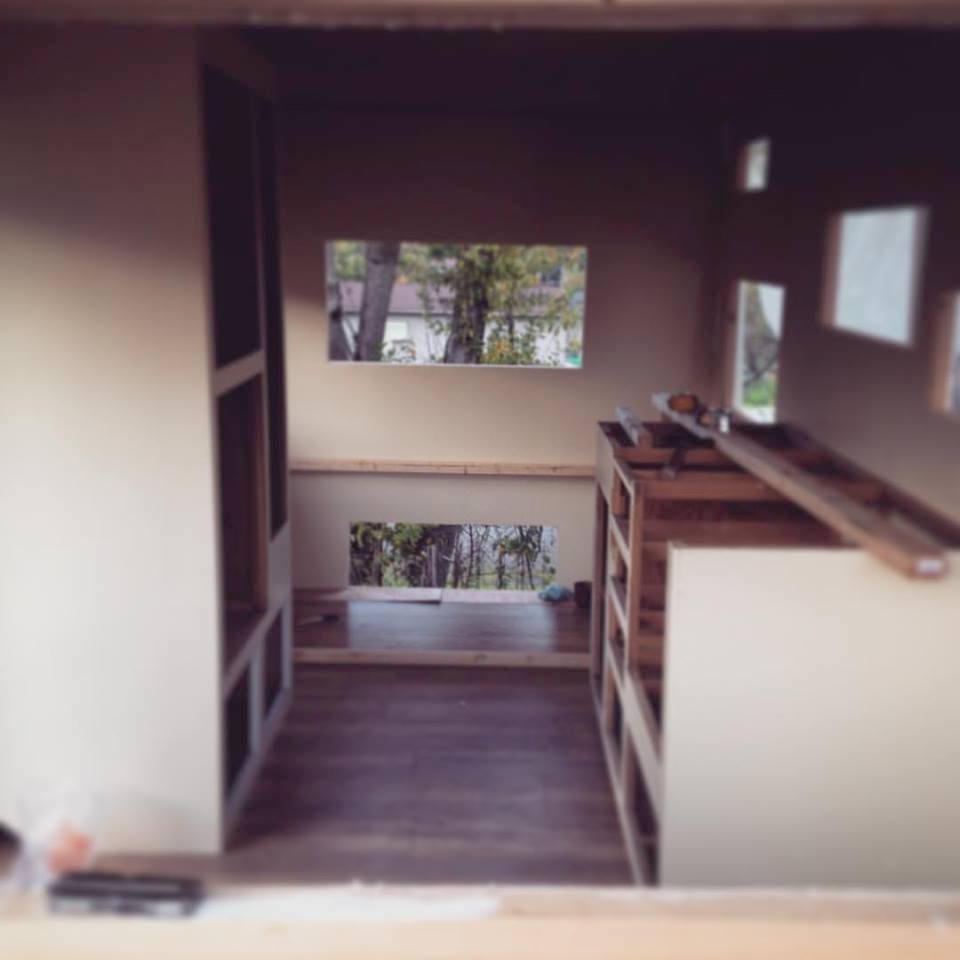
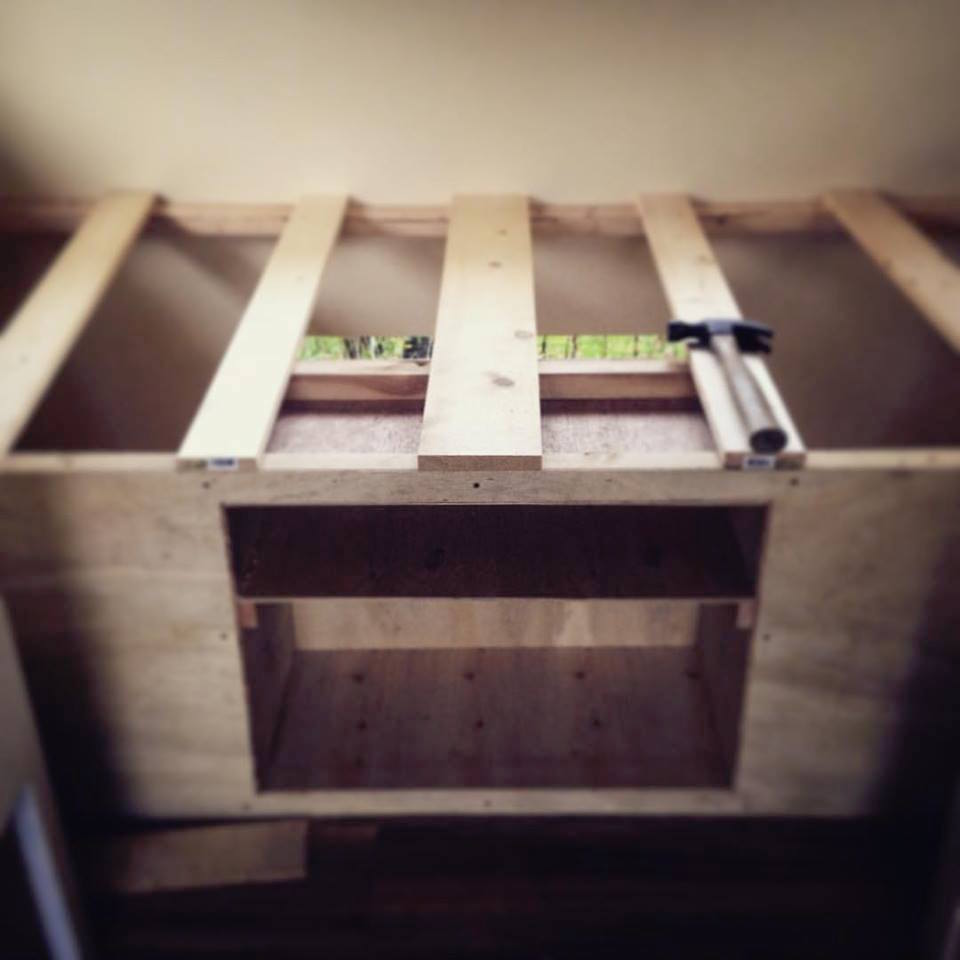
The funny thing about the construction of a trailer is that you kinda work backwards from normal construction. Once the walls are up you start working from the inside out. This is due to the fact that with the walls being so thin everything is secured in place from the outside of the trailer. So I wrapped my mind around that and started painting the interior walls and put in the laminate flooring while the salvaged cabinets were getting a makeover. Once the paint was dry the cabinets were the first to go in. The “closet” cabinet runs from the ceiling to the floor so it actually acts as a structural support for the entire trailer. The kitchen counter also acts as a structural support. This is due to both of them being fastened to the floor and walls, and in the case of the closet, being fastened to the roof, as well.
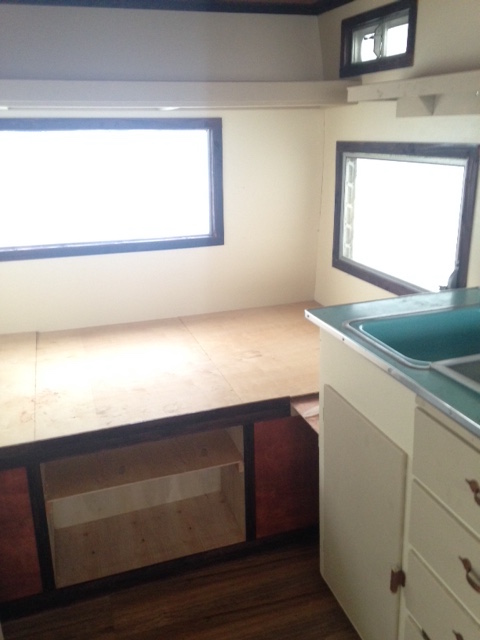
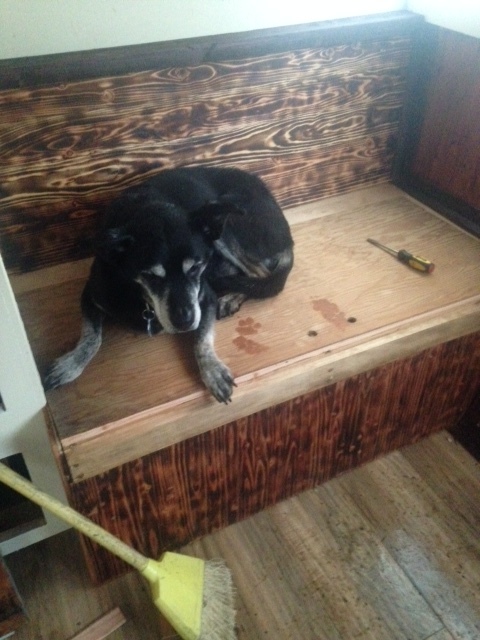
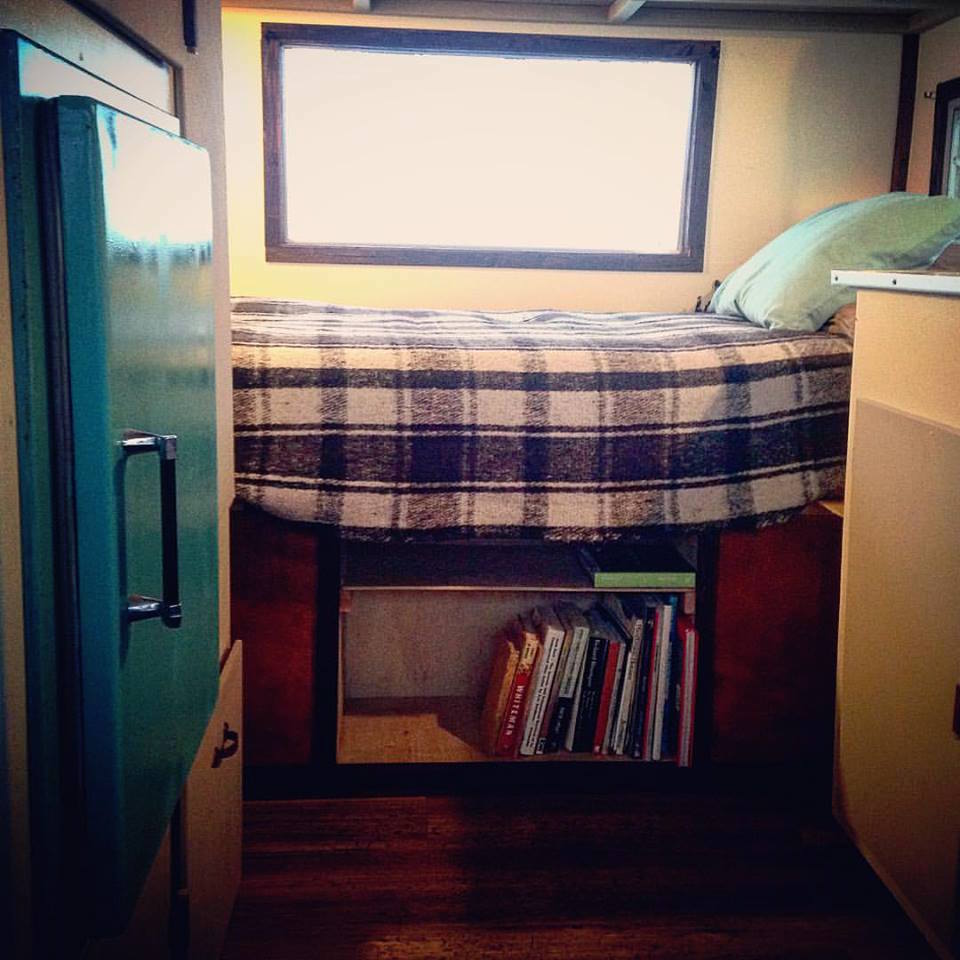
The next step was to build a bed and the benches in the front. This was refreshing because it was the first time in the project that I really got to throw in some creative flair. Both the benches and the bed needed to be able to double as storage in true trailer form. So I raise the bed a little higher than the original and put in a little book shelf that could be easily reached from a lying down position. The bed went in very quickly. The benches were a little trickier and were constructed outside of the trailer and put into place later on. The tricky part was making sure that the table could still fol
down into place between them to make up a second bed. This required lots of measuring and trying to account for every inch of space. For the benches I torched and wire brushed the wood that would show to give it a bit of an aged look and a bit of personality. Once installed, it was a delight that they fit snuggly into place and that the table also fit in between them to make the guest bed. I think I speak for everyone when I say that it’s nice when things work out.
It didn’t take long to realize that the original deadline was not going to be met so Deb gave me an extra month to finish things up. This seems like it would have been plenty of time but it really came down to the wire. Speaking of wire, the next step was to get all the electrical hooked up. I had little experience working with electrical, but with the help of the internet and George, we figured it out and it was fairly painless, no one died. We ran the wire, hooked up the breaker, installed all the fixtures and plugged her in. I can not even begin to describe the feeling of flipping the light switch for the first time and getting to see her all lit up in the night. Still, to this day, I will occasionally turn the lights on and walk outside for that sight again. I’ve never chanced a white dragon but I assume it feels quite similar. That feeling was what I needed to get through the headache of insulating the walls.
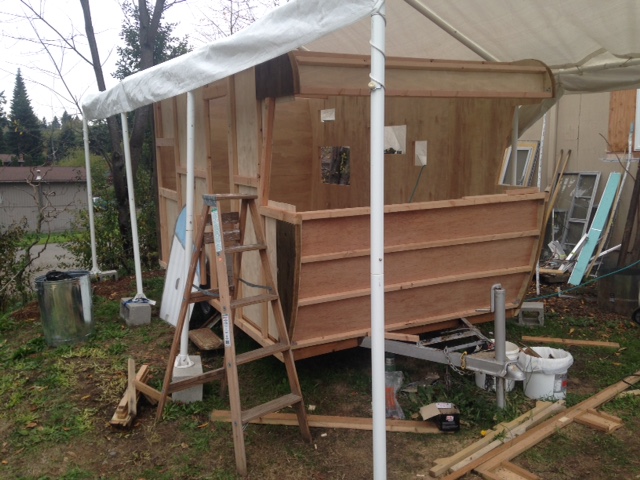
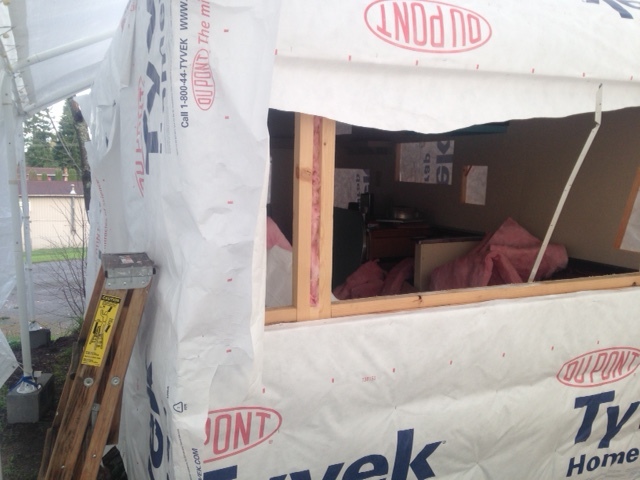
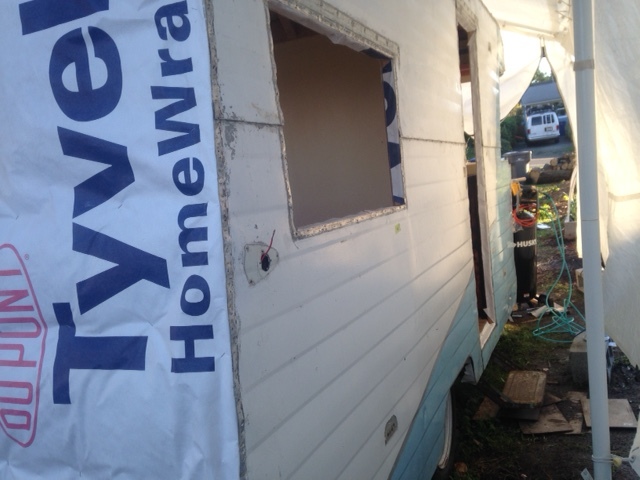
Due to the walls being so thin, we had to spilt all of the bats of insulation in two. This took up half a day and insulation is gross as it is, never mind having to pull it apart and getting it everywhere. After the insulation was all stapled in we wrapped the entire trailer in Tyvek. This was a huge upgrade as it will help create an extra air and moisture barrier. The obvious idea is to keep all the water out but everyone I’ve talked to about trailer construction said at some point the trailer will take on moisture. Knowing that helped to plan for it, and Tyvek was a major addition in the planning for that point. Another major addition was using treated wood on all the corners and other areas that I noticed rot when taking the trailer apart.
It was a very wet and rainy morning as Jake Fetterman and I started to put up the metal skin. This was a huge part of the process and would be the moment of truth of whether or not I got everything right up to this point. The metal panels are super awkward to maneuver so I needed an extra pair of hands to install them but I really didn’t want anyone else around to see my failures if, indeed, the moment of truth revealed that I got it wrong. As we reached the end of the first wall and that last panel fit almost perfectly, I felt, perhaps, the first deep breath I took in a month. Jake and I got the skin put up by lunch time and just in time to get the call that our sheet of metal for the roof was ready for pick up.
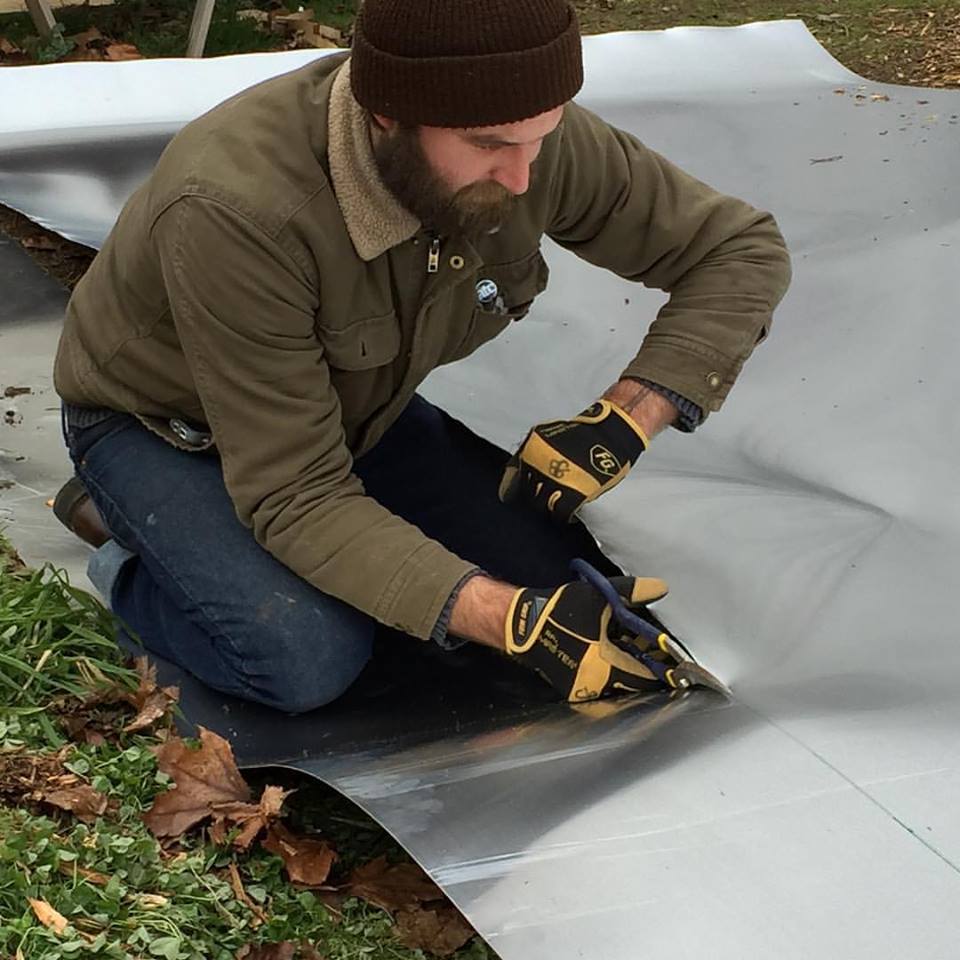
The previous roof was in very bad shape and had to be completely replaced. The roof was comprised of four panels originally and I knew that I didn’t want those seams on the roof (more seams equal more places to get leaks). Deb and I quickly noticed that finding a 7ftx15ft sheet of metal was actually going to be a little harder than we thought. After a week of calling around to different trailer companies, boat companies, truck companies, we finally found a place that could offer what we needed. As soon as Deb and I got back from picking up the giant metal role, I got to work on trying to figure out the installation. The metal didn’t come in the exact size I needed and I was happy to have extra to have some wiggle room but that meant that I needed to trim and cut th
sheet metal to fit. This by no means was a simple task but with some metal sheers, a rubber mallet, and some pliers, I got the metal sheet to bend and fit on the roof. The fresh new metal looked almost alien in contrast to the 50 year old metal skin on the sides of the trailer.
After the roof was on the final steps were installing the windows, the door, the fan and all the little flashing strips. This part was fairly easy and went without too much trouble. It was nice to know all the windows fit and it was a good feeling to be done with the outside of the trailer. The last step was to trim out all the windows and the door and making the inside look sharp. I finished all the trim the morning of the last day I had to work on the trailer and spent my afternoon moving my belongings from the guest room into the trailer and getting myself all situated.
I took a moment to sit in my new space and realized that once again, I flew by the seat of my pants into building my living space. In the moment it was hard to feel like I was finished and that it was now where I lived. In that moment, I let myself feel proud about what I had just accomplished but it was only the beginning of what I came to Seattle to do. I let it sink in and then I walked to the corner store as a new man, bought the same beer the old me drank and then I went into my studio and opened a bag of clay. It was time to start doing what I know how to do best, drinking beer and playing with clay. And since it was fresh on my mind, I built another trailer.