

Techniques for Using Wax Resist.
/We hope you enjoy this writing on using wax resist! On our Rat City Studios YouTube Channel you will find a coinciding article covering the wax resist techniques with descriptions and more images. Here's a link... We are all using Reed Wax available locally through Clay Art Supply in Tacoma.
Jon Johnston
No-Scrape Mishima
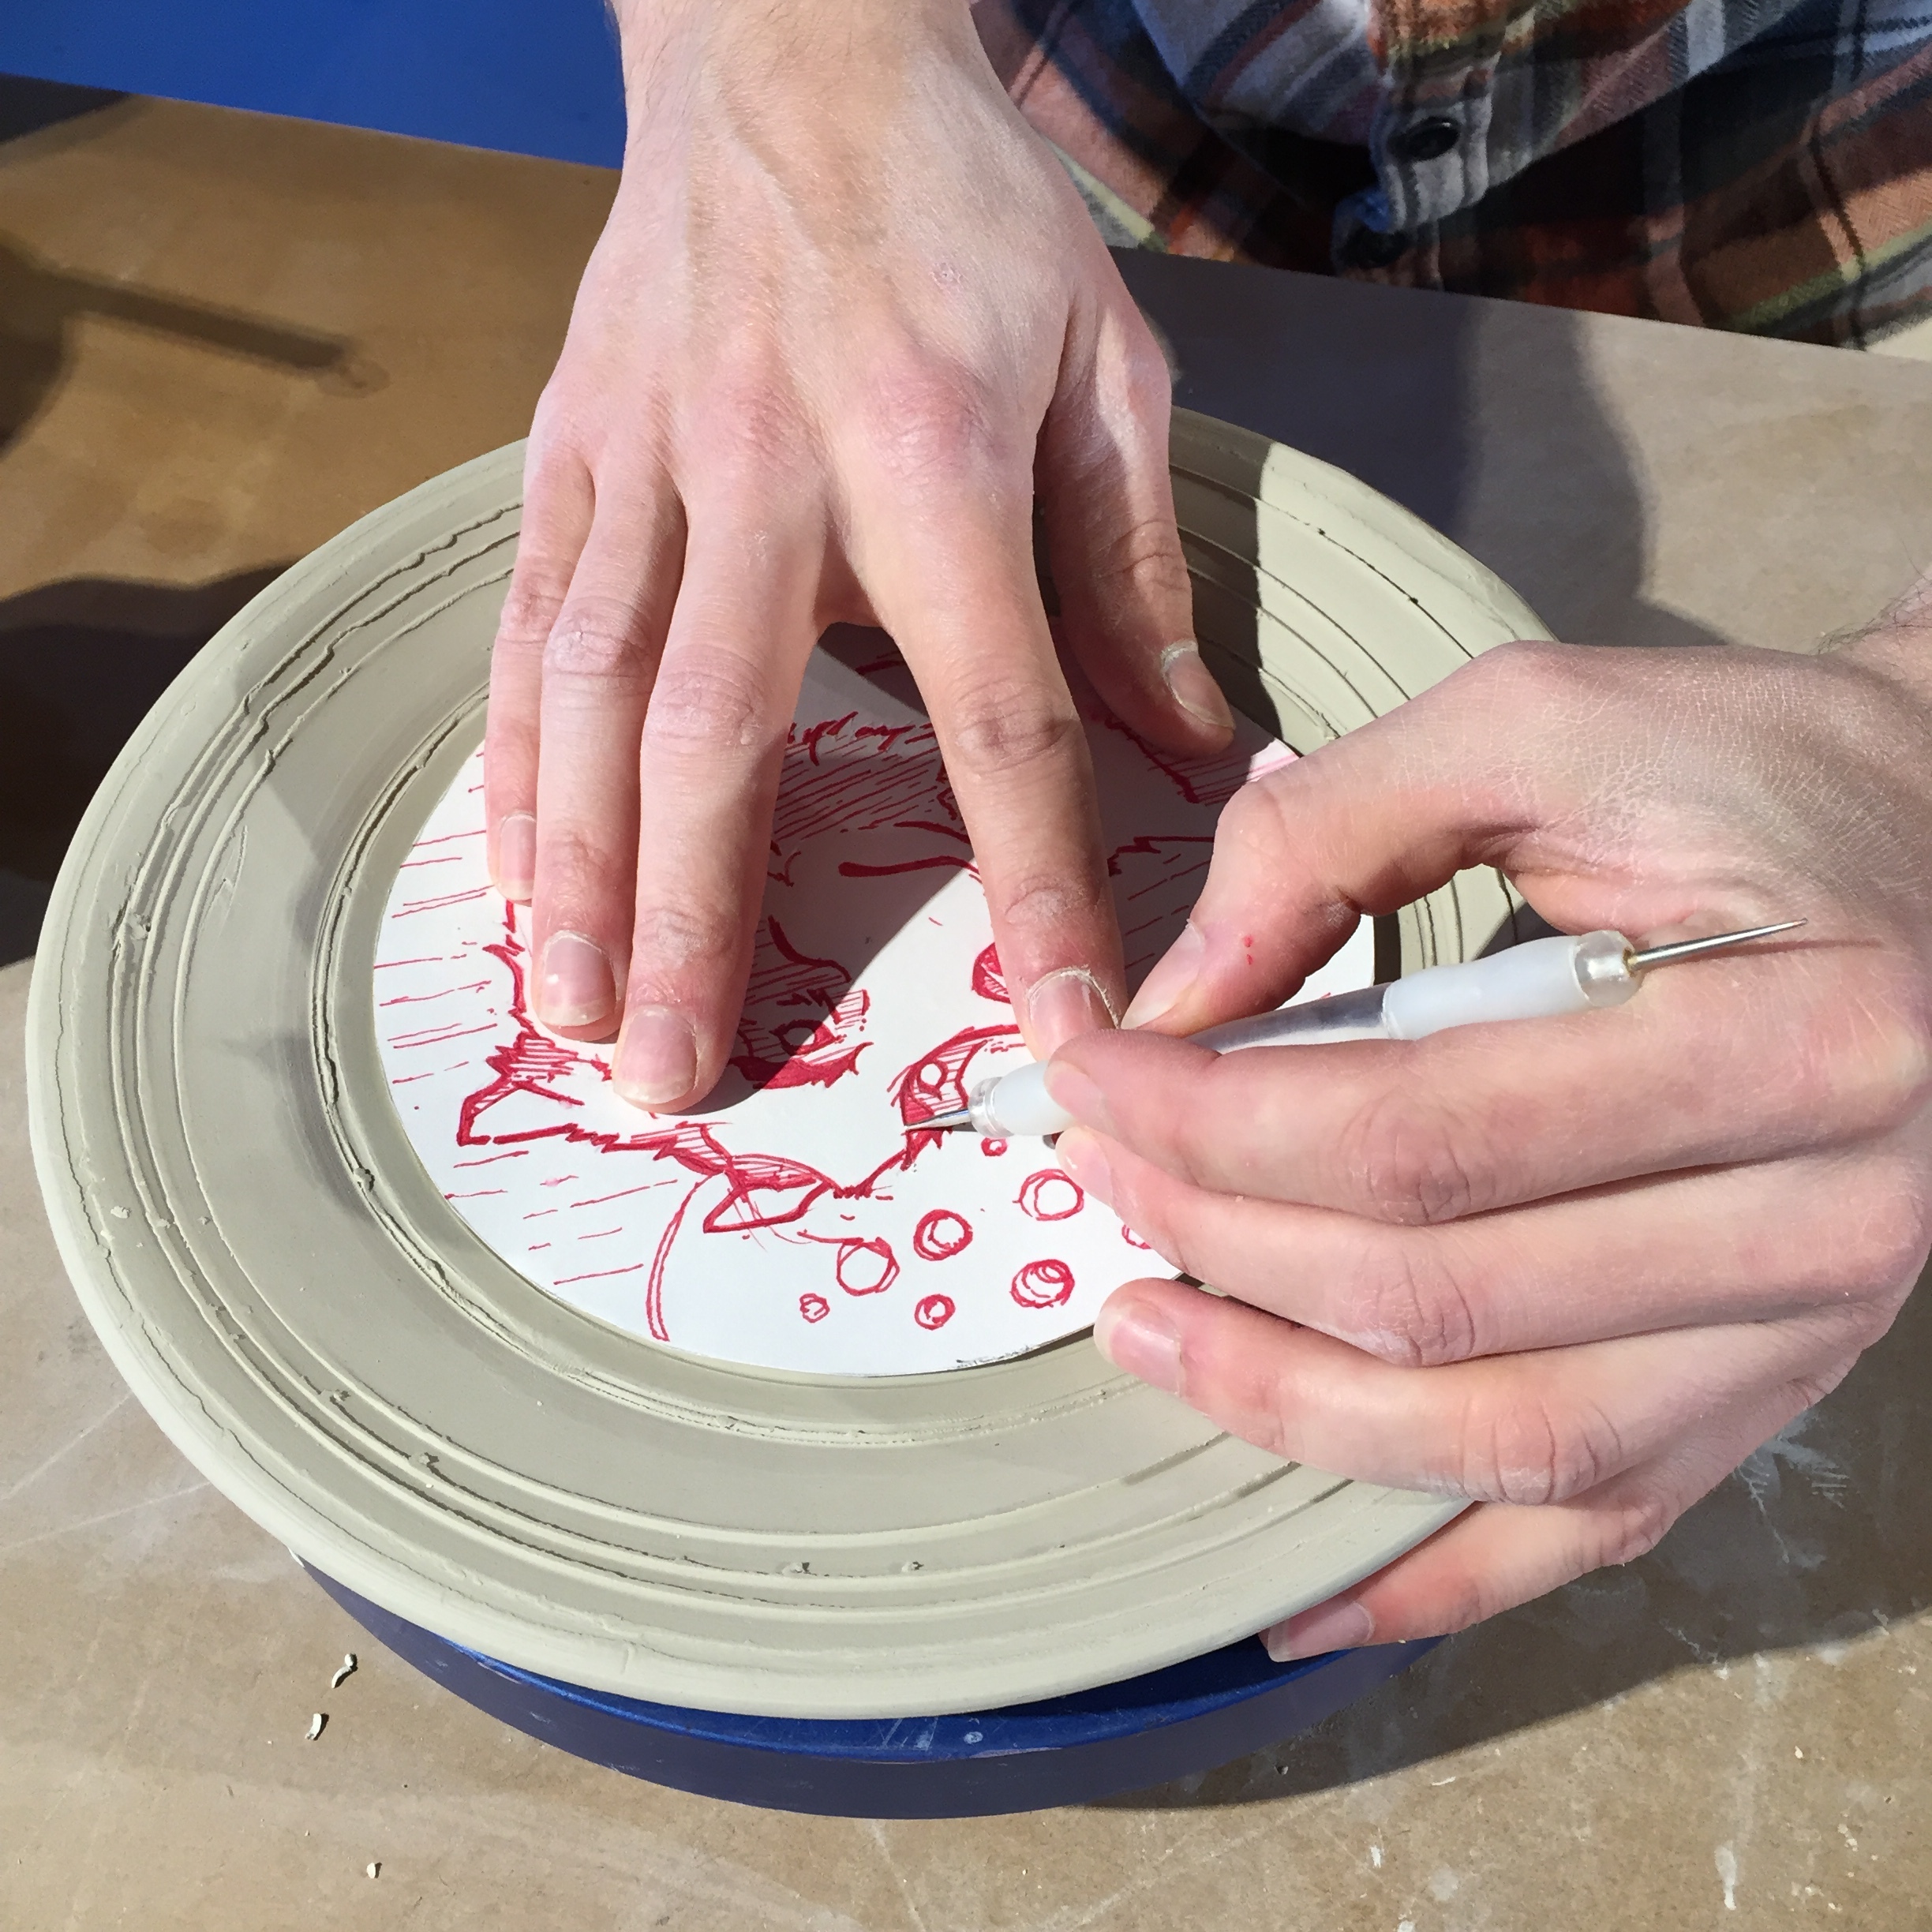
As potters, we are always trying to find ways to save time and tedium. Used with a little creativity, wax resist affords us both. In this demo, I use wax as a mask to save time, effort, and materials when inlaying slip.
Brush wax onto the surface to be decorated. Ensure that you are building up a solid layer of wax and that there aren’t any gaps where glaze could spill over. Here, I’m using Reed Wax from Clay Art Center in Tacoma, WA.
Once the wax has dried, I lightly sketch in the drawing I want.
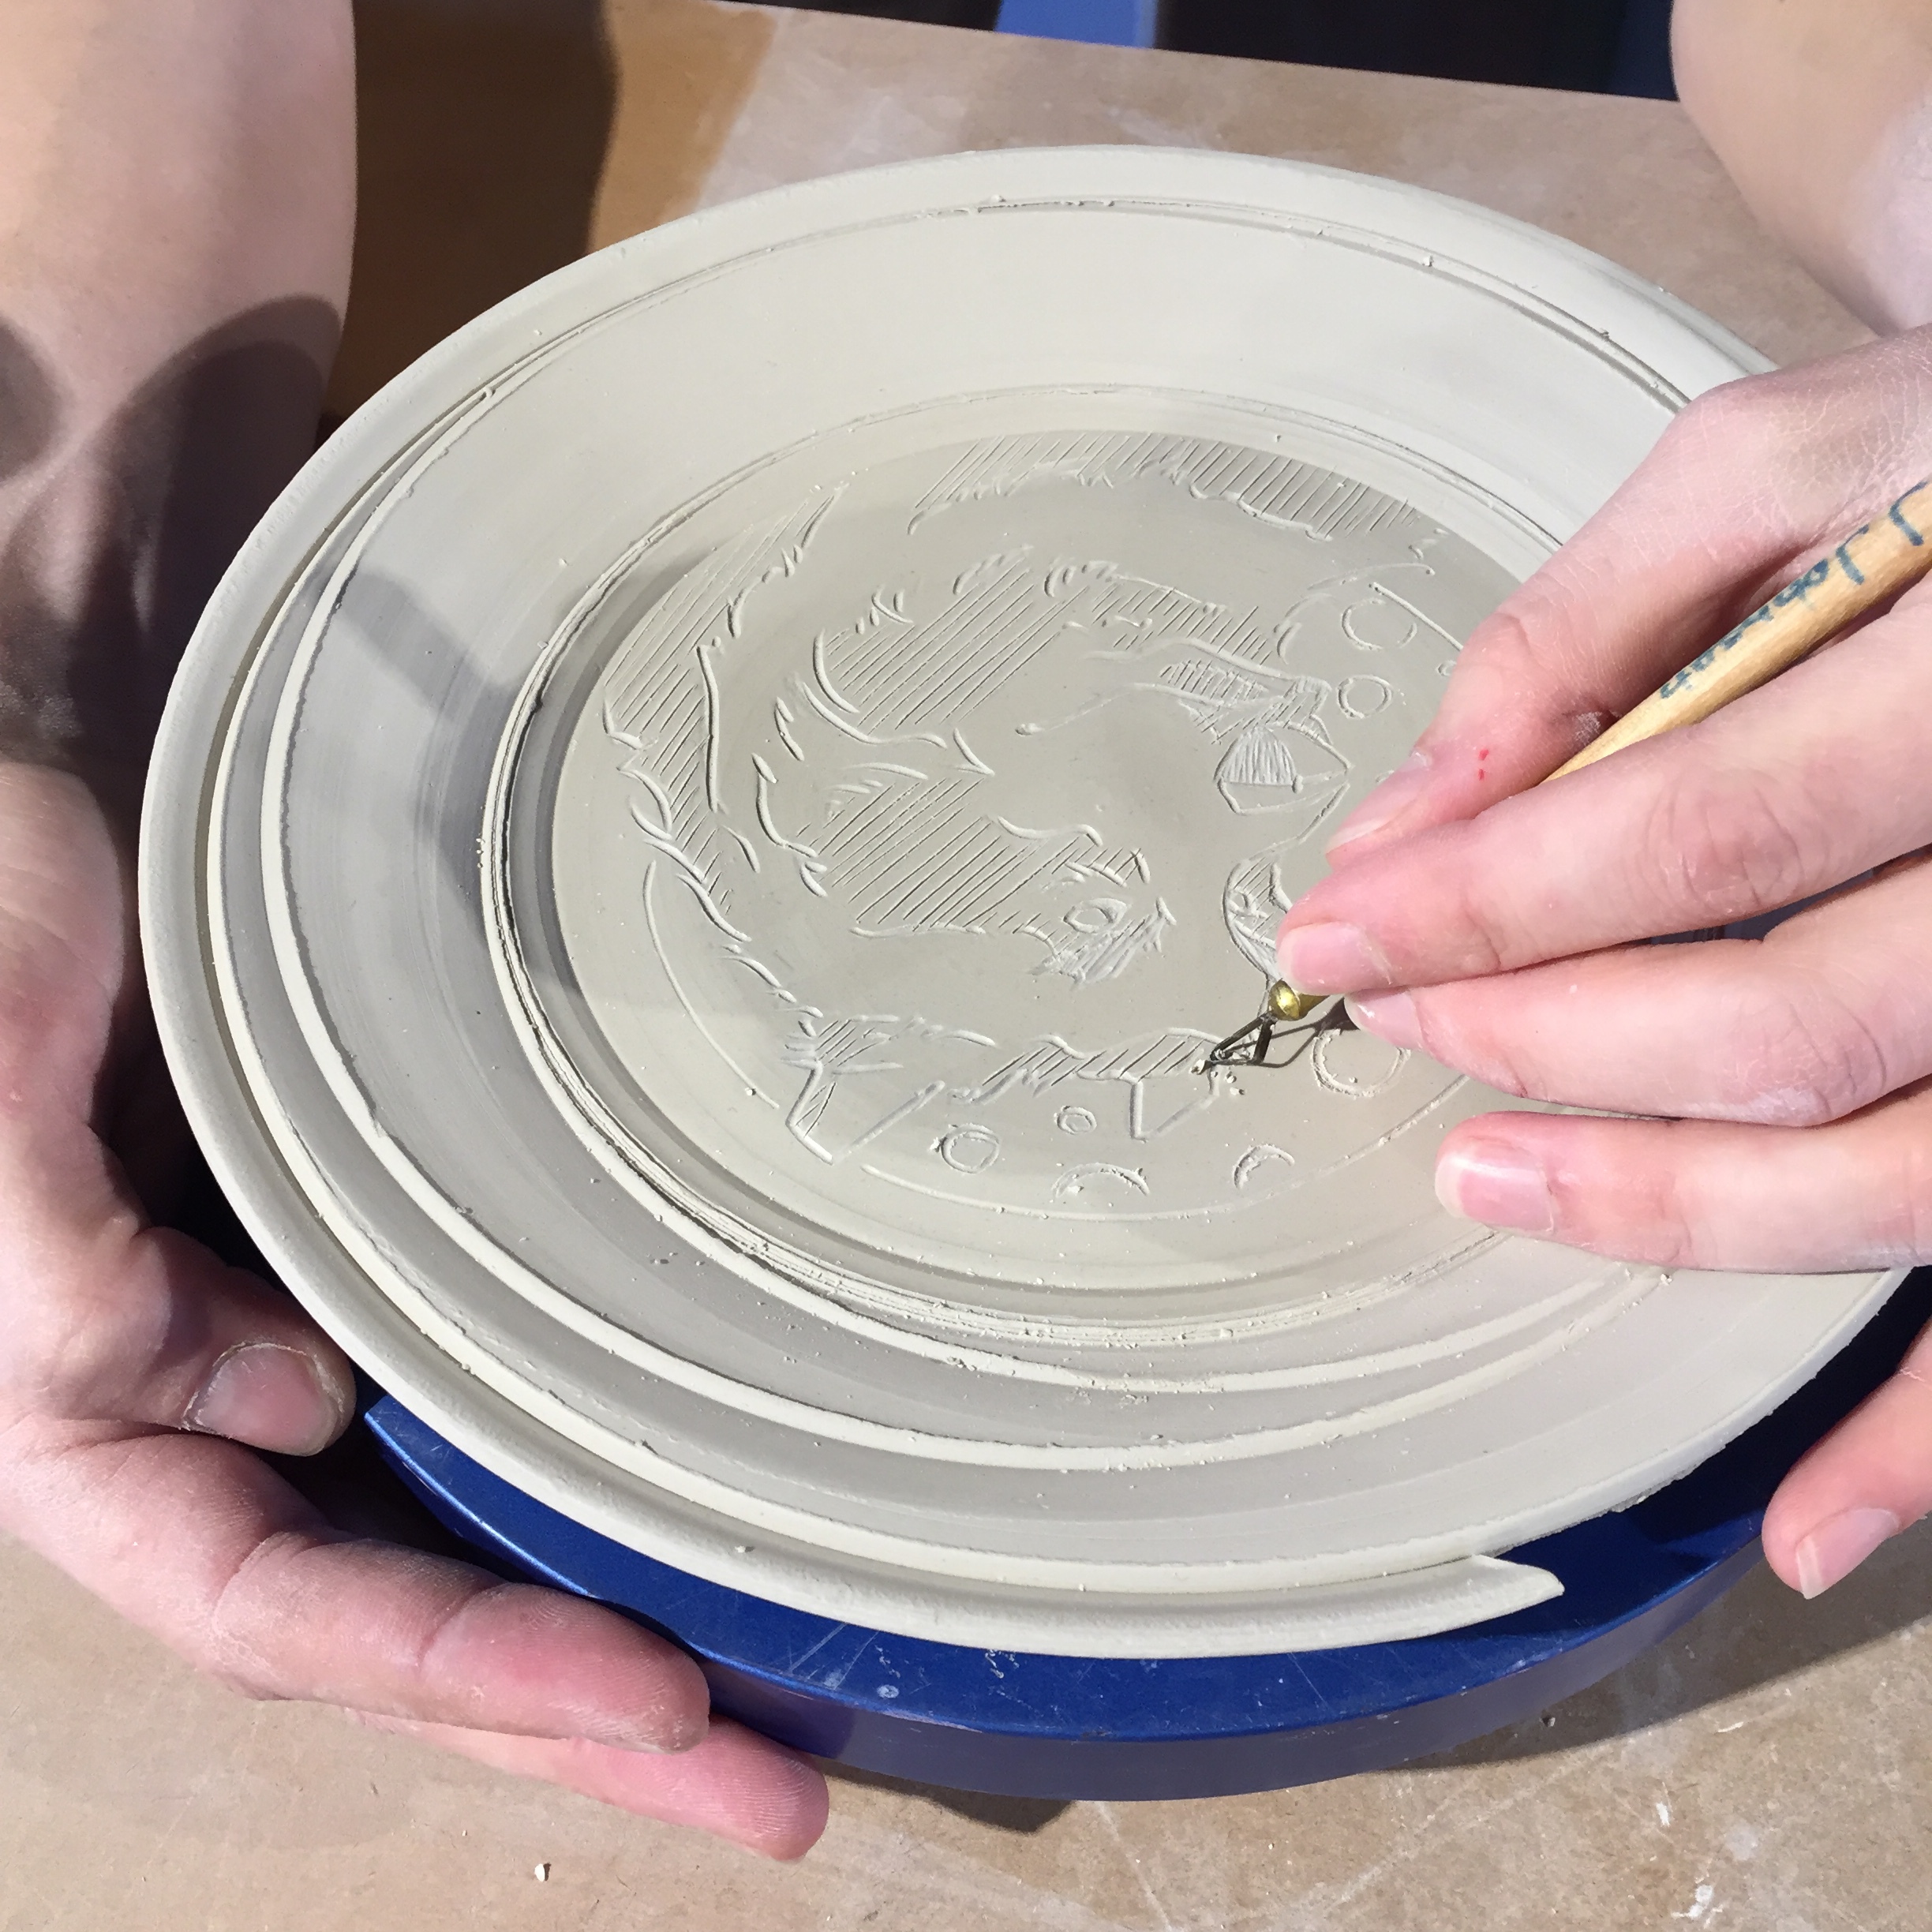
Use small carving or trimming tool to cut through the wax and into the clay a bit. [test this]-For a thin line, use a utility blade to lightly cut into the surface. Don’t cut too deeply!
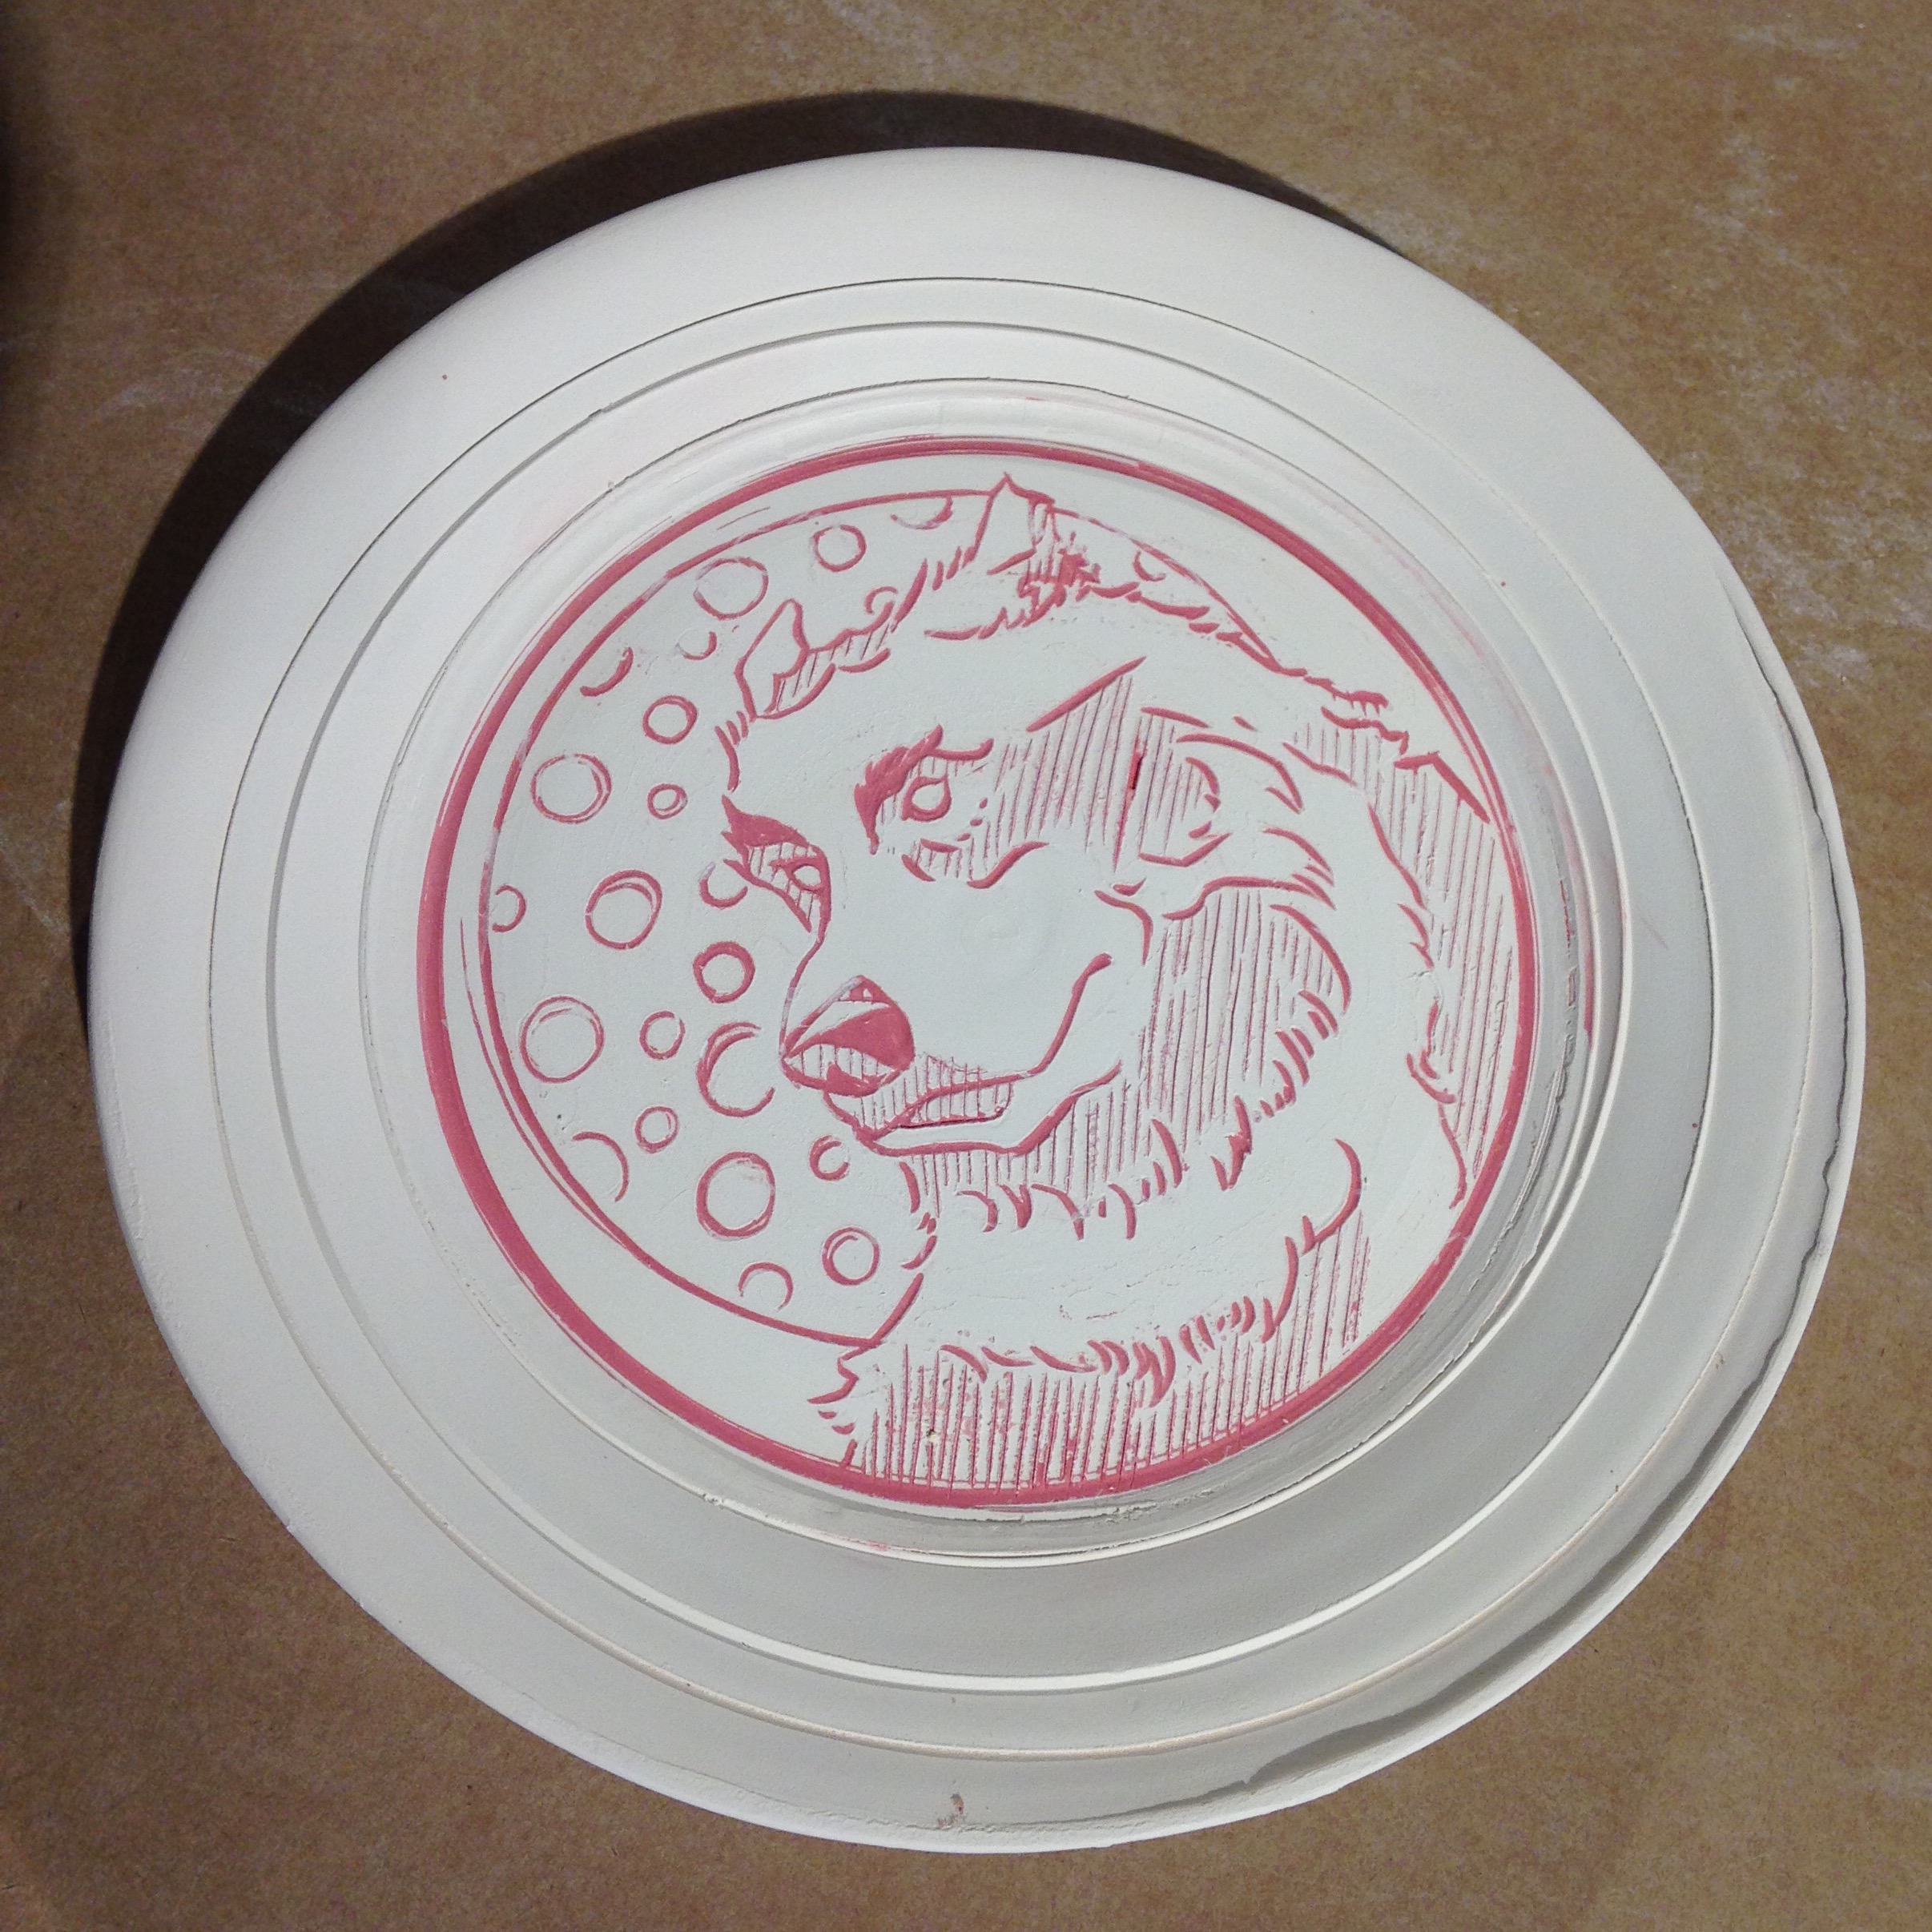
Using a brush or small sponge, apply underglaze to the surface. It should settle into the carved areas while being resisted in the waxed areas.
Wipe away any excess underglaze left on the waxed surface. The wax will burn off in the bisque firing.
Jake Corboy
Laymans Foot Waxing
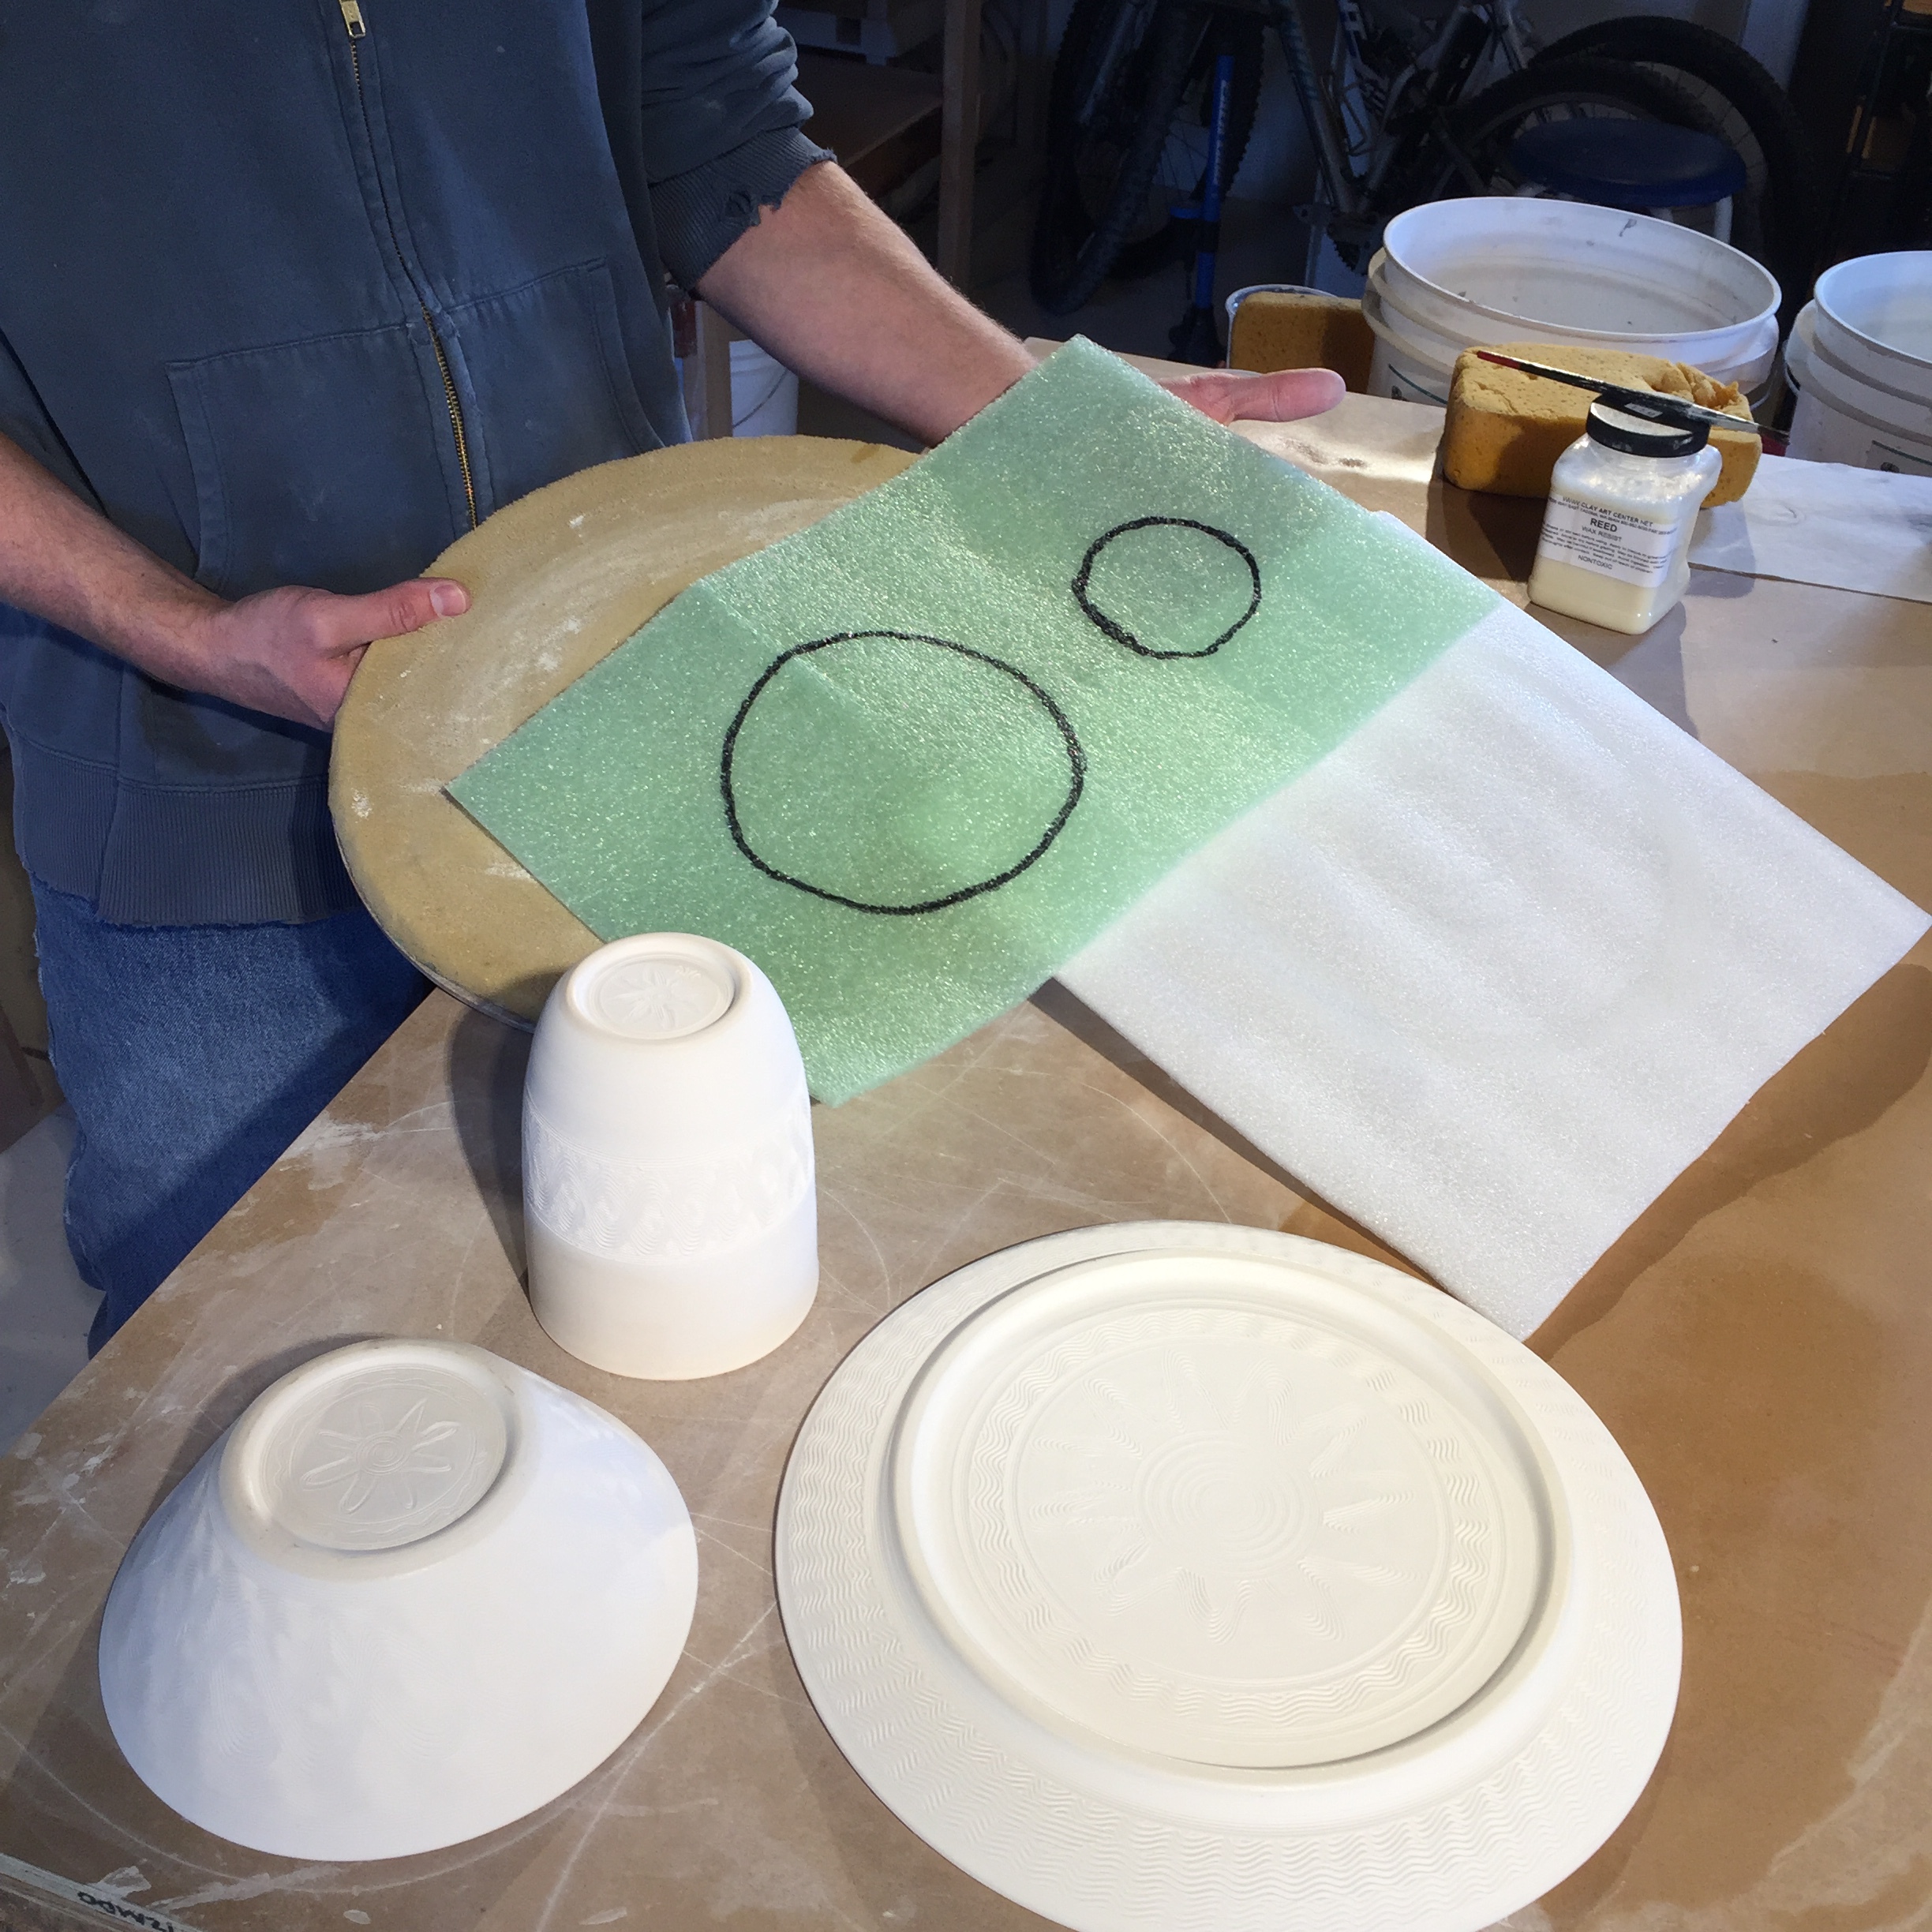
How to wax the foot of a pot consistently, accurately and quickly with little to no skill needed. I have been using store bought brush on glazes for years. I have never used wax before. I just "carefully" brushed glaze around the foot, then sponged off any that got on it. Now that I'm at Rat City Studios and mixing up glazes for dipping, I needed to start waxing the feet of my pots. I knew that I did not have the brush work skills for doing this and also knew that any drips of wax on the pot could only be removed by bisque firing it again. I did not want to spend my time here at Rat City Studios perfecting my waxing technique. I have found that brushing wax onto a piece of yoga mat or closed cell foam padding (like the kind you likely use for shipping) works great as an alternative to brushing wax directly onto the foot of the pot.
A few pointers on this technique:
1) If you just want a shallow waxed foot on a small pot. Brush the wax away carefree onto the mat. Then spin the pot around in the wax while applying light pressure.
2) If you want a deeper waxed foot on a bigger piece. Only brush the wax on the mat in a circle about the same size as the foot. Then spin the pot around in the wax while applying medium pressure. If you have wax in the center of the mat while doing this you will likely end up with wax on the bottom of the pot. Especially if your foot is shallow or wide like on a plate. The mat can be doubled up or placed on some foam to allow more cushioning for the foot to sink into. Try out different types of foam padding because some are stiffer than others.
3) As with anything in ceramics test it out. Experiment with different types of closed cell foam, different thicknesses of foam and layering the foam on other cushy meterials until you get a result you like.

Eliane Medina
Waxing Over Glaze
Here is a way to use two or more glazes on your pots without the worry of them overlapping in unwanted areas.
Glazing a vessel with different glazes on the inside and outside:
1. Make sure to wipe away any dust or debris from a bisqued piece
2. Pour or brush your liner glaze onto the inside of the pot
3. Wipe away any drips from unwanted areas using a wet sponge
4. Wait until glaze is dry to the touch
5. Use a brush to cover the glaze with wax.
a. Be careful not to get any wax on the bare bisque unless you want it to remain unglazed.
** Your pot will now be damp from absorbing the moisture of the glaze and wax
6. Let the pot dry completely before applying outer glaze.
a. Glaze will adhere to the pot much better and more evenly when the piece is completely dry. This can take several hours. It is best to wait overnight if possible.
7. You can now apply your outer glaze!
a. Any glaze that lands on the wax will bead up and fall off or wipe away easily with a sponge or paintbrush!
** This technique can be used for any number of glazes and the smallest of details. Give it a try and have fun!


Deborah Schwartzkopf
Link to Handout on Glazing Tips!
A few last tips on using wax are below...
Using Wax Resist on Bisque-ware
Wax does not come off once it is applied on bisque-ware until it is fired away.
Be careful not to drip in unwanted places!
Clean your brushes well after waxing, between glazes, and after use. If they harden they will be unusable.
Apply wax resist (without alumina) to bisque ware anywhere you do not want glaze.
Apply it to lower ¼” of the foot of your artwork to create a clean line for the glaze to stop at.
Let it dry for 15 minutes before applying the first glaze.
Apply wax resist (with alumina) to lids and galleries of covered jars/ teapots.
Using Wax Resist Over Glaze
Use Wax over glaze to create patterns when layering glazes.
Let your wax dry for several hours (when applied over glaze) before layering a second glaze.
Often it is best to apply wax the day before you will dip the second glaze.
Cover the wax jar so it doesn’t dry out.
Clean your brushes right after use them.
Clean glaze drips off of waxed areas well.
Using Wax Resist on on Greenware
Wax may be applied to greenware and “cut” through to create precise lines. These lines may then be filled with oxides or underglaze. Any drips not absorbed into the lines may be wiped off to create a clear pattern.


