

Process: Designing a Sea & Sky Mug
/
There are many factors I consider when designing a mug: size, shape, weight, handle, color, glaze, feel and function to name a few. Here’s the rundown on my process for my Sea & Sky surface designs.
I do most of the surface design on my mugs after the bisque fire. It’s easier for me this way because it allows me freedom in sketching and painting on a not-as-fragile greenware piece. Everything I do before the bisque focuses solely on form. Everything I do after the bisque is adding color and lines to enhance the form.
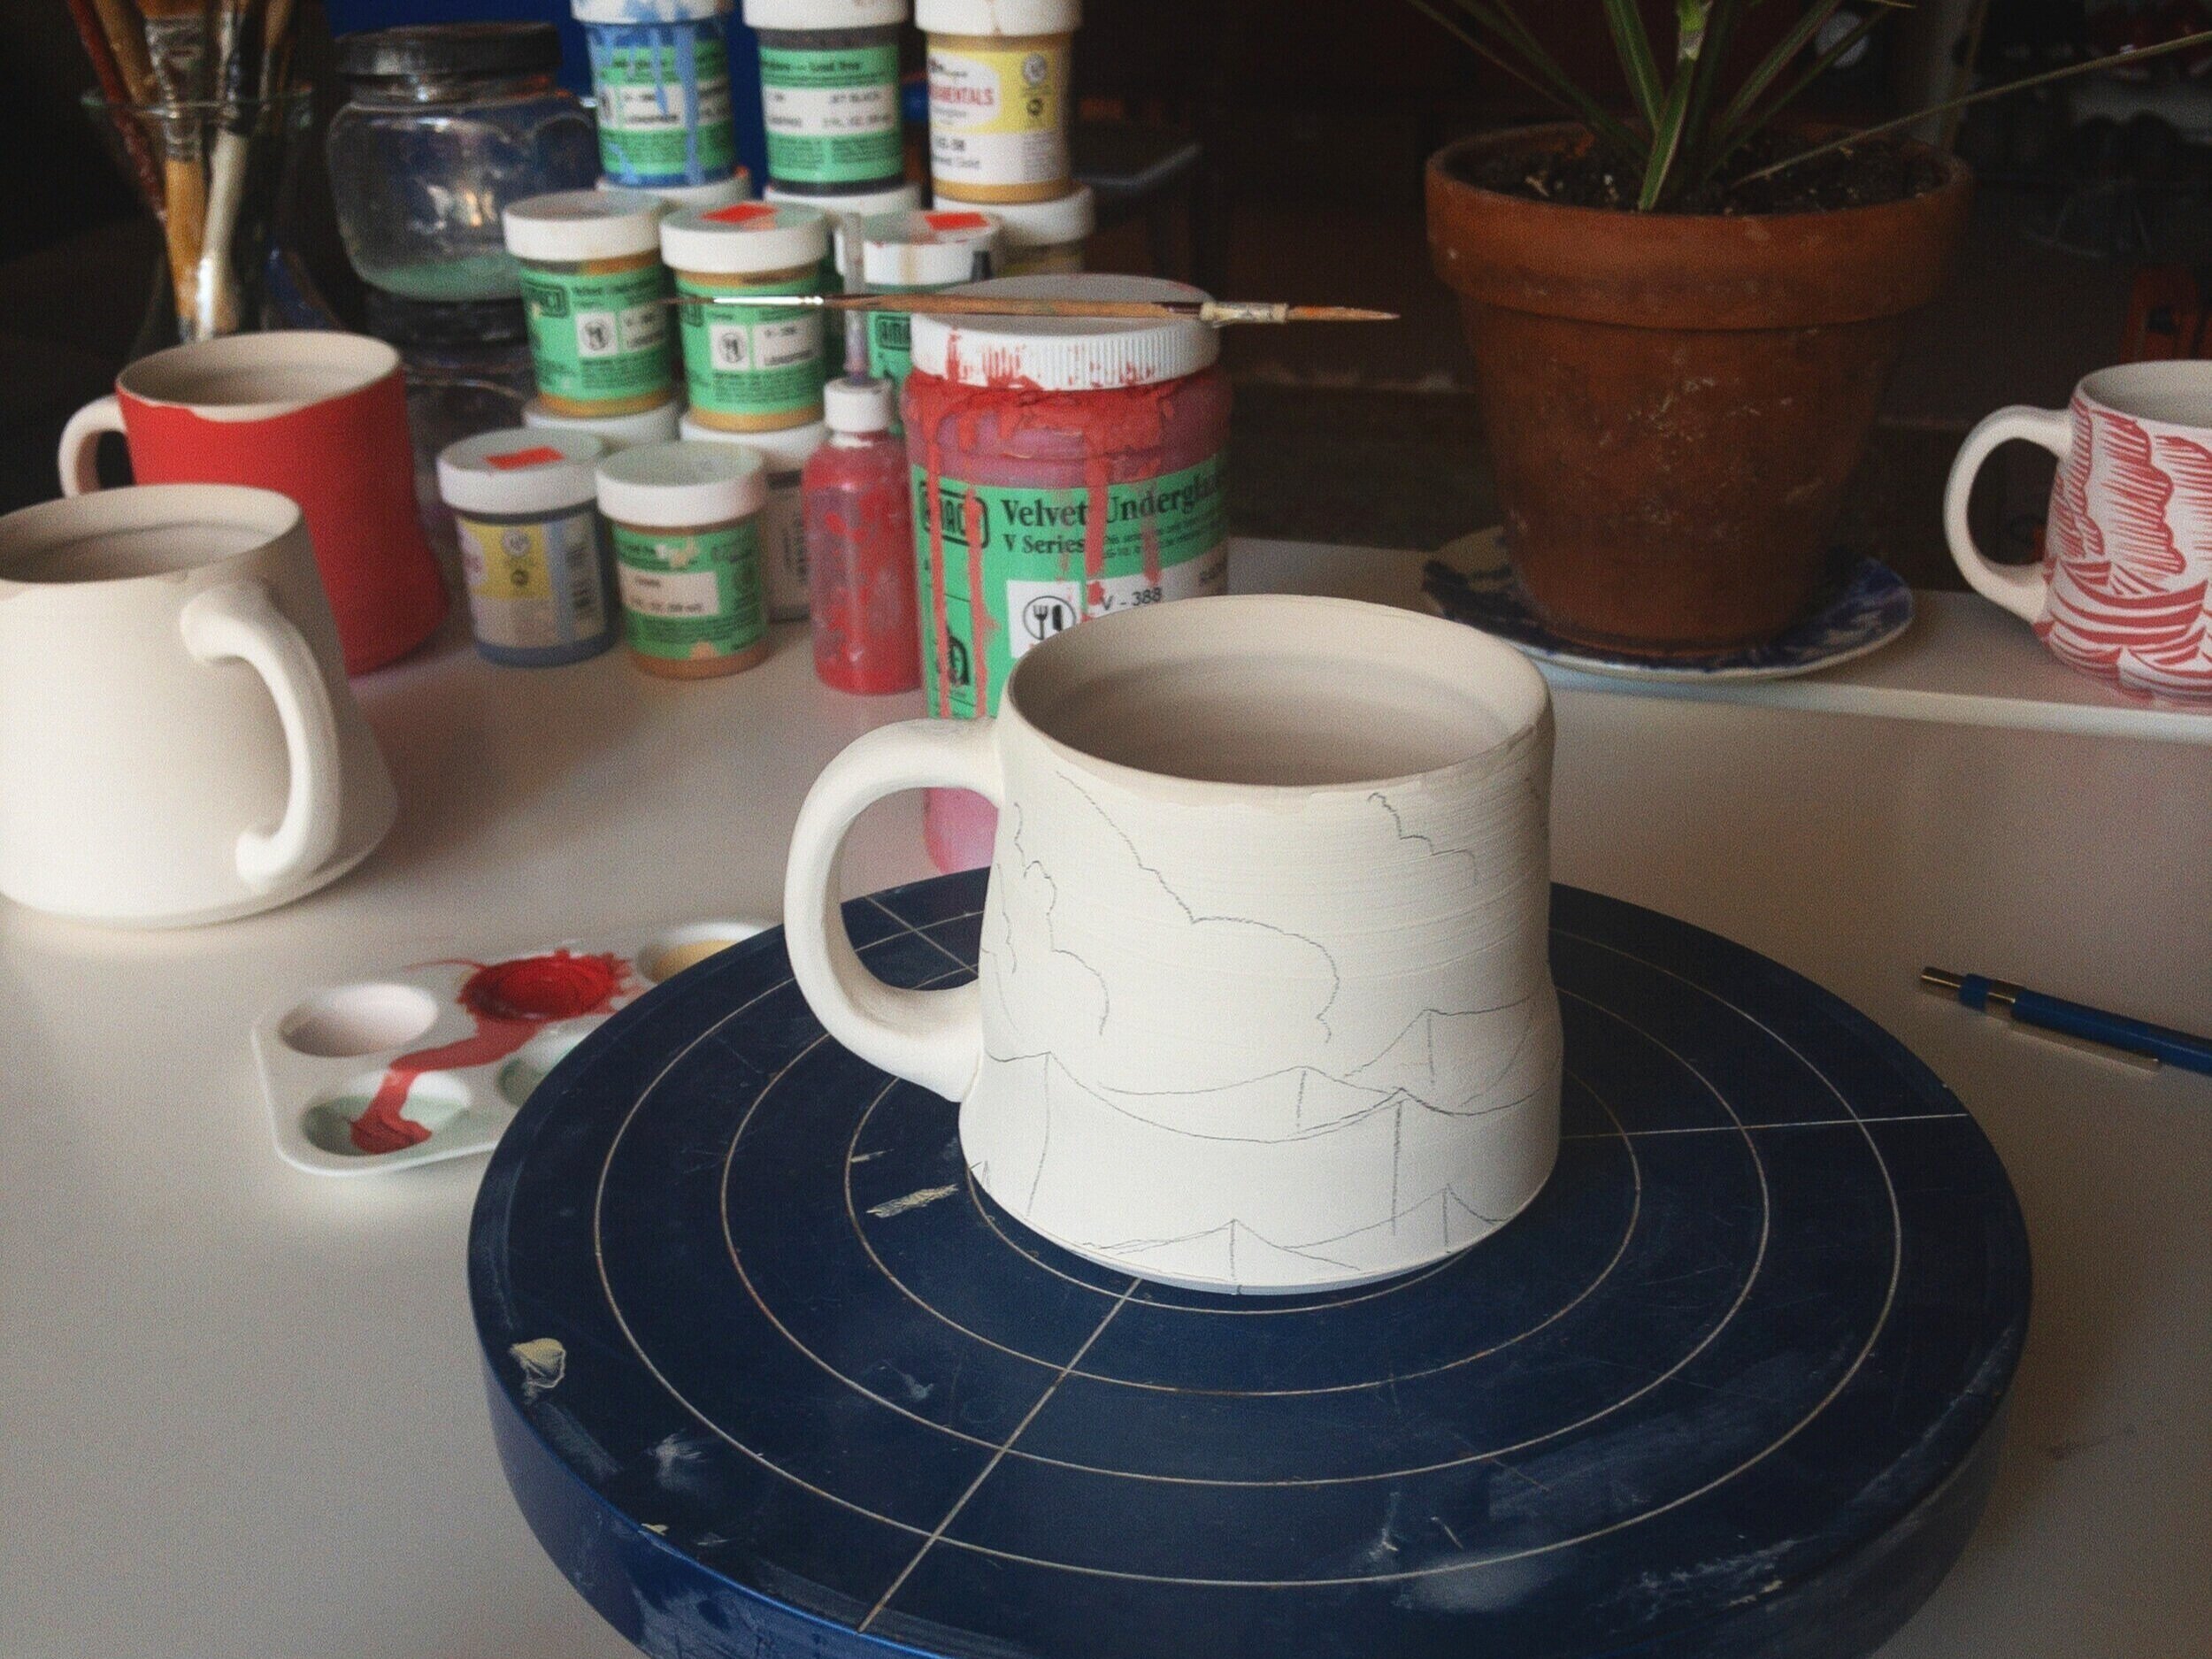
Sketching the structure of my design on the mug at bisque ware with a pencil.

Order of operations: glaze interior, wax interior, paint exterior and bottom, wax bottom and dip in final exterior glaze.
Once the mug is bisque fired, I like to sand the surface all over to remove any irregularities. After sanding I wipe the mug down with a wet sponge and let it dry completely before continuing on. I glaze the interior next, as it’s important to glaze the inside of the mug before painting the exterior of the mug. If I accidentally spill or drip glaze on the outside of the mug, washing it off would undo the hours of brushwork the exterior pattern requires. I glaze the interior of my mugs with a glossy white or black glaze. I simply pour glaze into the mug almost to the top, turn the mug as I pour the contents out and let the remainder drip out as I hold it upside down. After the interior glaze is dry, I apply wax over it and am ready for sketching the exterior pattern.
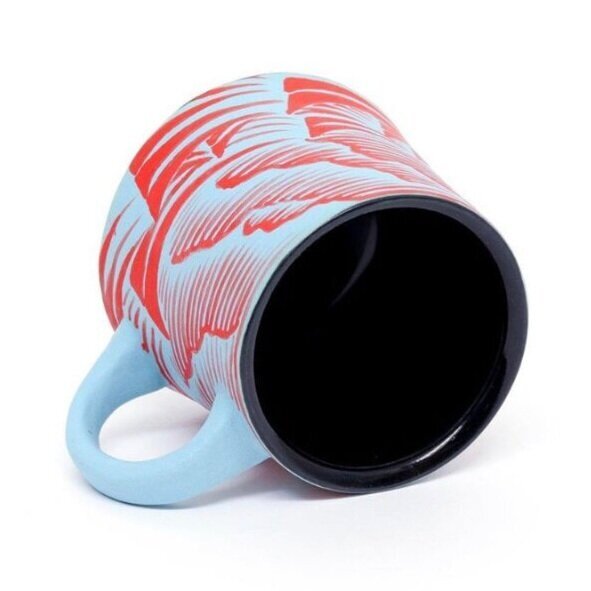
I focus on two colors for each mug. Some of my favorites are blue and red, black and white and red and black. The colors and sharp design qualities are reminiscent of Pacific Northwest Native Art. I choose a light color and a dark color so the design pops. If the mug has a base color, I apply that when it is green so I’m only applying one color during each stage of the process, it’s easier to clean if I make a mistake! Next I use a pencil and sketch the structure of my design. Every great drawing begins with structure! The waves comprise the bottom half of the mug and the sky the top. I break up each wave with a line down the center. The design pops because of basic principles of light and dark. To the left of each line is the darkest darks, or shadows, to the right of each line is the lightest lights, or where the sun would hit the wave. For the sky I sketch a few cascading lines to mimic comic-like clouds. The rest is freehanded within that structure.

Invest in a great, tiny paint brush with longer hairs to facilitate smooth, graceful brushstrokes. Anchor your hand with your fingers for a steady hand. You can see here my pinky is anchoring my painting hand so I can achieve consistent brushstrokes.

I like to take as much care and time into the bottom of the mug as the rest of it. Calipers are a great tool for glazing if you don’t want your fingerprints to leave a mark.
I begin painting the waves because they are the hardest part. Sometimes I warm up to painting bisque ware by practicing on a piece of paper with paint. This helps me notice and remember the movement it takes for a smooth, continuous brushstroke. The focus of my designs lie in the brushwork. I start at one edge of the wave and paint one continuous line to the end. The initial brushstroke is often fluid and fast and dictates where the rest of the color can be added. Remember, the right side is the darker side where the color will be a little thicker and the left side of the wave will taper off into the lightness. I go back in adjusting the shape and rotating the mug as I go. The clouds are also a sweeping brushstroke, but straight across. Each stroke needs two to three coats depending on what underglaze you are using. I anchor my hand while brushing, just like when I throw or trim by resting my fingers (that I’m not painting with) on the mug (shown in picture) to achieve steadiness. I find these pieces to be quite meditative and end up forgetting that they take close to three hours to paint. Find a comfortable setting and take your time.
Once I’ve finished painting and signing the bottom, I apply wax to the bottom and about 1/4” up the side. I let that dry overnight and dip the whole mug in a transparent matte. The glaze you chose for the exterior can dramatically change your piece for better or worse. A glossy glaze can cloud your image and take away from the design. No glaze can leave a rough, dry, unfinished look. A transparent matte glaze is a happy medium. It adds a bit of sheen to the finished product without detracting from the design. And that’s how I make my Sea & Sky mugs! Hope you are inspired to create something special!


